Vine Robot Body Fabrication
This page covers building the vine robot body itself — the soft, pneumatically-actuated “vine” that everts from the base — as opposed to the compute box that drives and powers it.
Table of contents
Overview
The general fabrication workflow is:
- Prepare materials, equipment, and workspace
- Cut fabric
- Mark fabric with stencil
- Form and seal the robot body
- Install pneumatic fittings
- Inspect and test the completed body
Detailed instructions for each stage are provided below.
Materials, equipment, and tools
Materials
| Item | Qty | Manufacturer/Source | Part Number / Specification | Notes |
|---|---|---|---|---|
| Heat-Sealable TPU Coated Nylon Fabric | At least 4 meters (width by length) | Adventure Xpert | — | — |
| Painter’s Tape (1 in) | 1 roll | Scotch Blue | — | — |
| Magic Tape (1 in) | 1 roll | Scotch | — | — |
| Double-Sided Red Tape (Heat Resistant) | 1 roll | Amazon | — | — |
| Permanent Marker, Fine Point | 1 | Sharpie | — | — |
| PP/PVC Sheet | 1 | Amazon | — | Used a plastic folder, but could be anything that can be perforated or laser cut |
| Push-to-Connect, Through-Wall Connectors | 3 | Amazon | — | — |
See the main BOM for compute box hardware.
Fabrication equipment and tools
| Item | Notes |
|---|---|
| Precision Pick | — |
| 6” x 24” Sewing & Quilting Ruler with Gridlines | — |
| Yard Stick / Straight Edge | — |
| X-Acto Knife | — |
| Scissors | — |
| Foot-Operated Impulse Sealer | ULINE H-89 |
The foot-operated heat sealer H-89 has limited space in the back between the sealing edge and the stand post. This makes it difficult to handle fabric while sealing, especially when making a long vine robot (10ft+). For an enhanced model that facilitates the process in a roll-to-roll manufacturing style, see the H-1256 model.
Workspace and equipment preparation
Before beginning fabrication:
- Clean the work surface and remove debris that could damage the fabric.
- Gather the required materials, tools, and fixtures.
-
Verify that all fabrication equipment is operating correctly, especially the impulse sealer.
Overheating of the heating element can ruin hours of work in a couple of seconds (and overheating errors are hard to fix!). Underheating, on the other hand, can result in a robot that bursts at low actuation pressures.
- Adjust the impulse sealer to the correct sealing time using the knob. This adjustment is critical to a good seal, and the correct value will depend heavily on the fabric — some TPU coatings need more heat to seal than others.
- Practice sealing a few times with a remnant piece of fabric to get used to the process.
Fabrication procedure
Step 1: Fabric preparation
Stencil preparation
Here we show how to make a stencil so the marking process is less tedious and less prone to human error. The stencil shown in these steps is very basic (a piece of plastic with holes in it!), but a more precise version could be made by laser cutting a stencil out of thin PVC or acrylic sheet.
-
Grab a plastic folder and unfold it a couple of times so it lies flat. Mark the desired distance from one edge, and cut it to the desired stencil width.
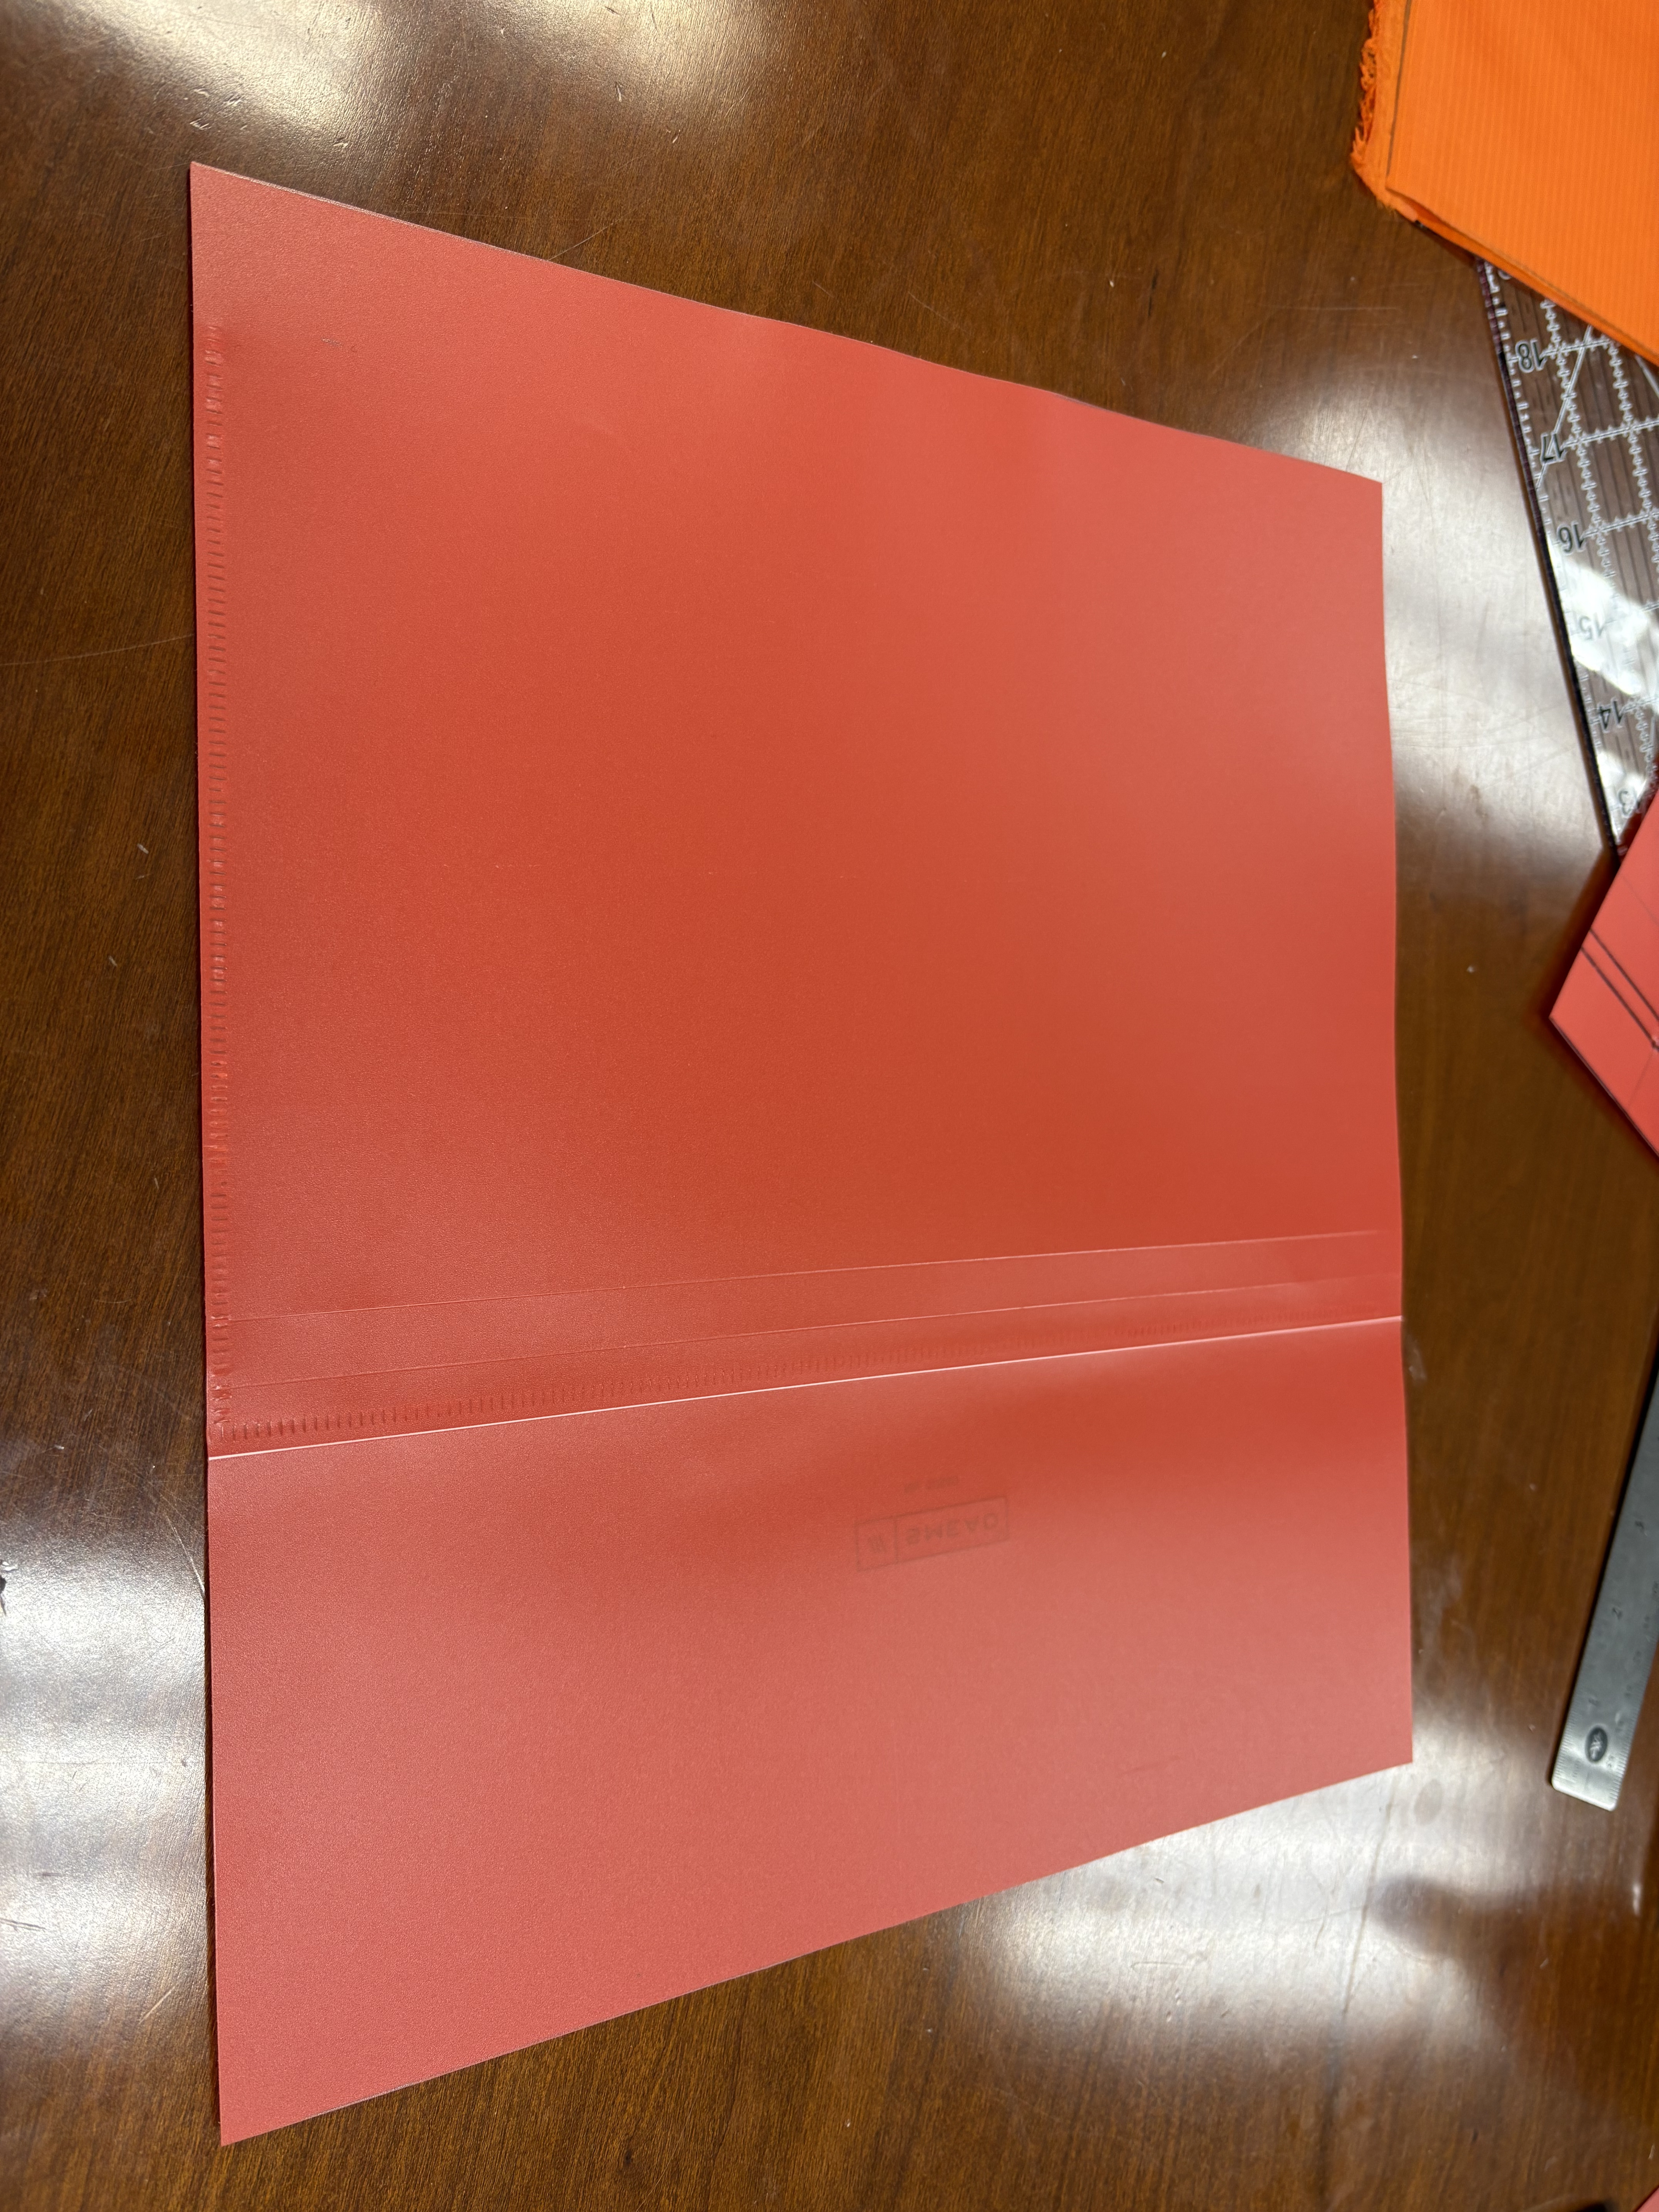
-
Use the permanent marker to mark the stencil according to the provided template.
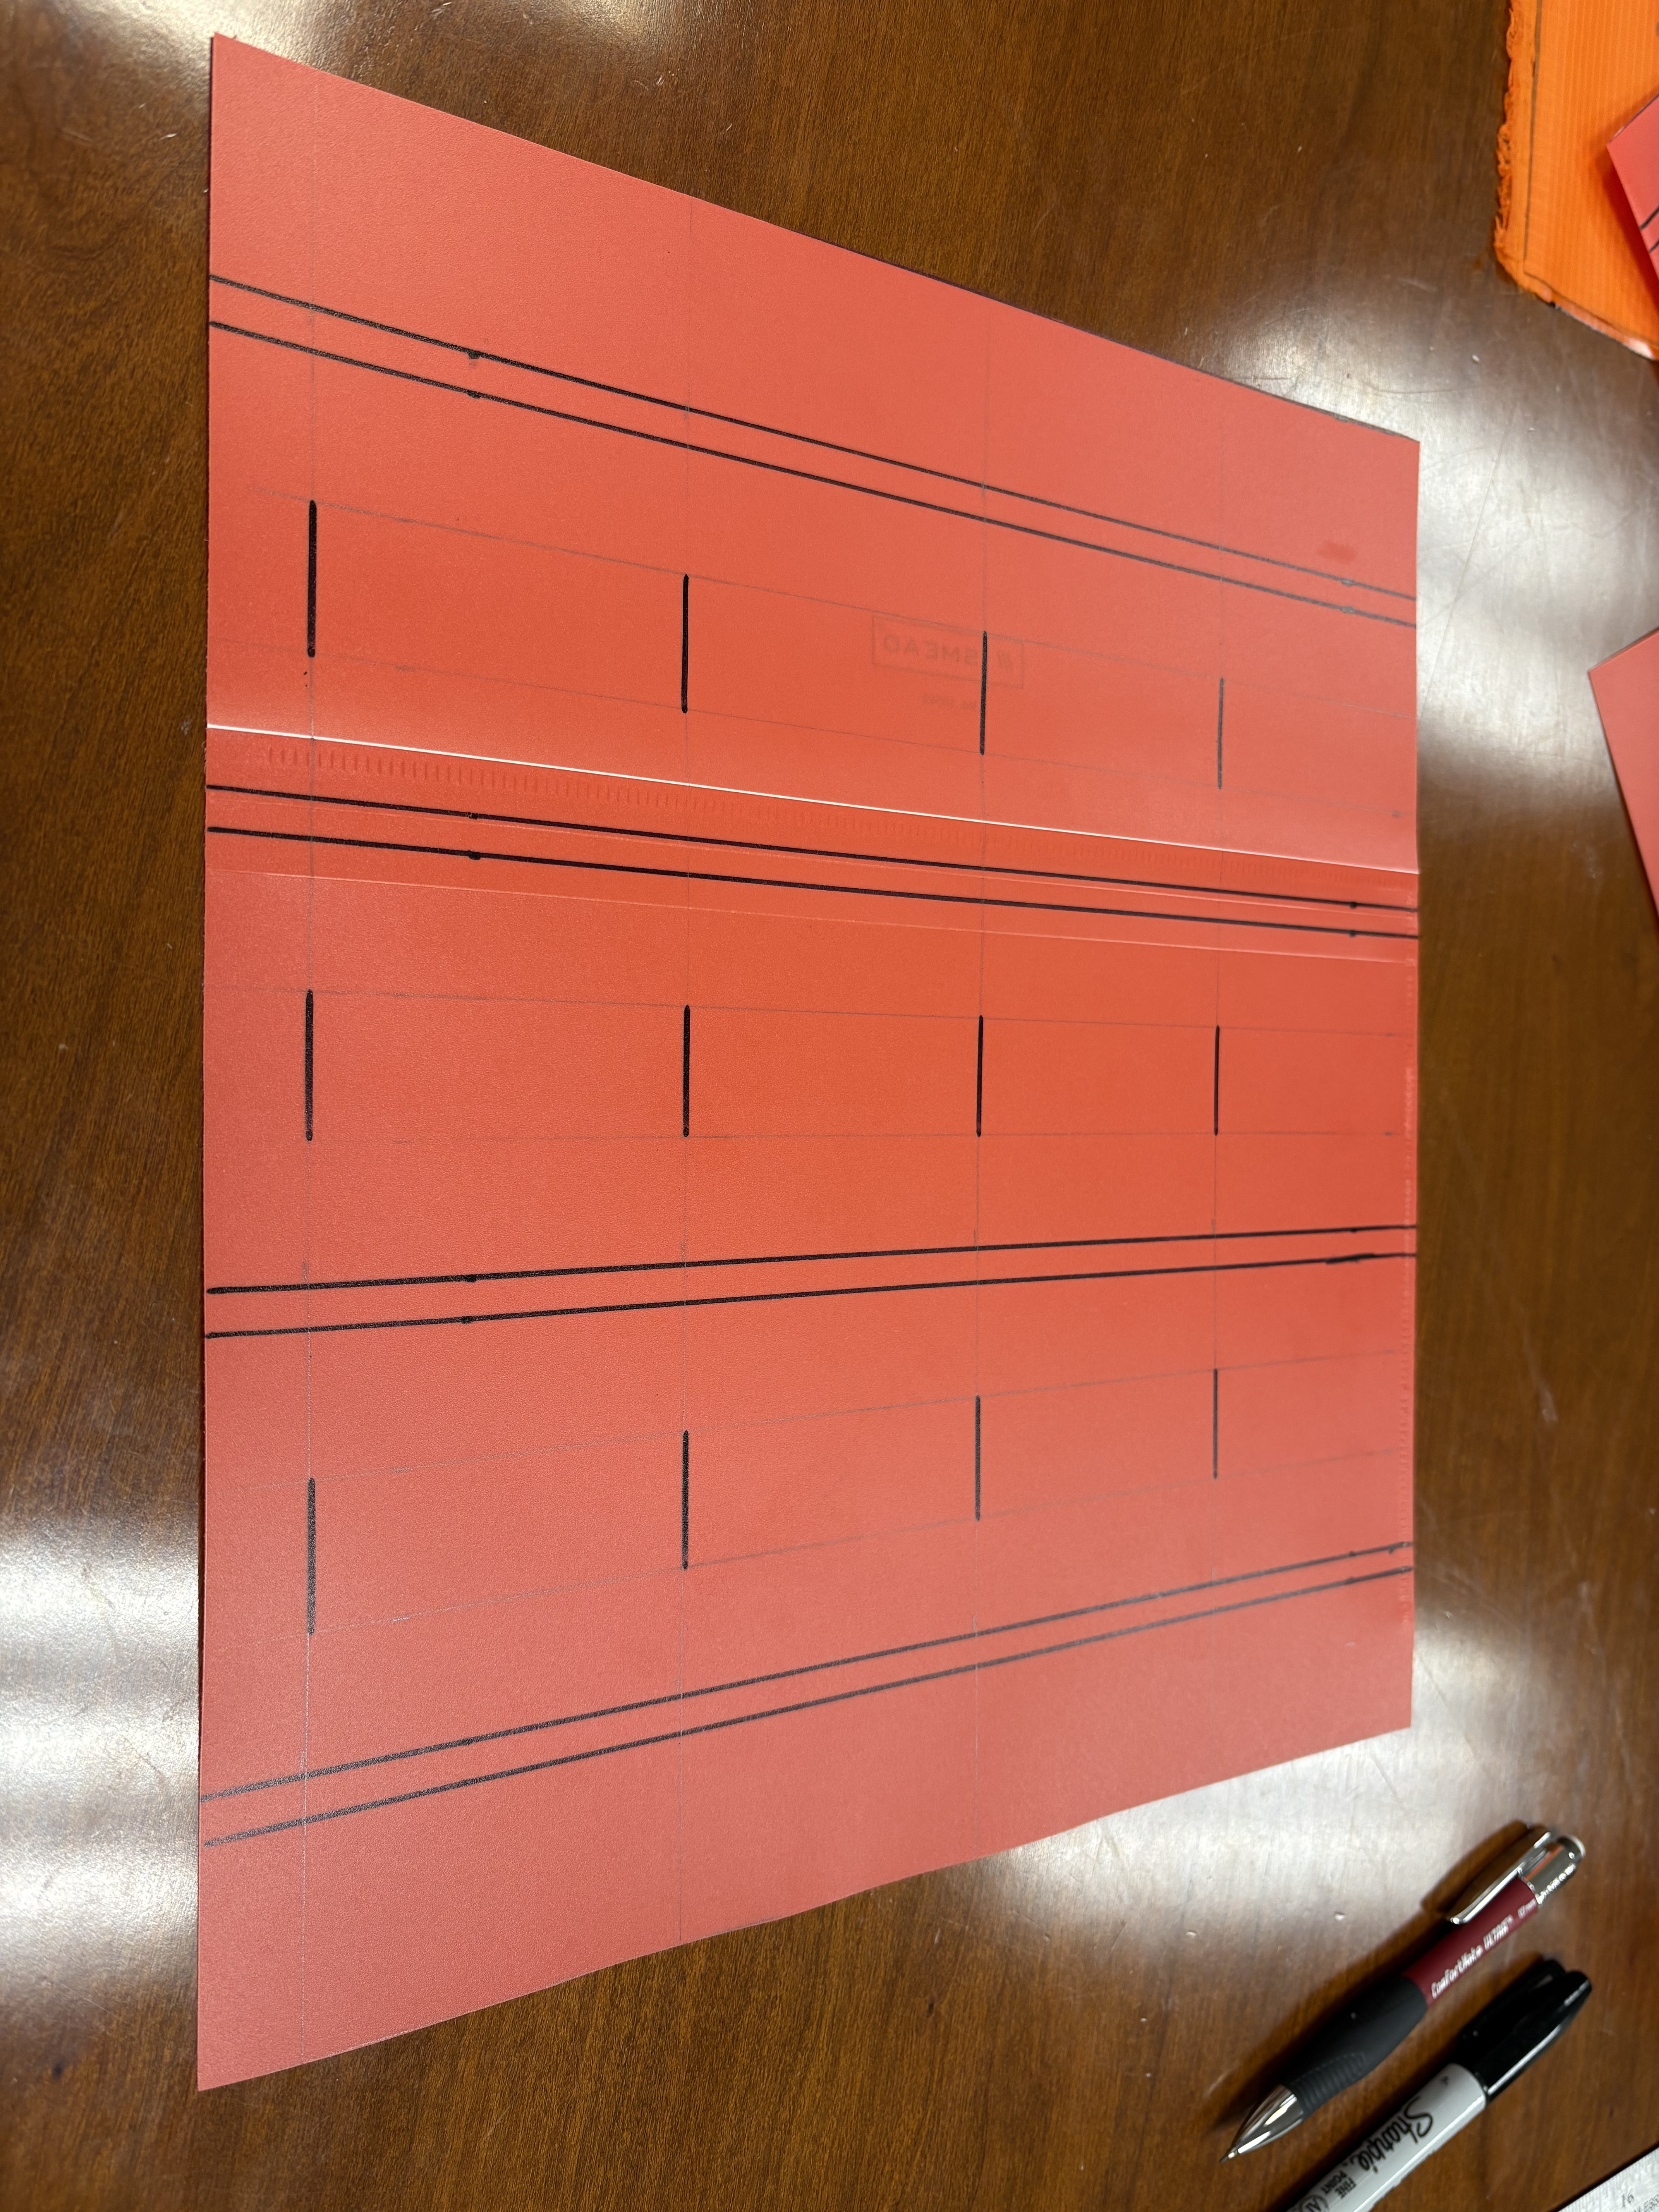
-
Make holes at the edges of each mark line using the precision pick.
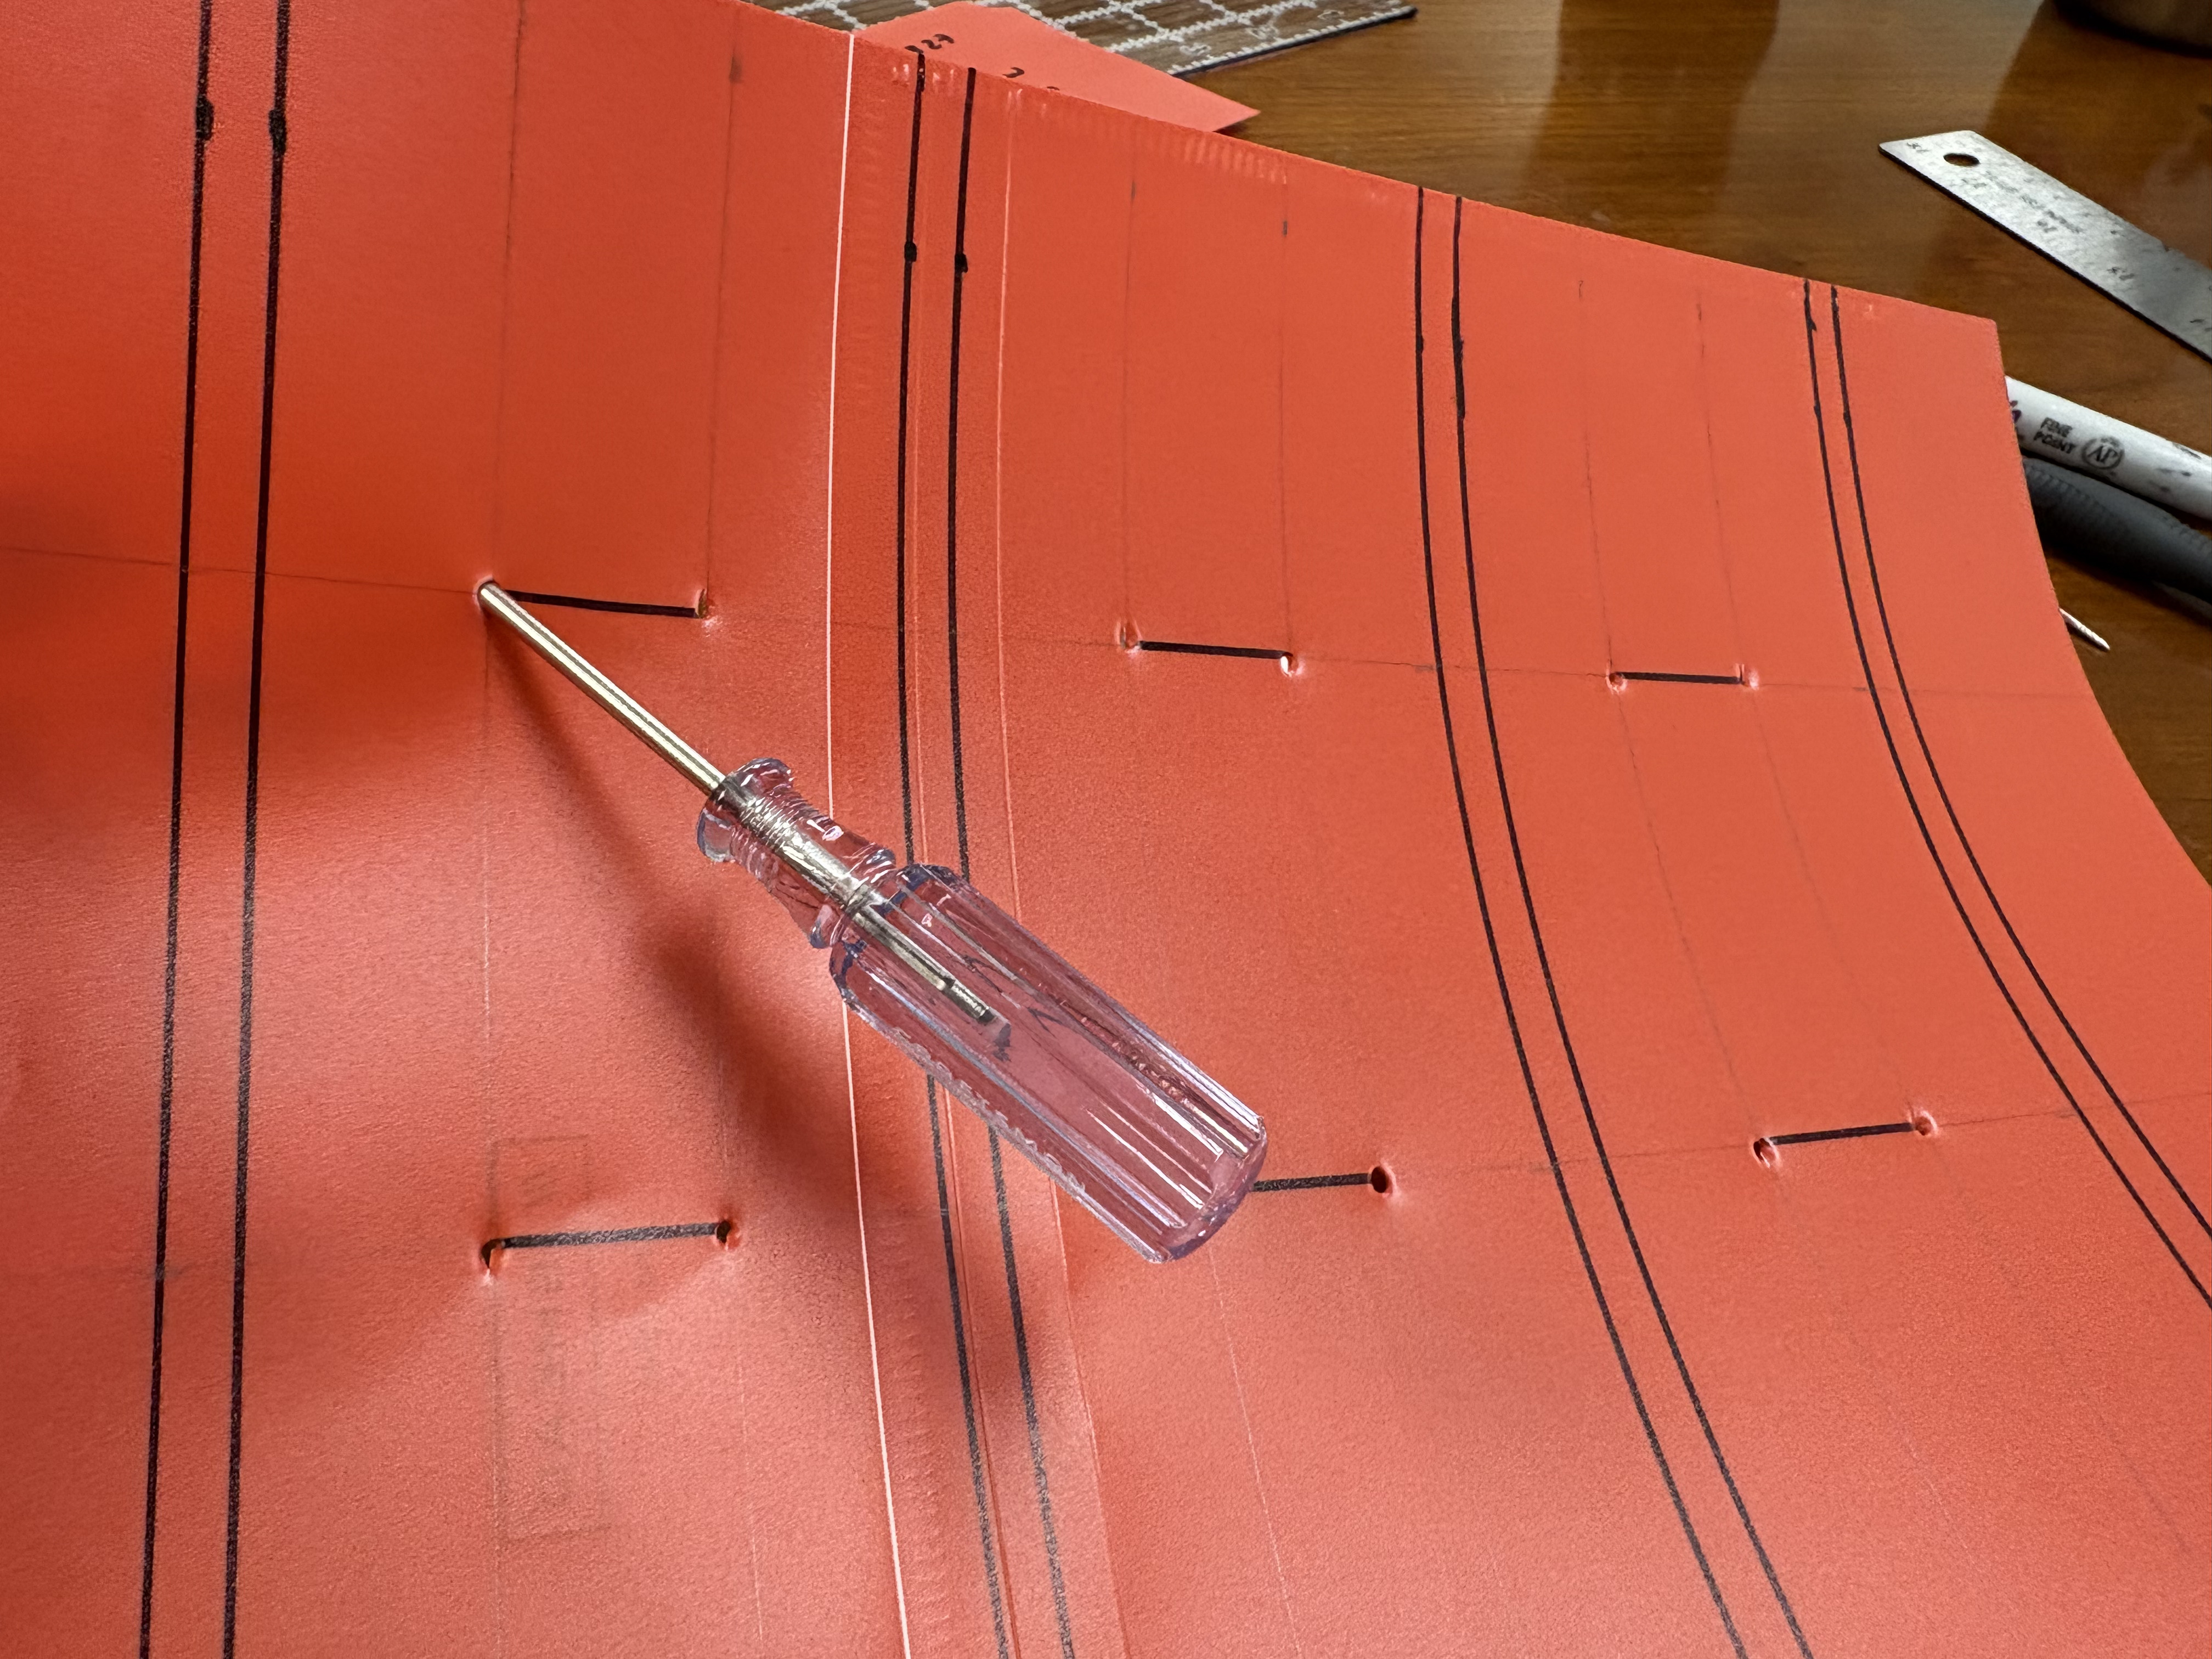
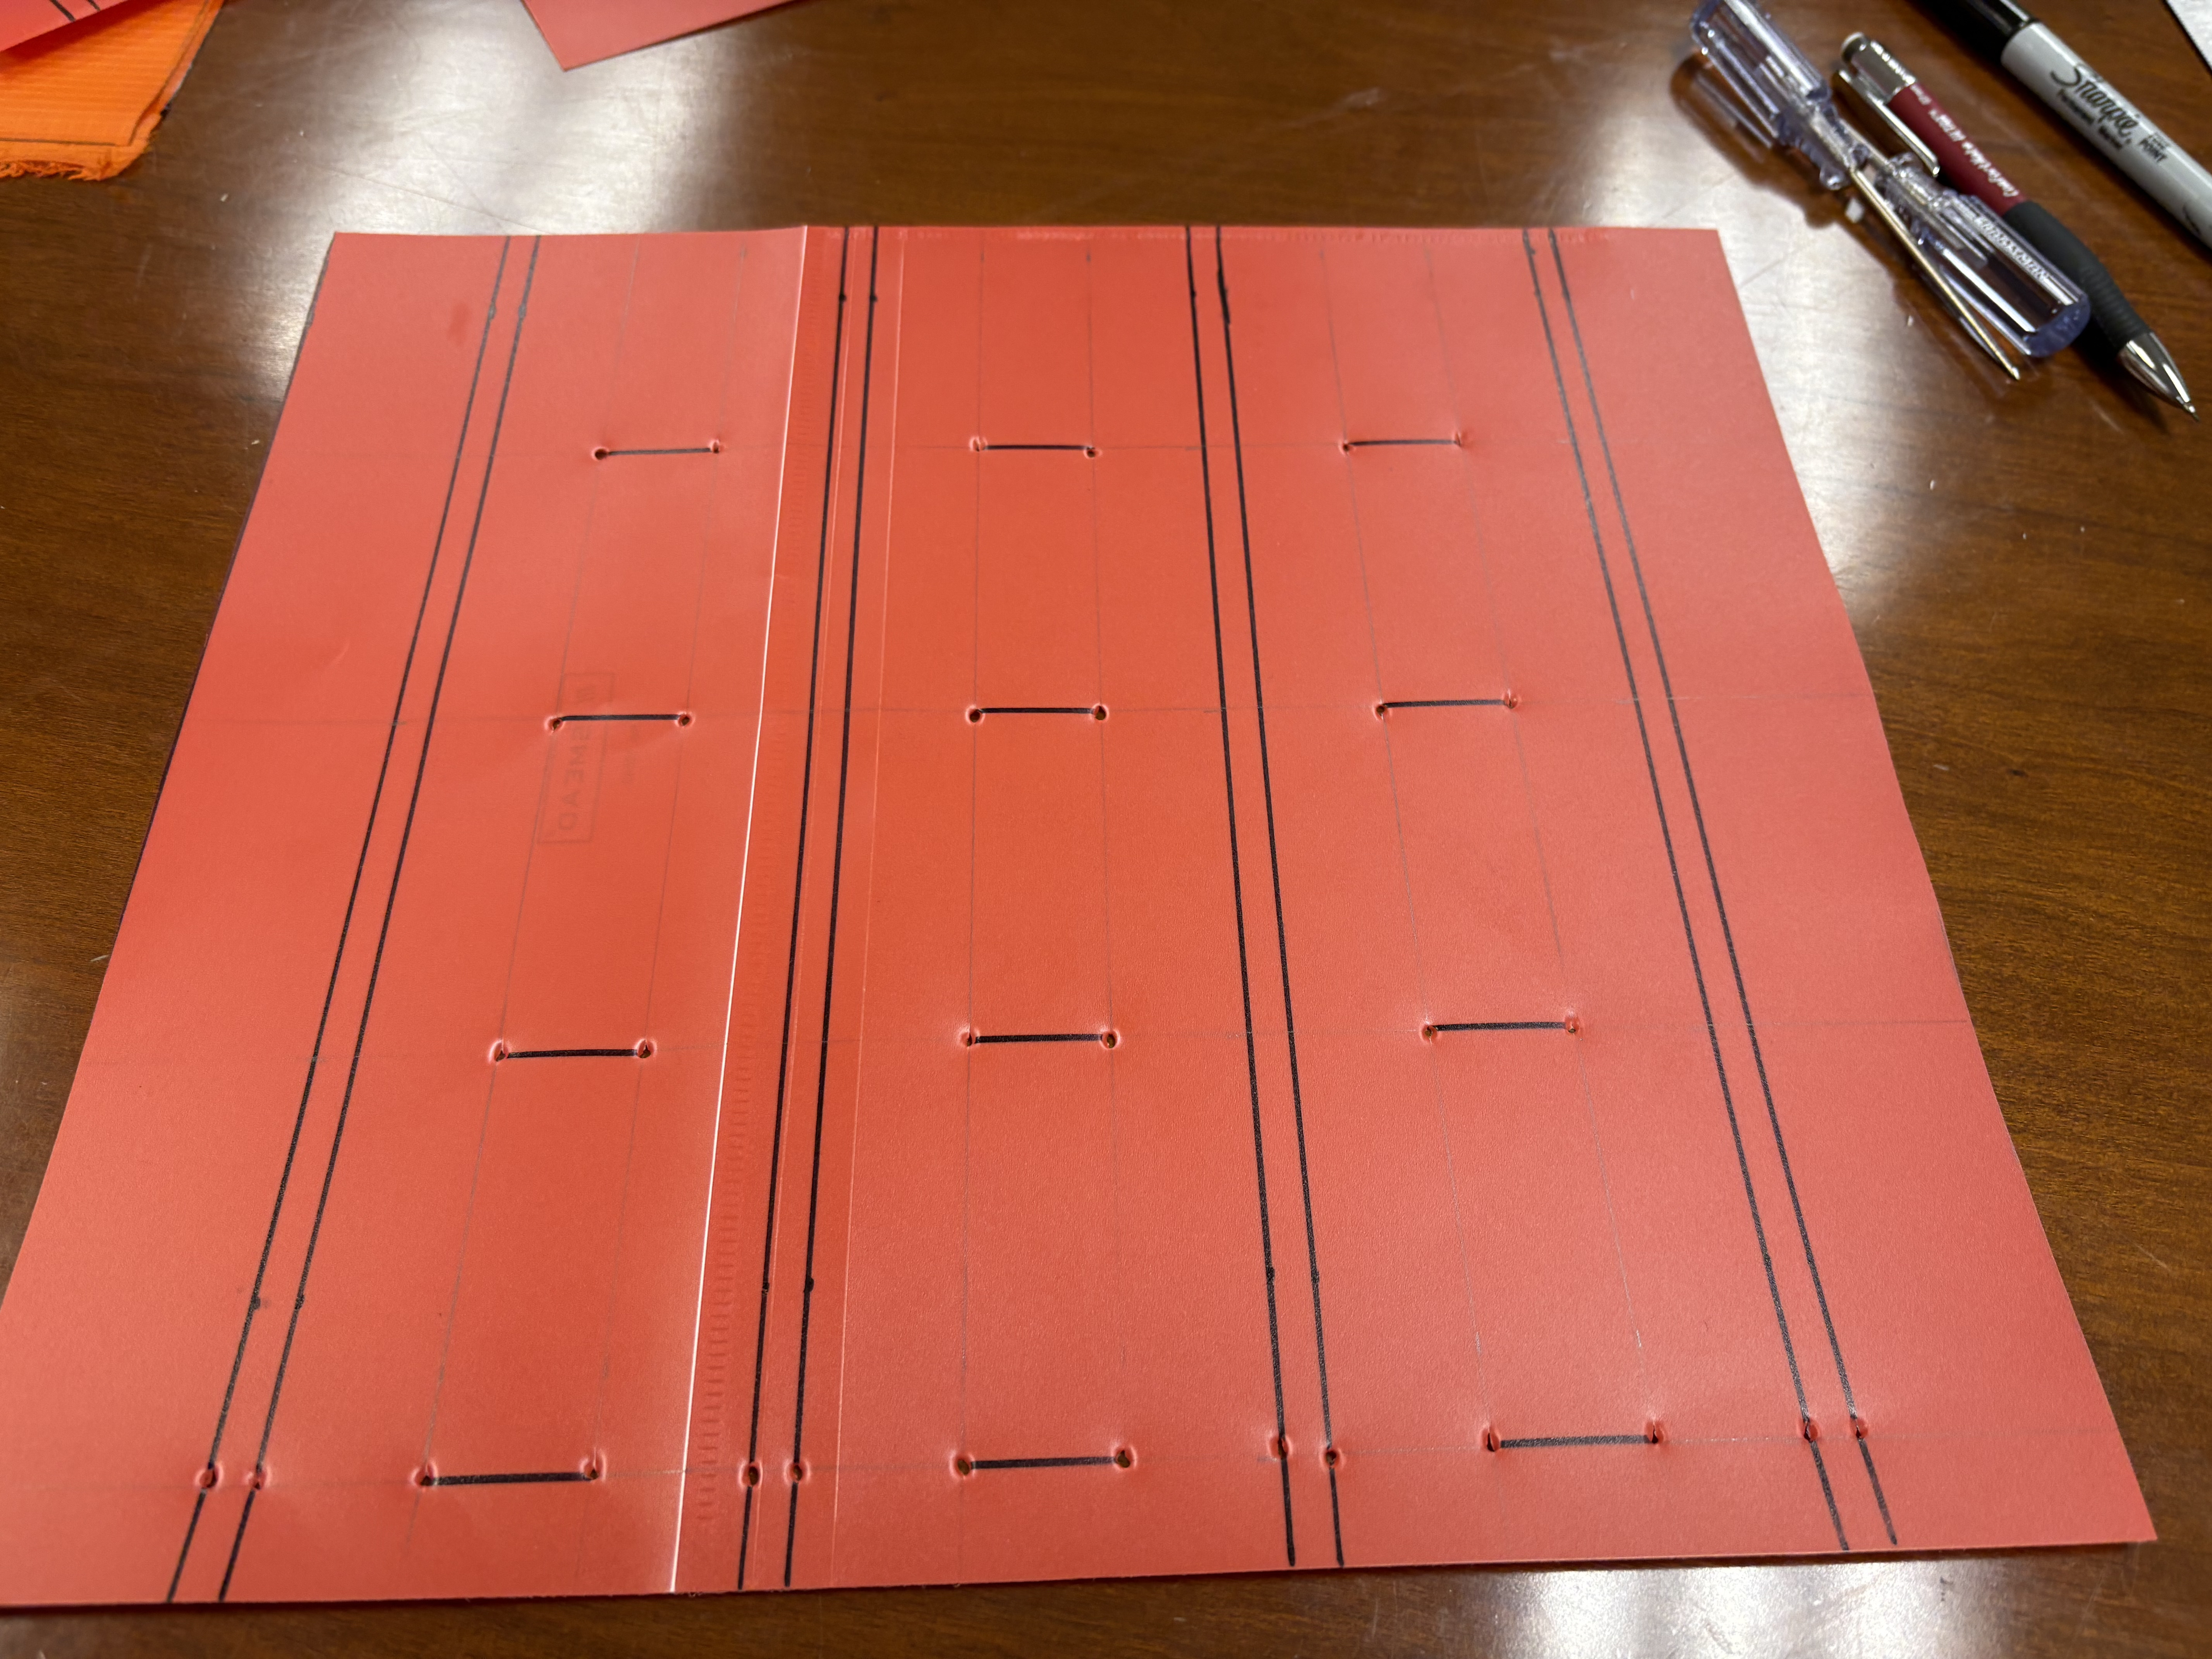
Material cutting and marking
-
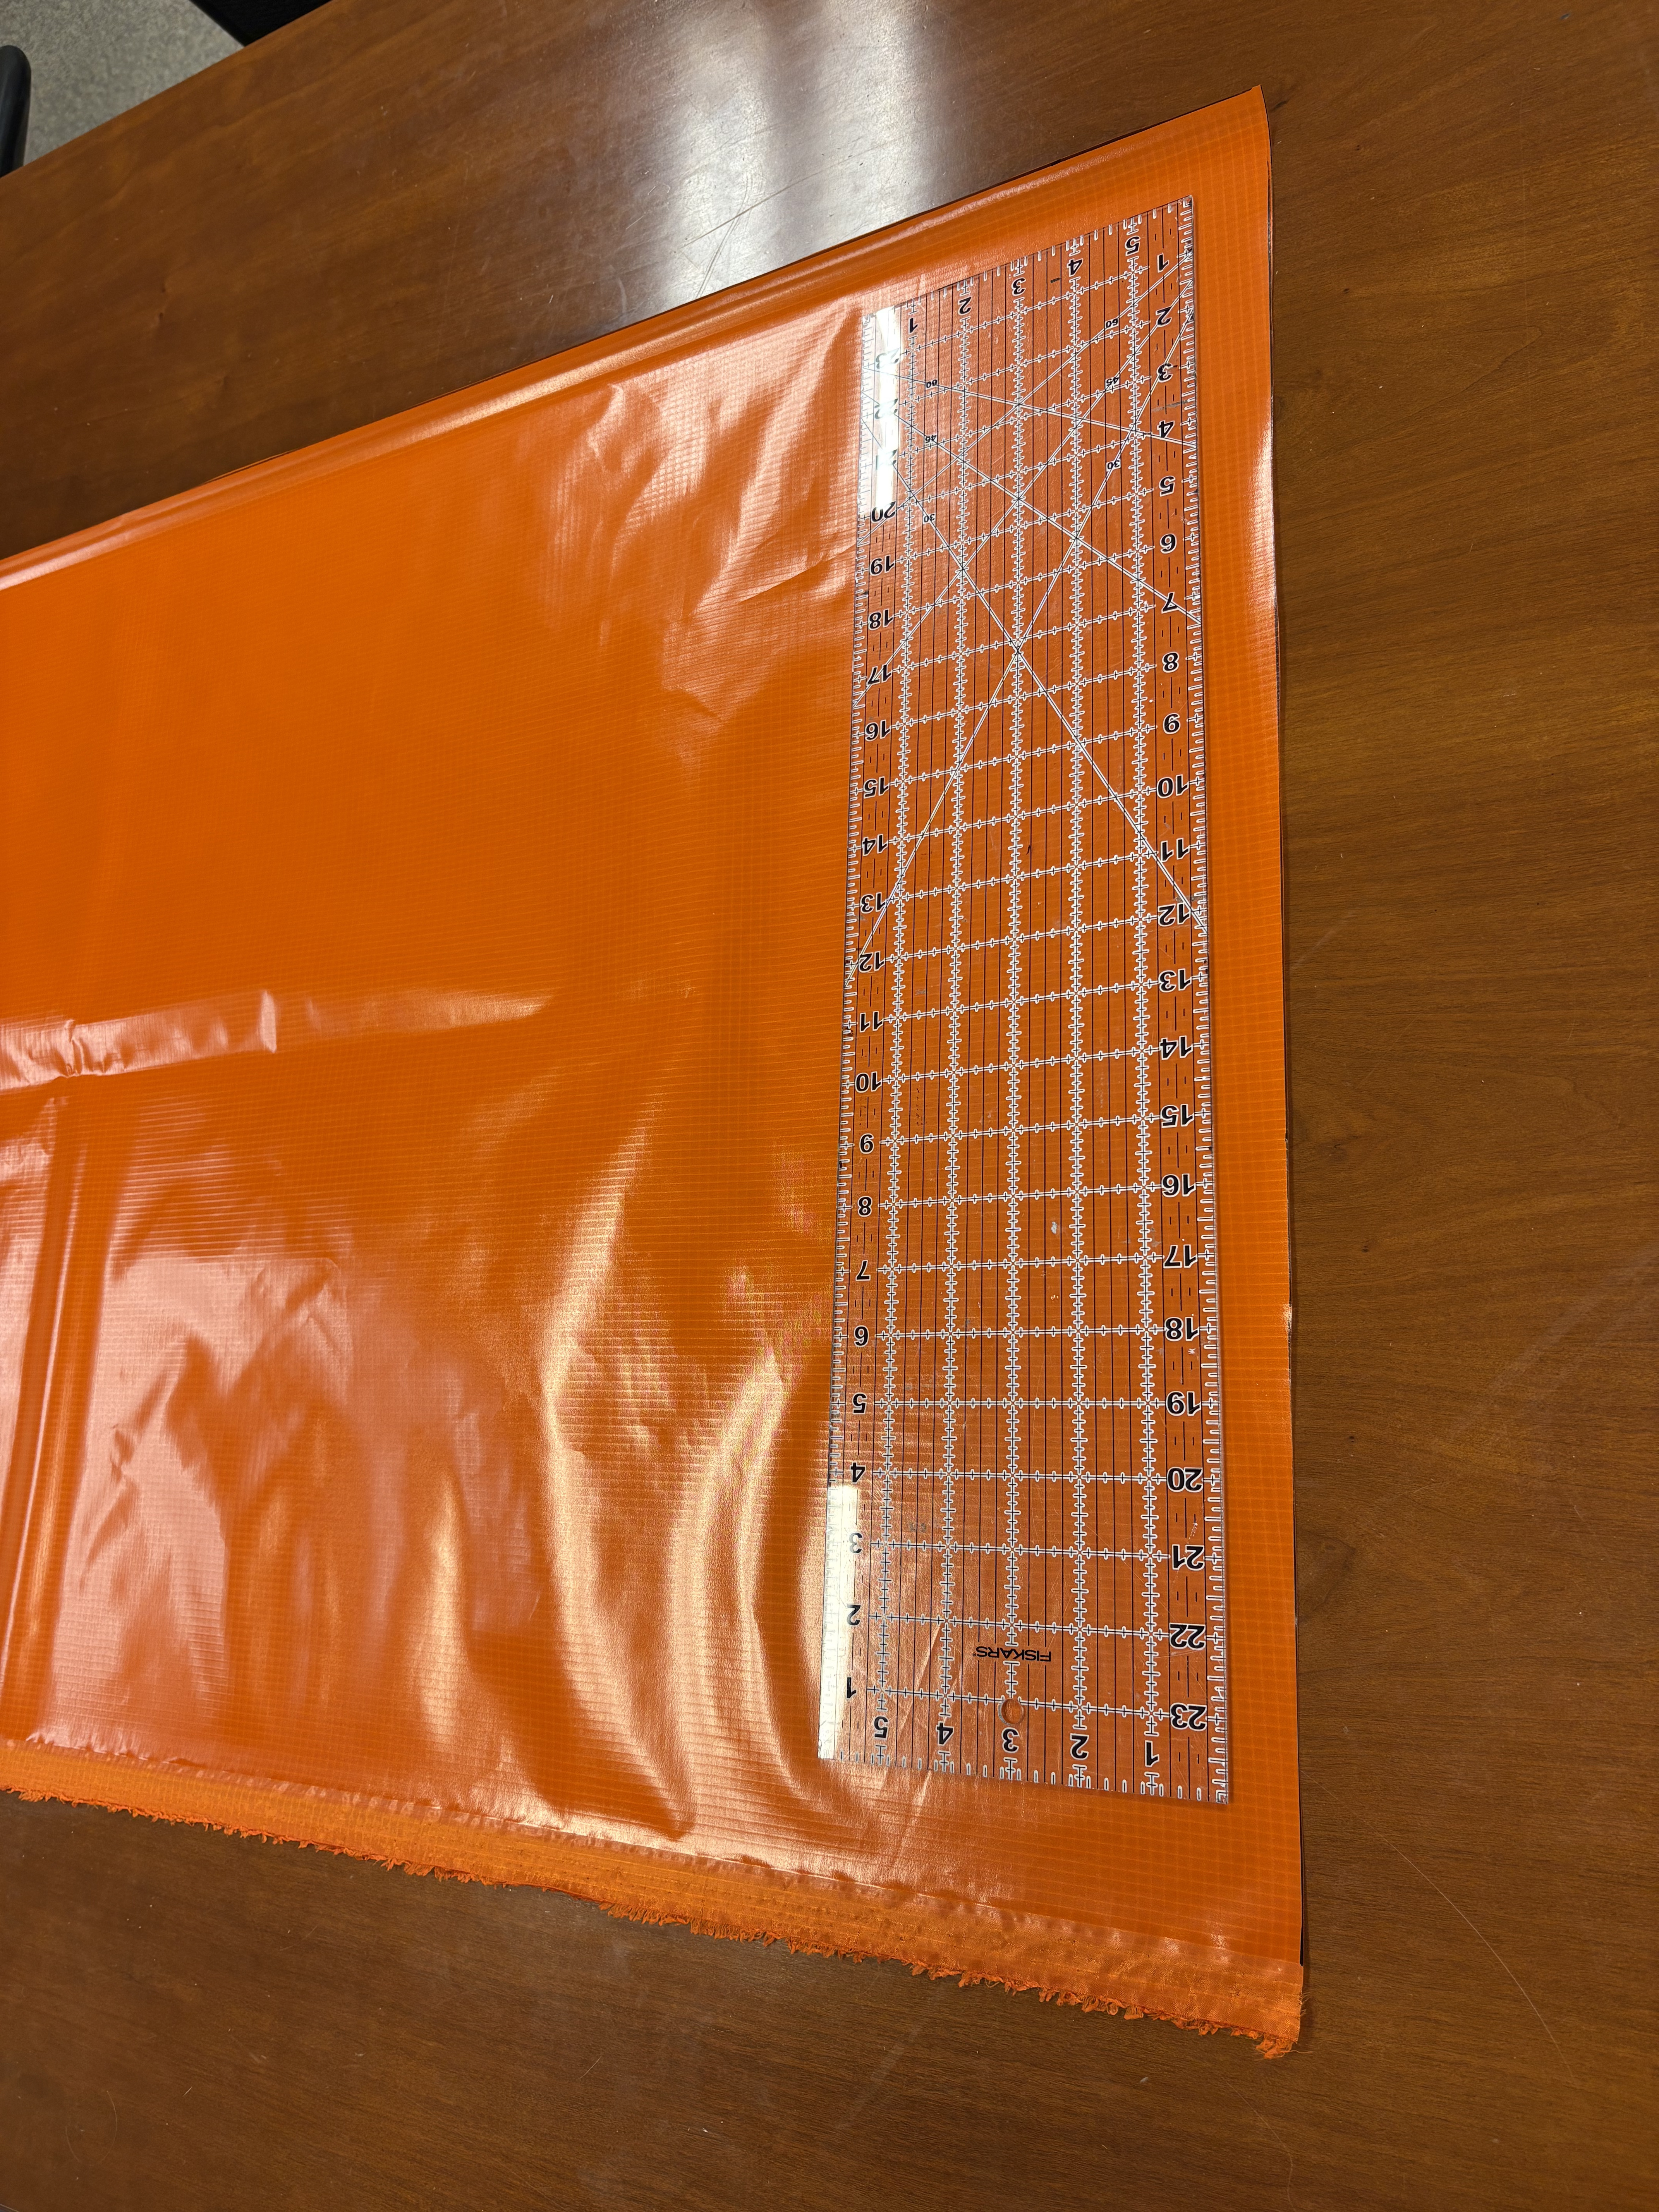
Cut a piece of fabric around 27in wide (and as long as the desired robot length).
-
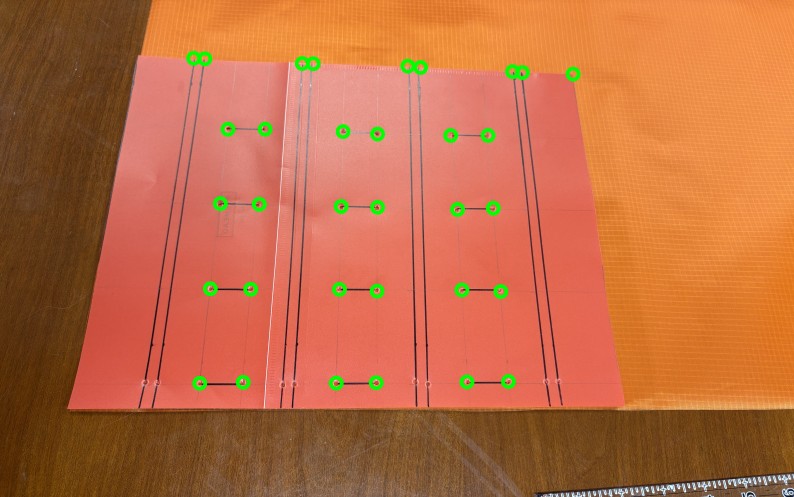
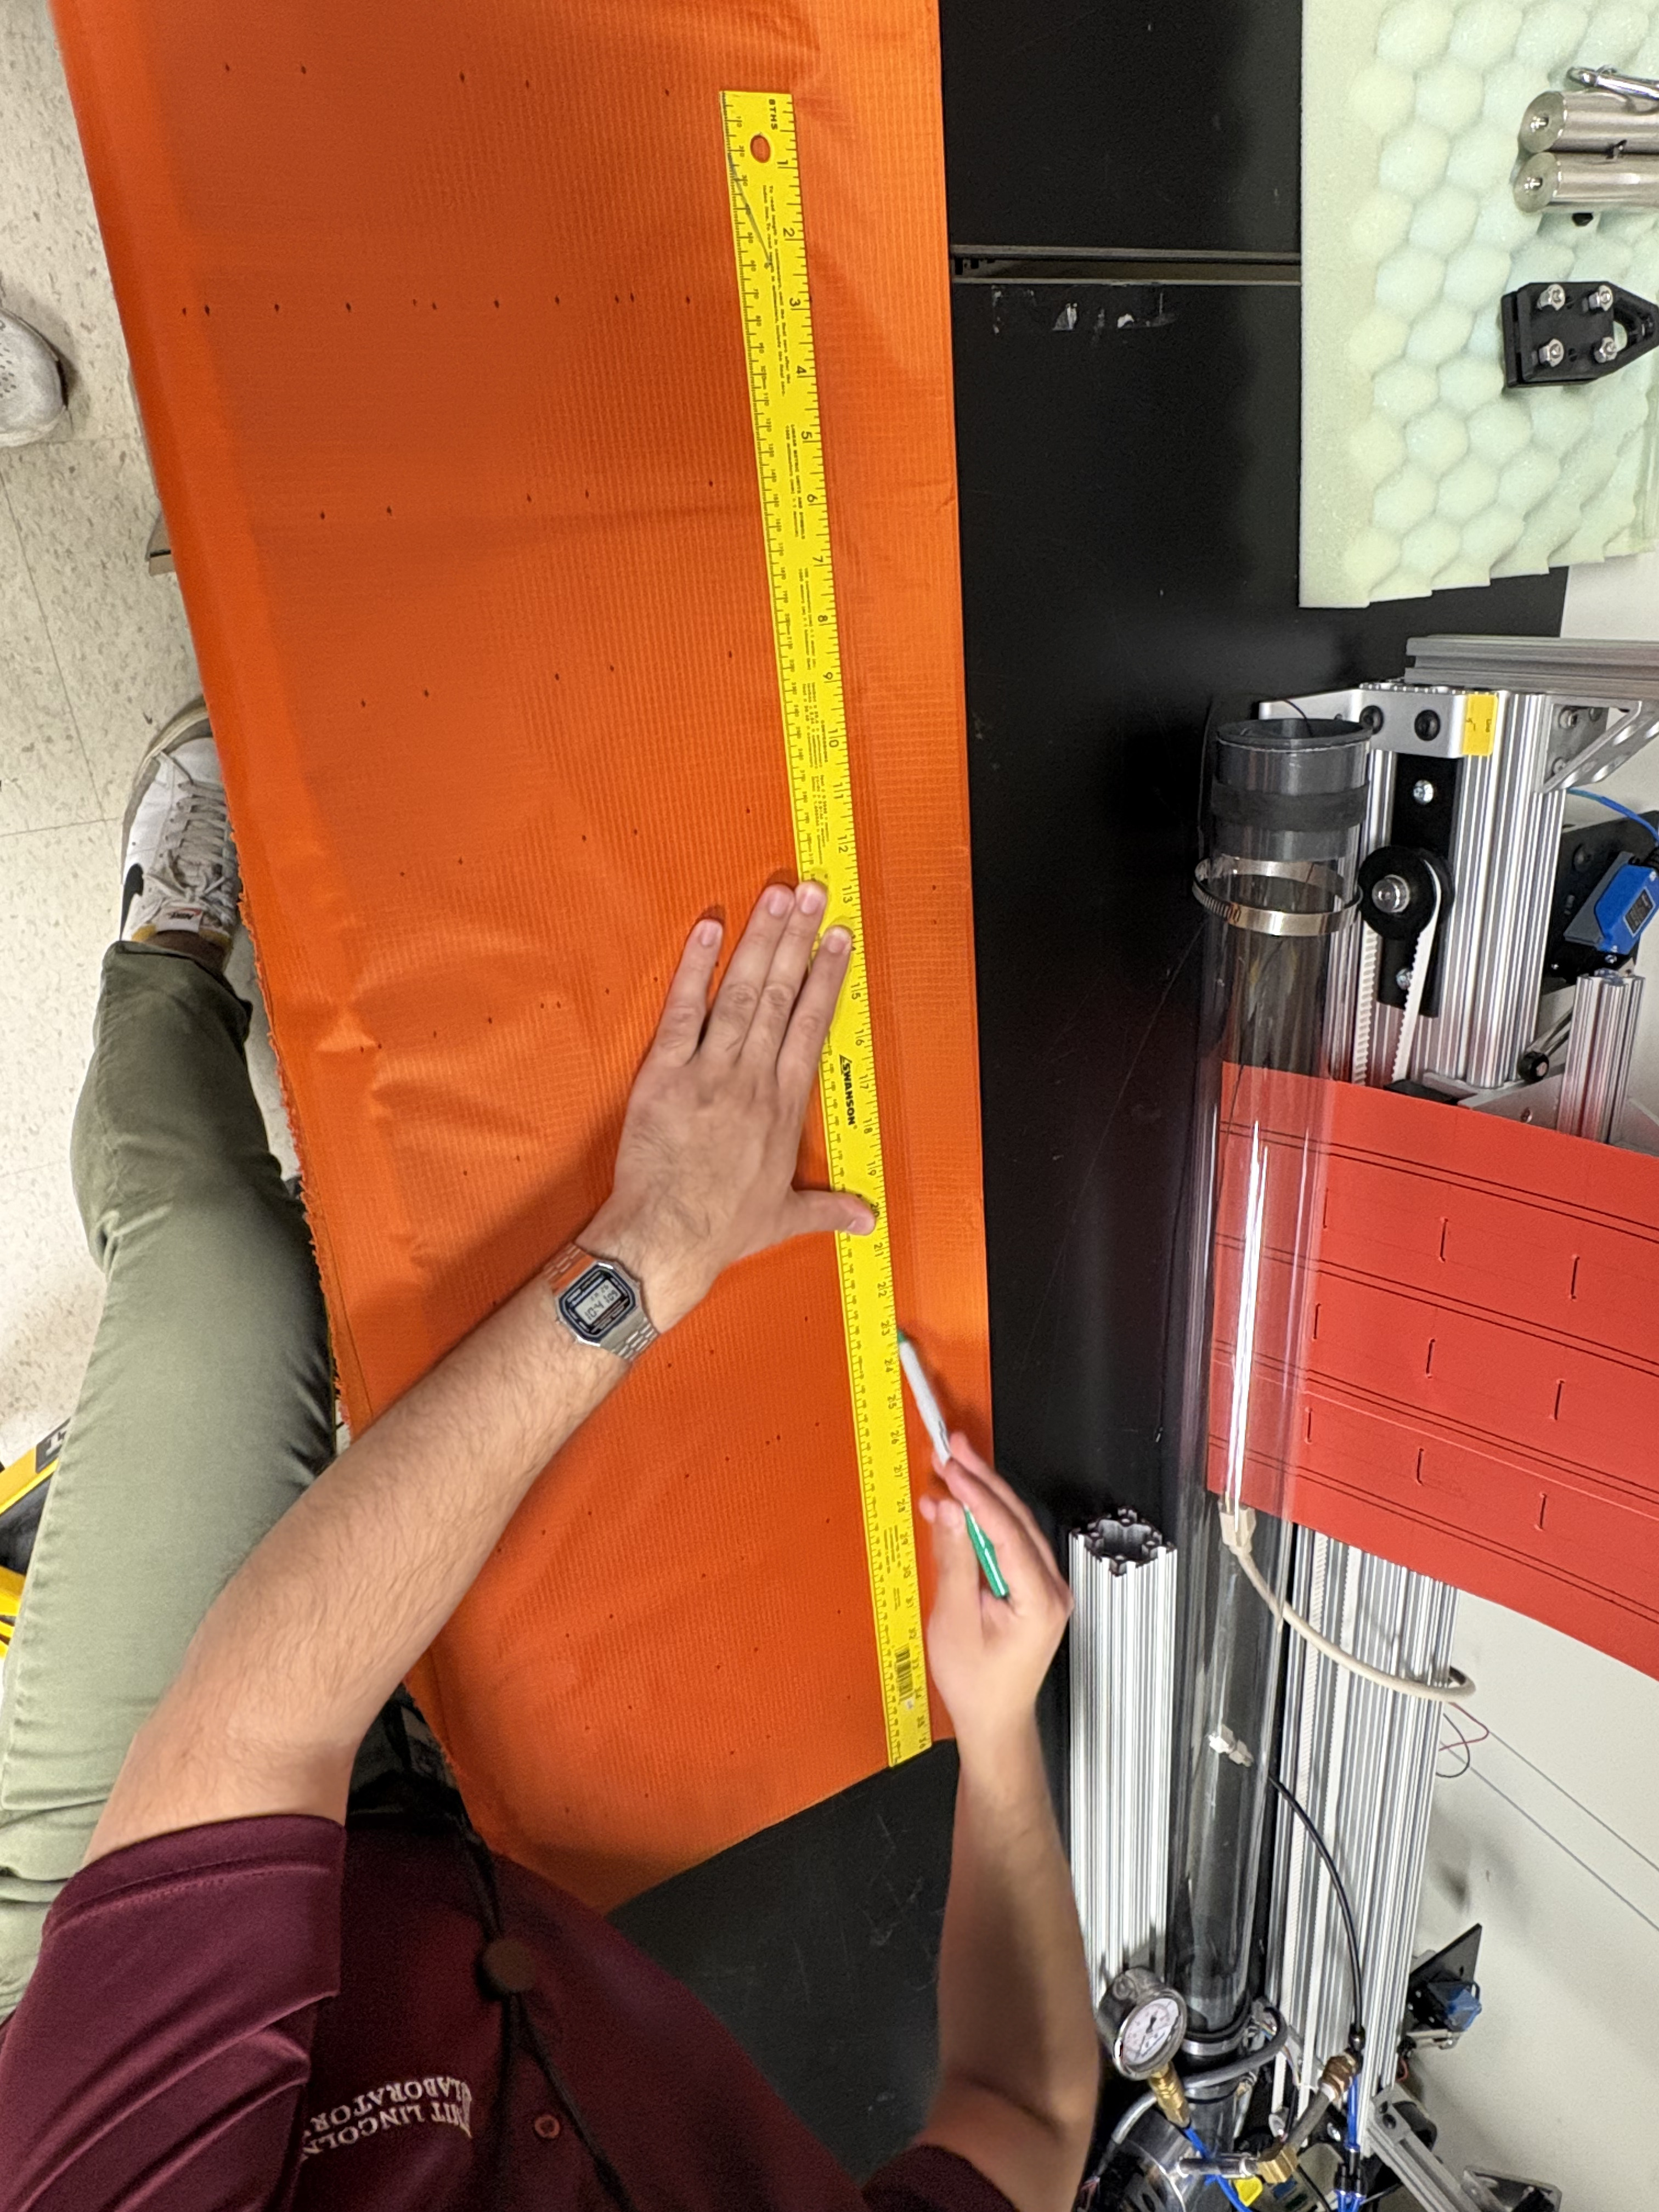
Lay the fabric flat on a surface with the TPU side down and place the stencil in one corner. Use the marker to mark each of the holes in the stencil, including the outer edges and the ends of each line in the stencil.
-
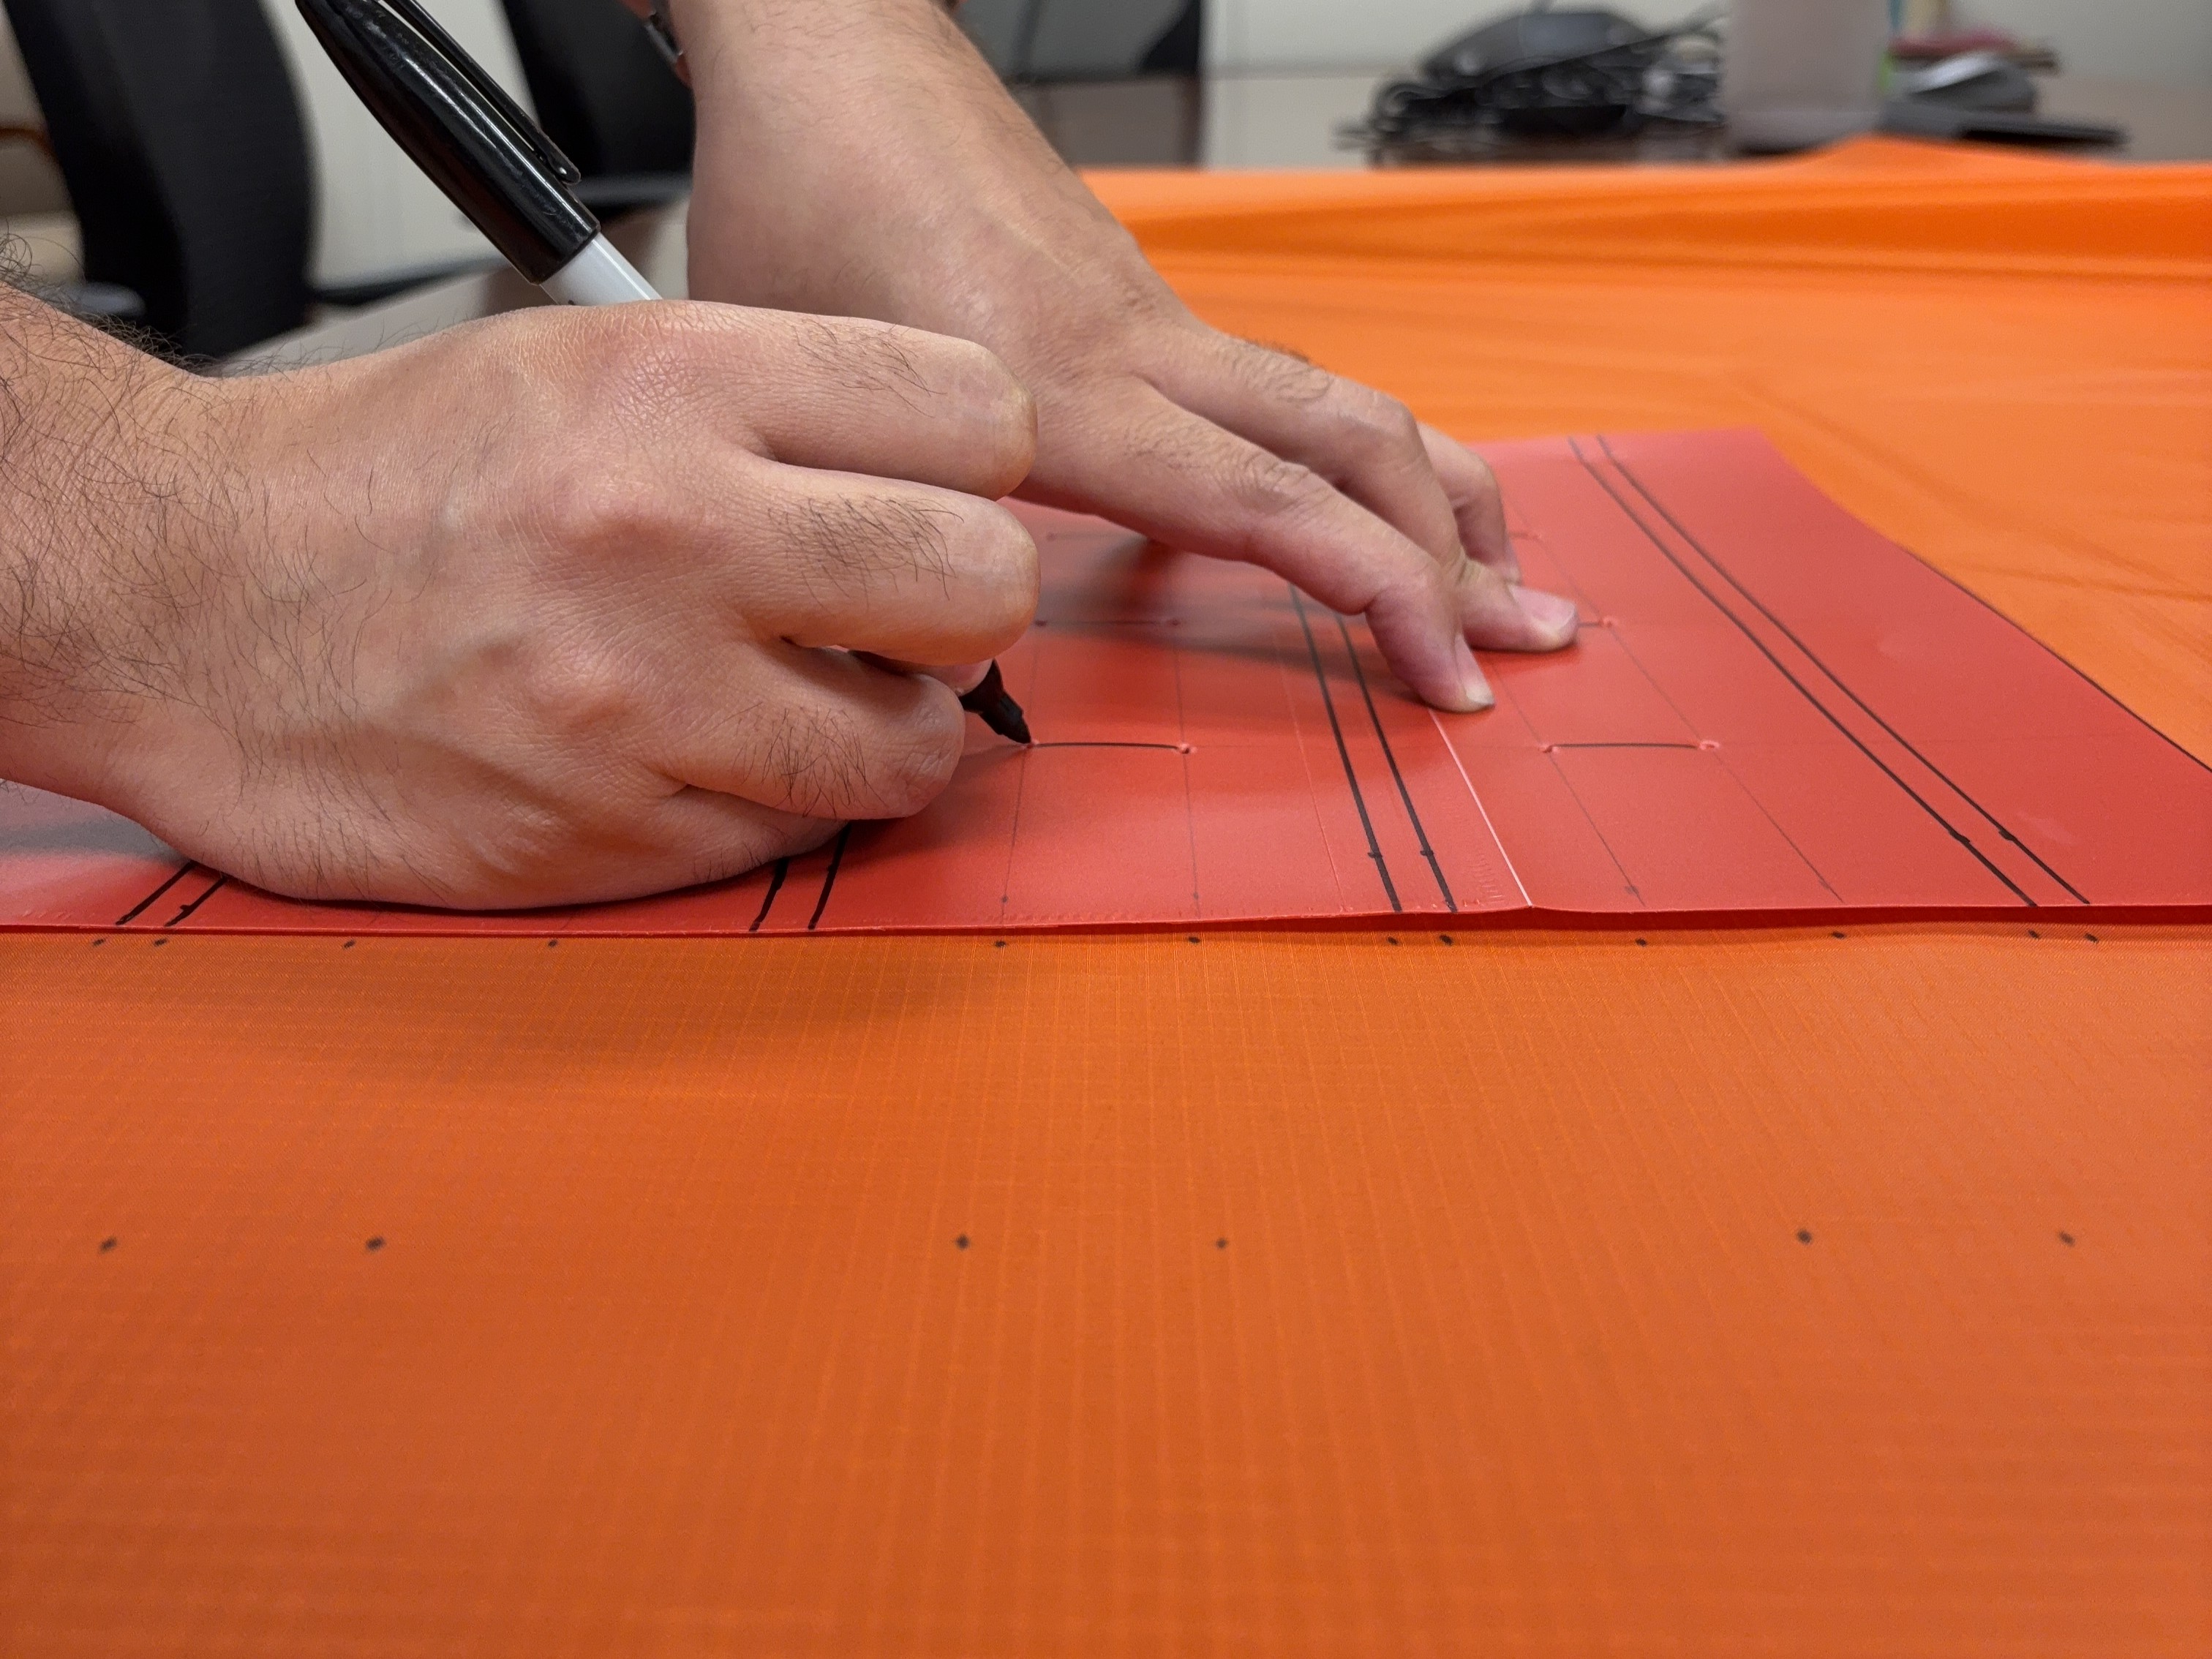
Move the stencil forward down the length of the fabric and align it with the previously made markings.
-
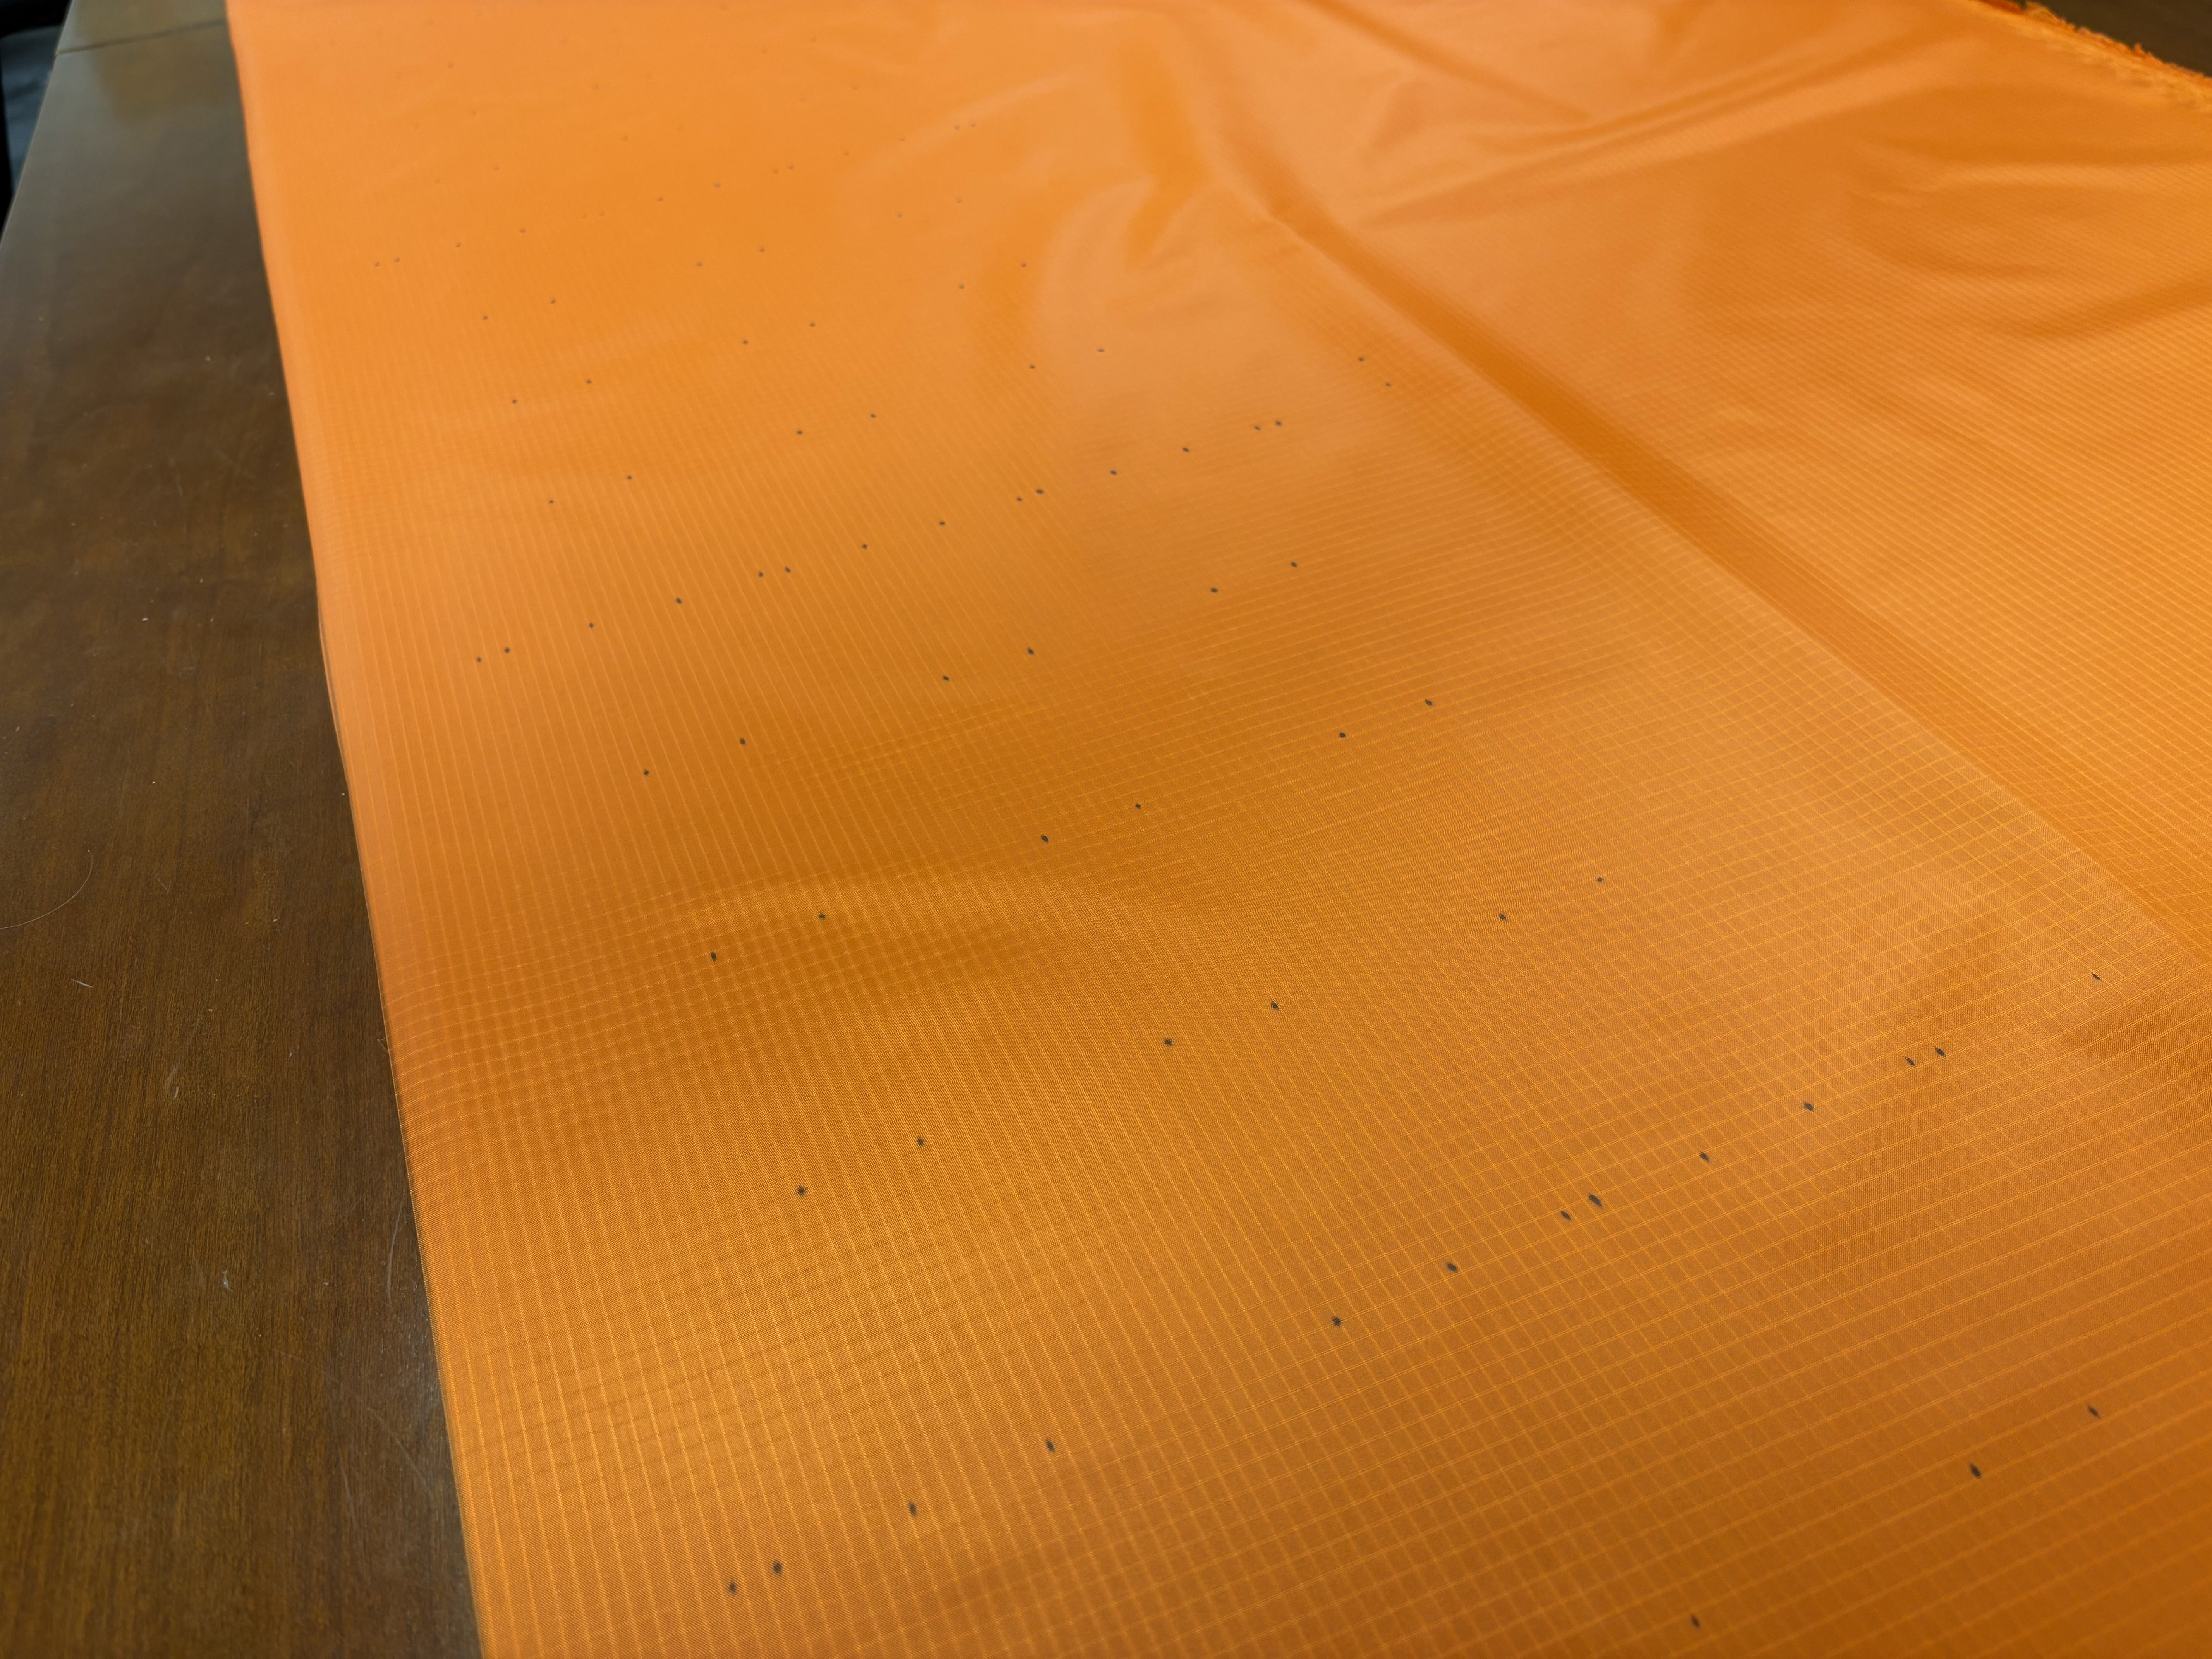
Continue until the whole length of the fabric is marked.
-
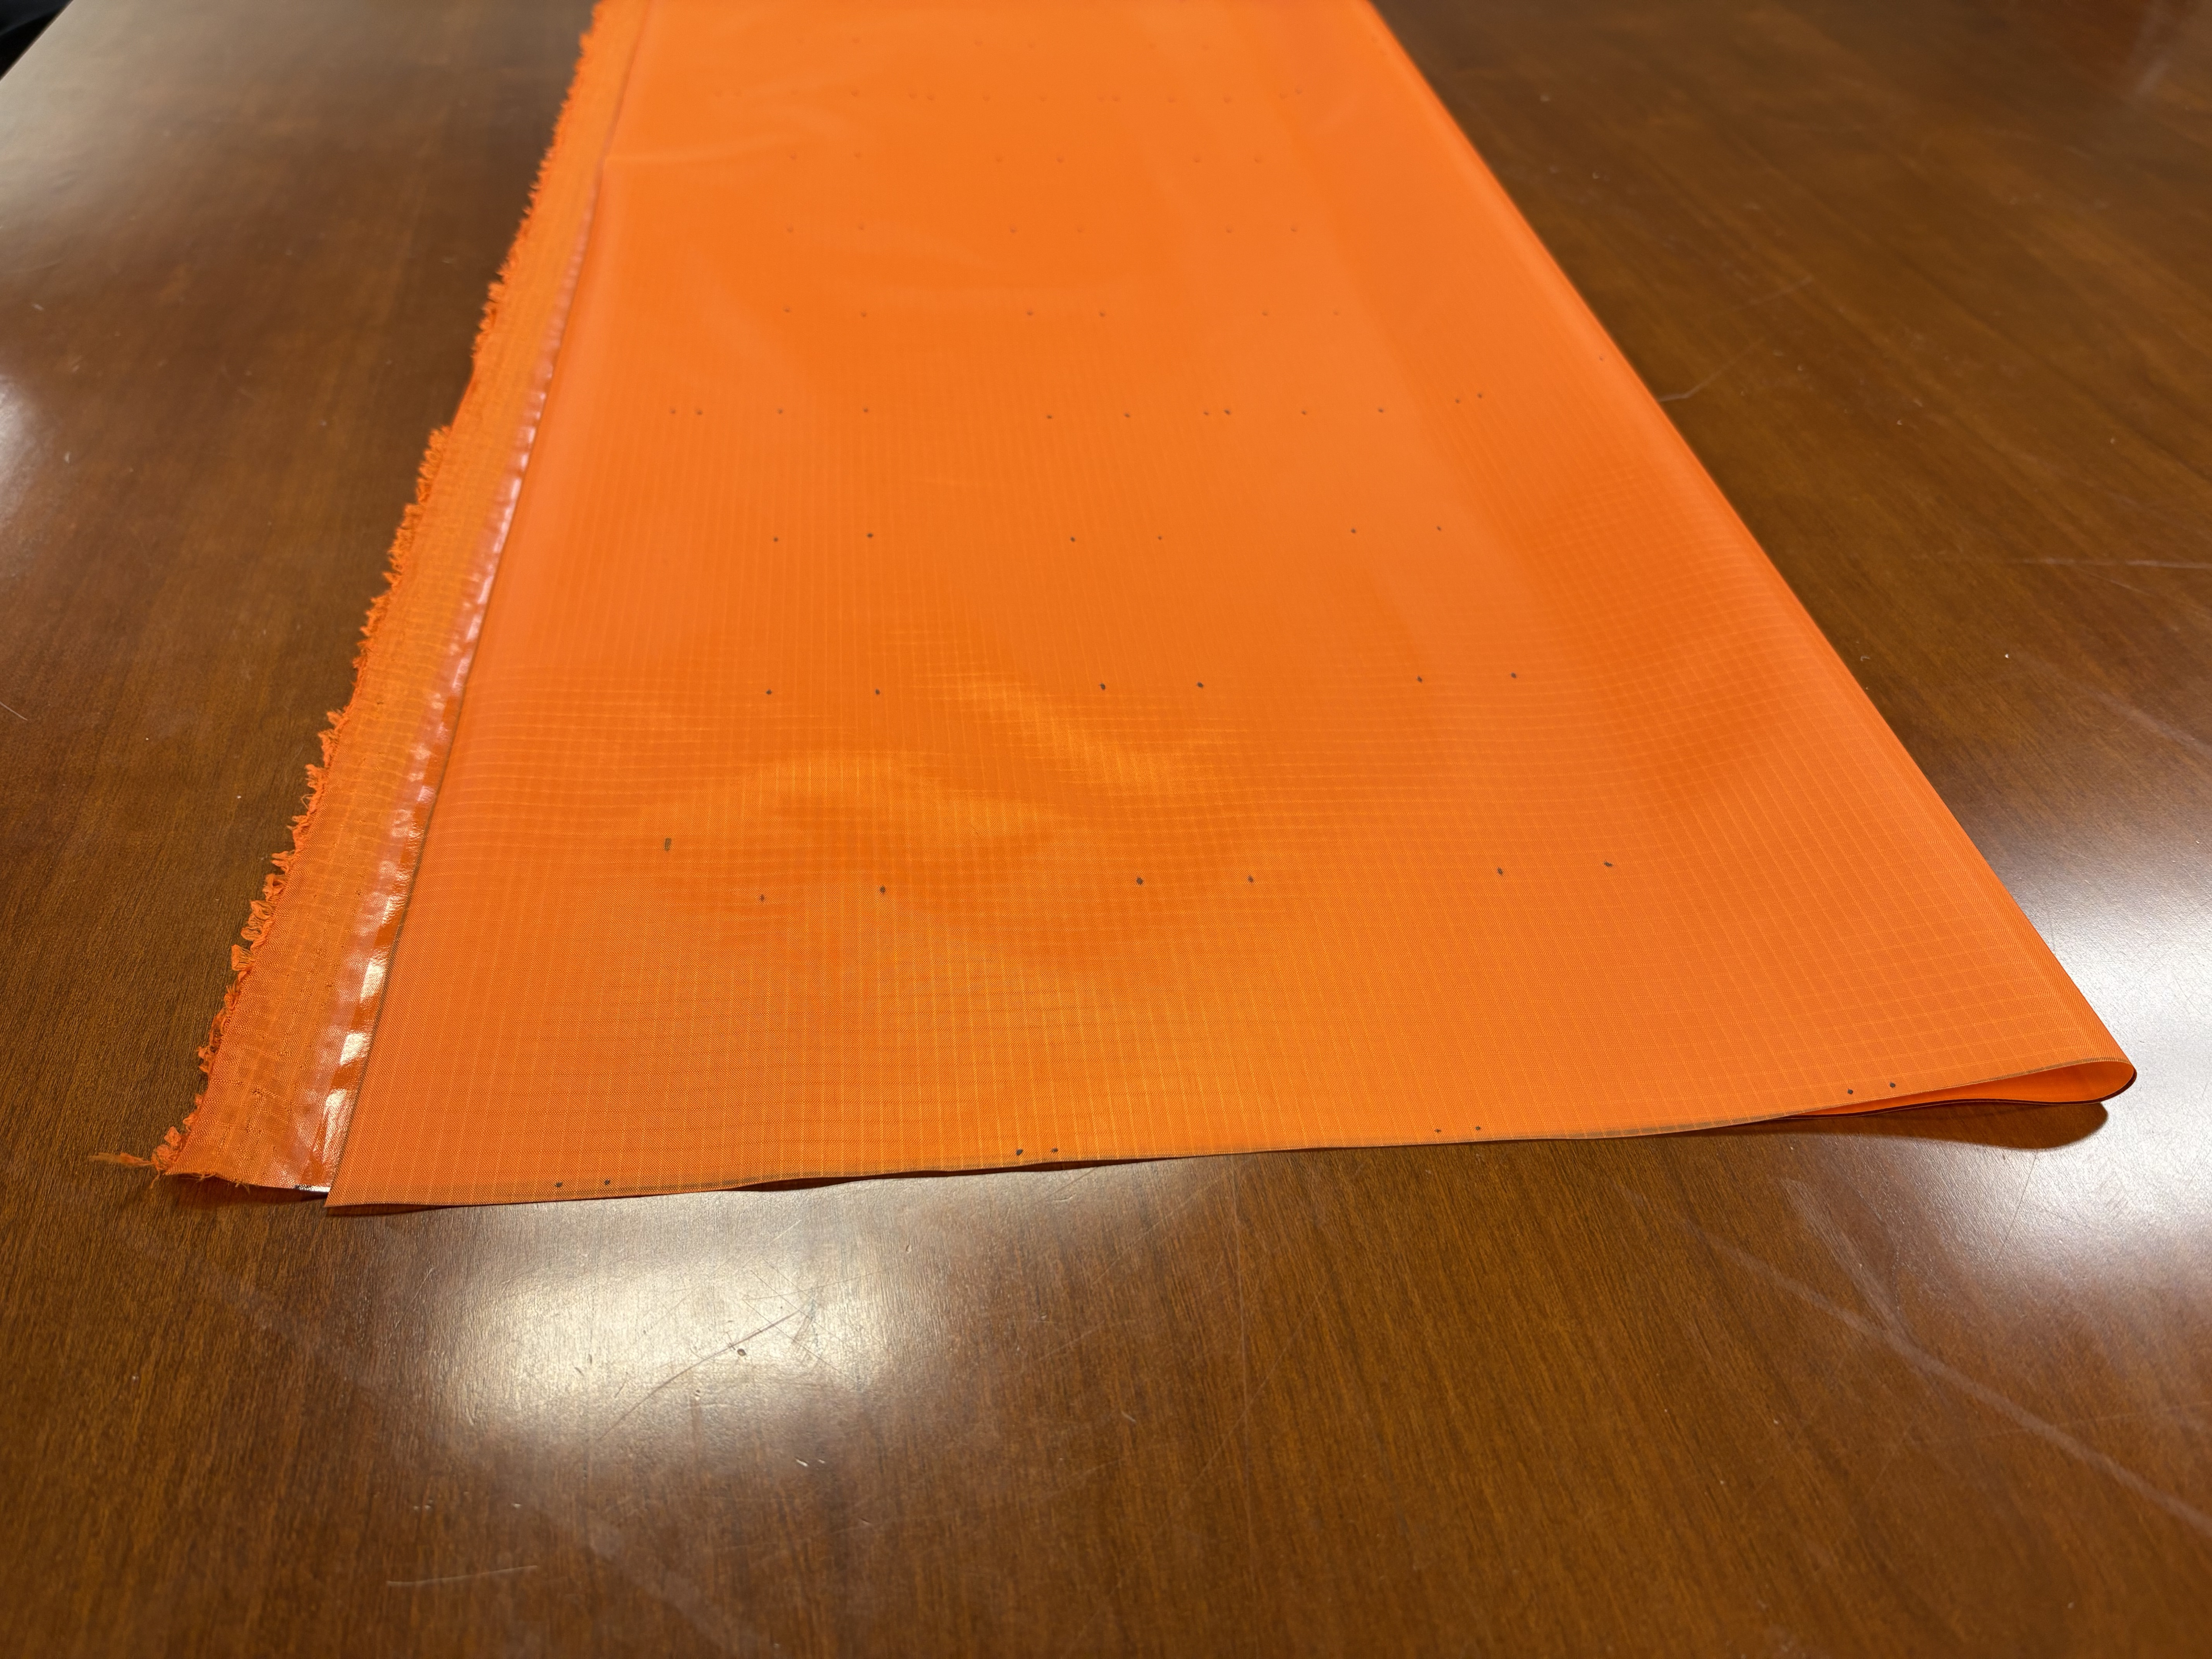
Fold the fabric in half (width-wise) with the TPU side inside. Keep the marked side facing up.
-
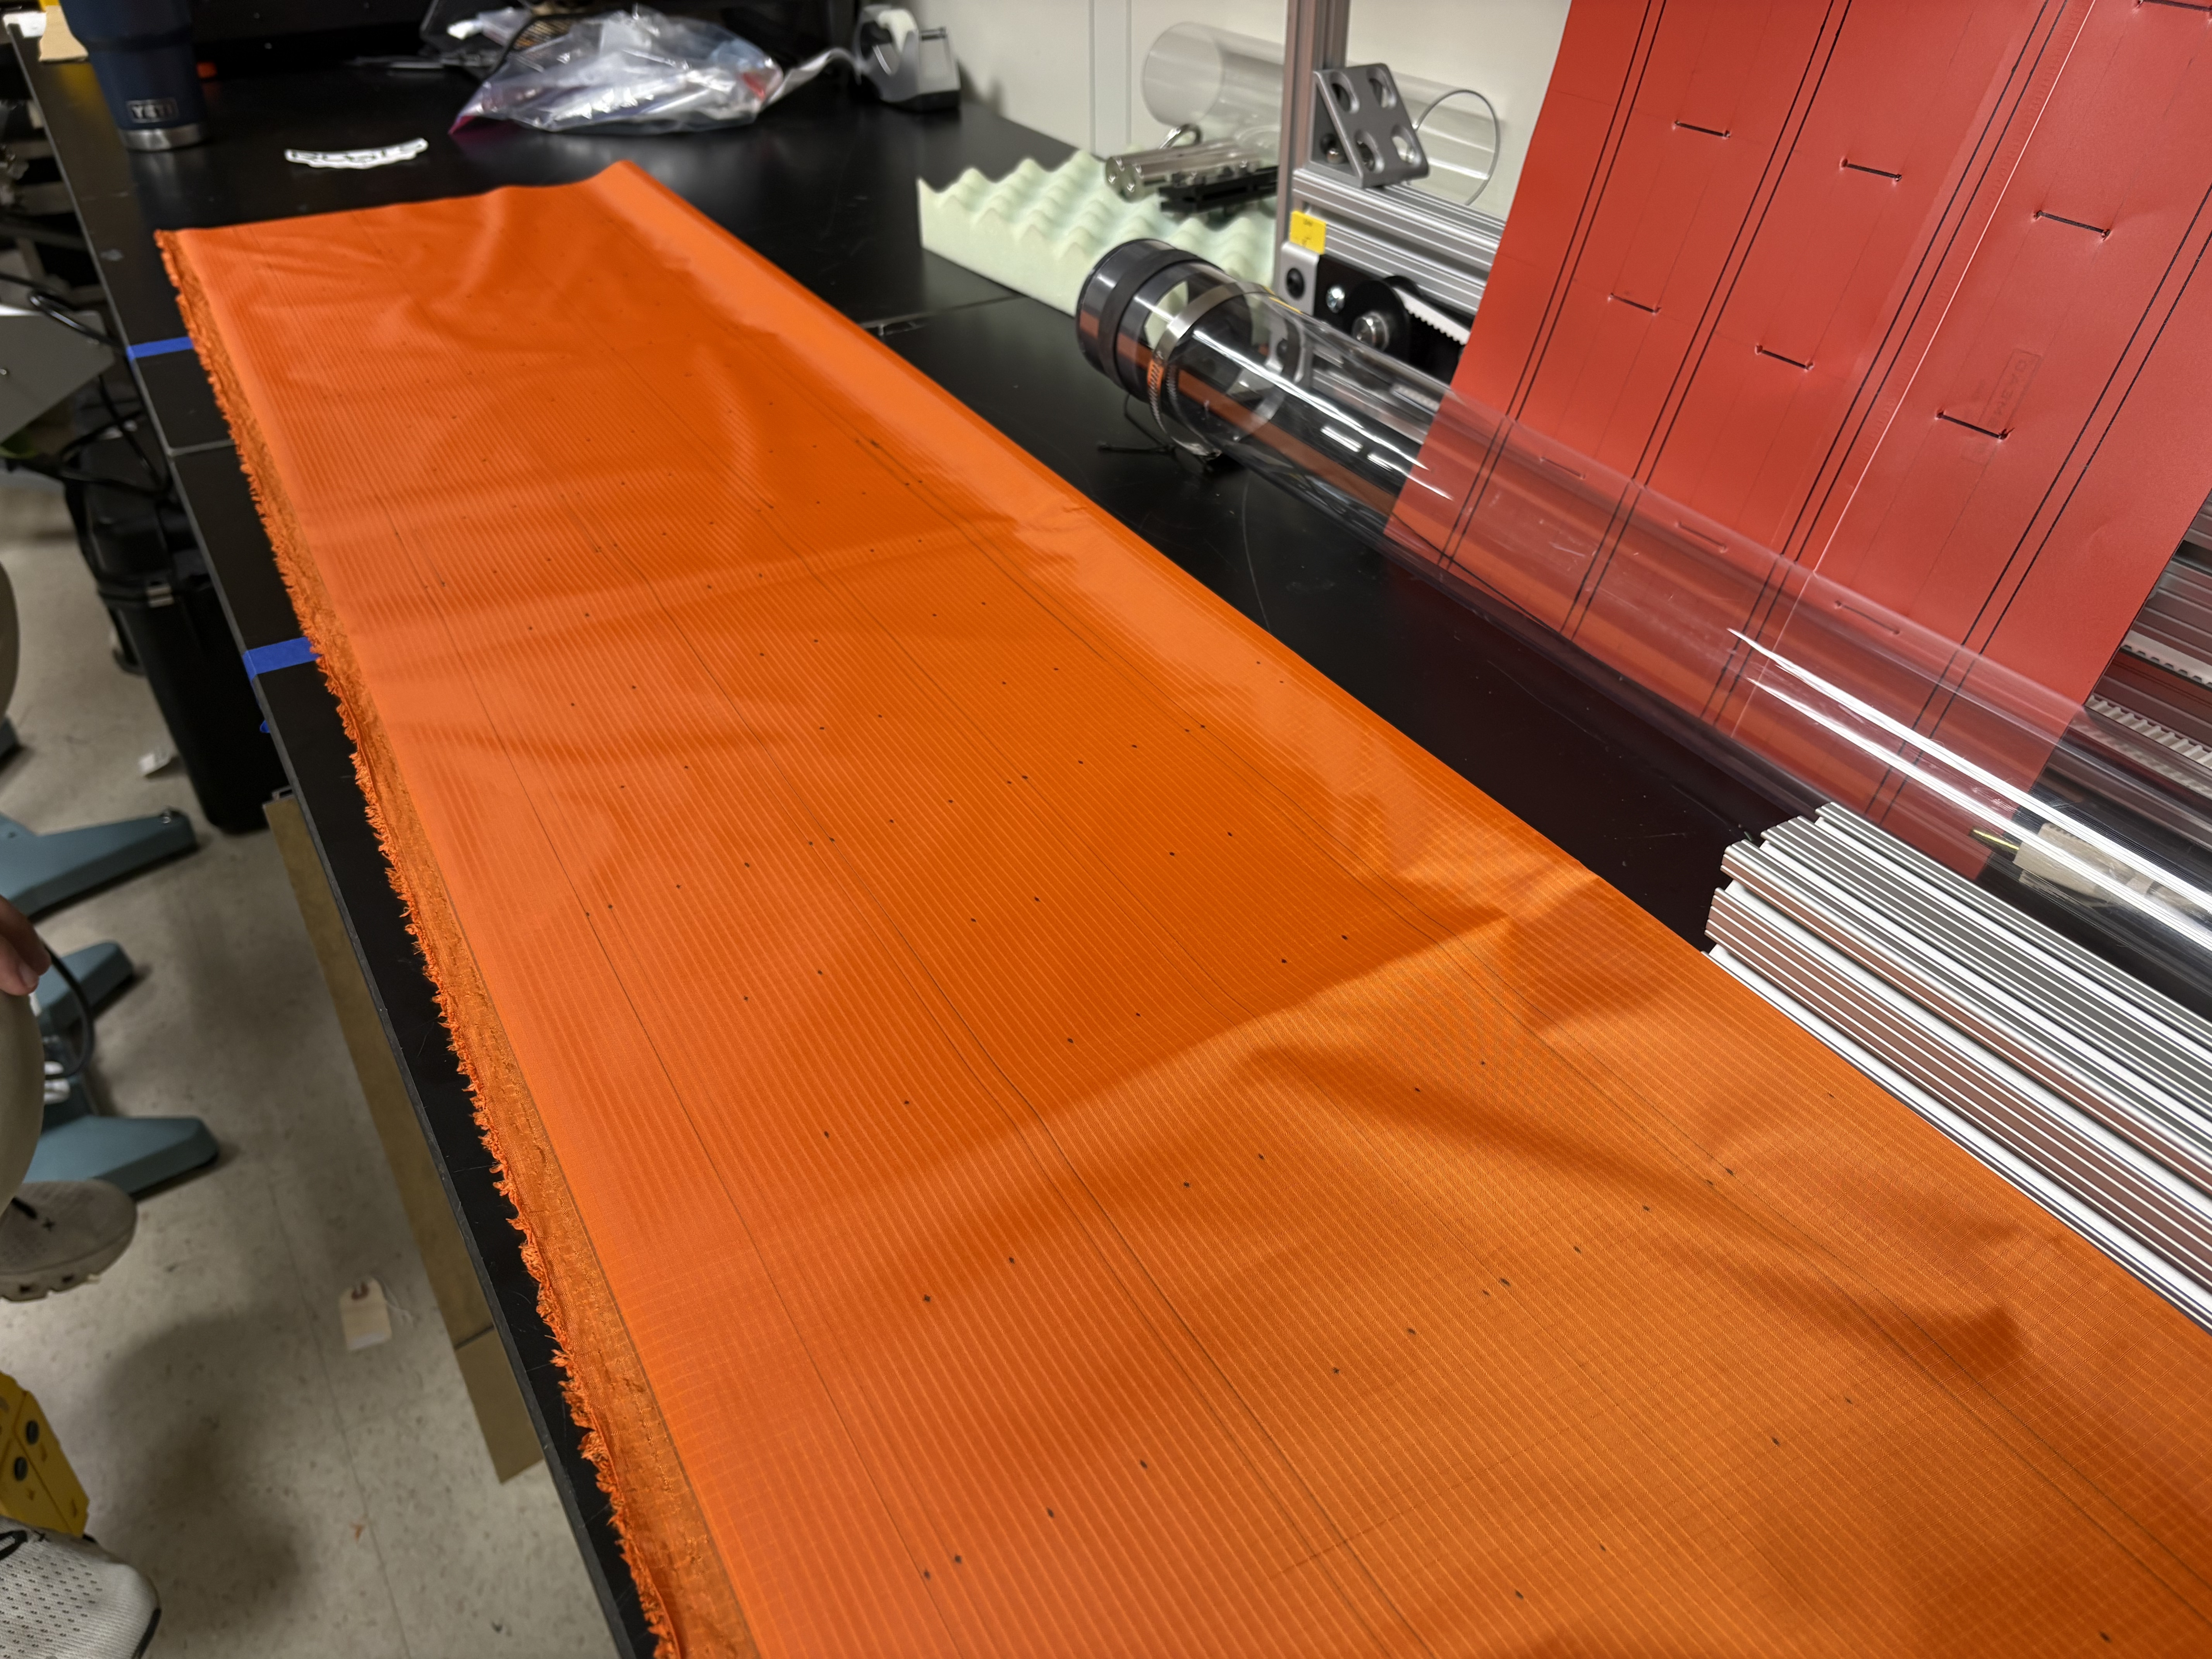
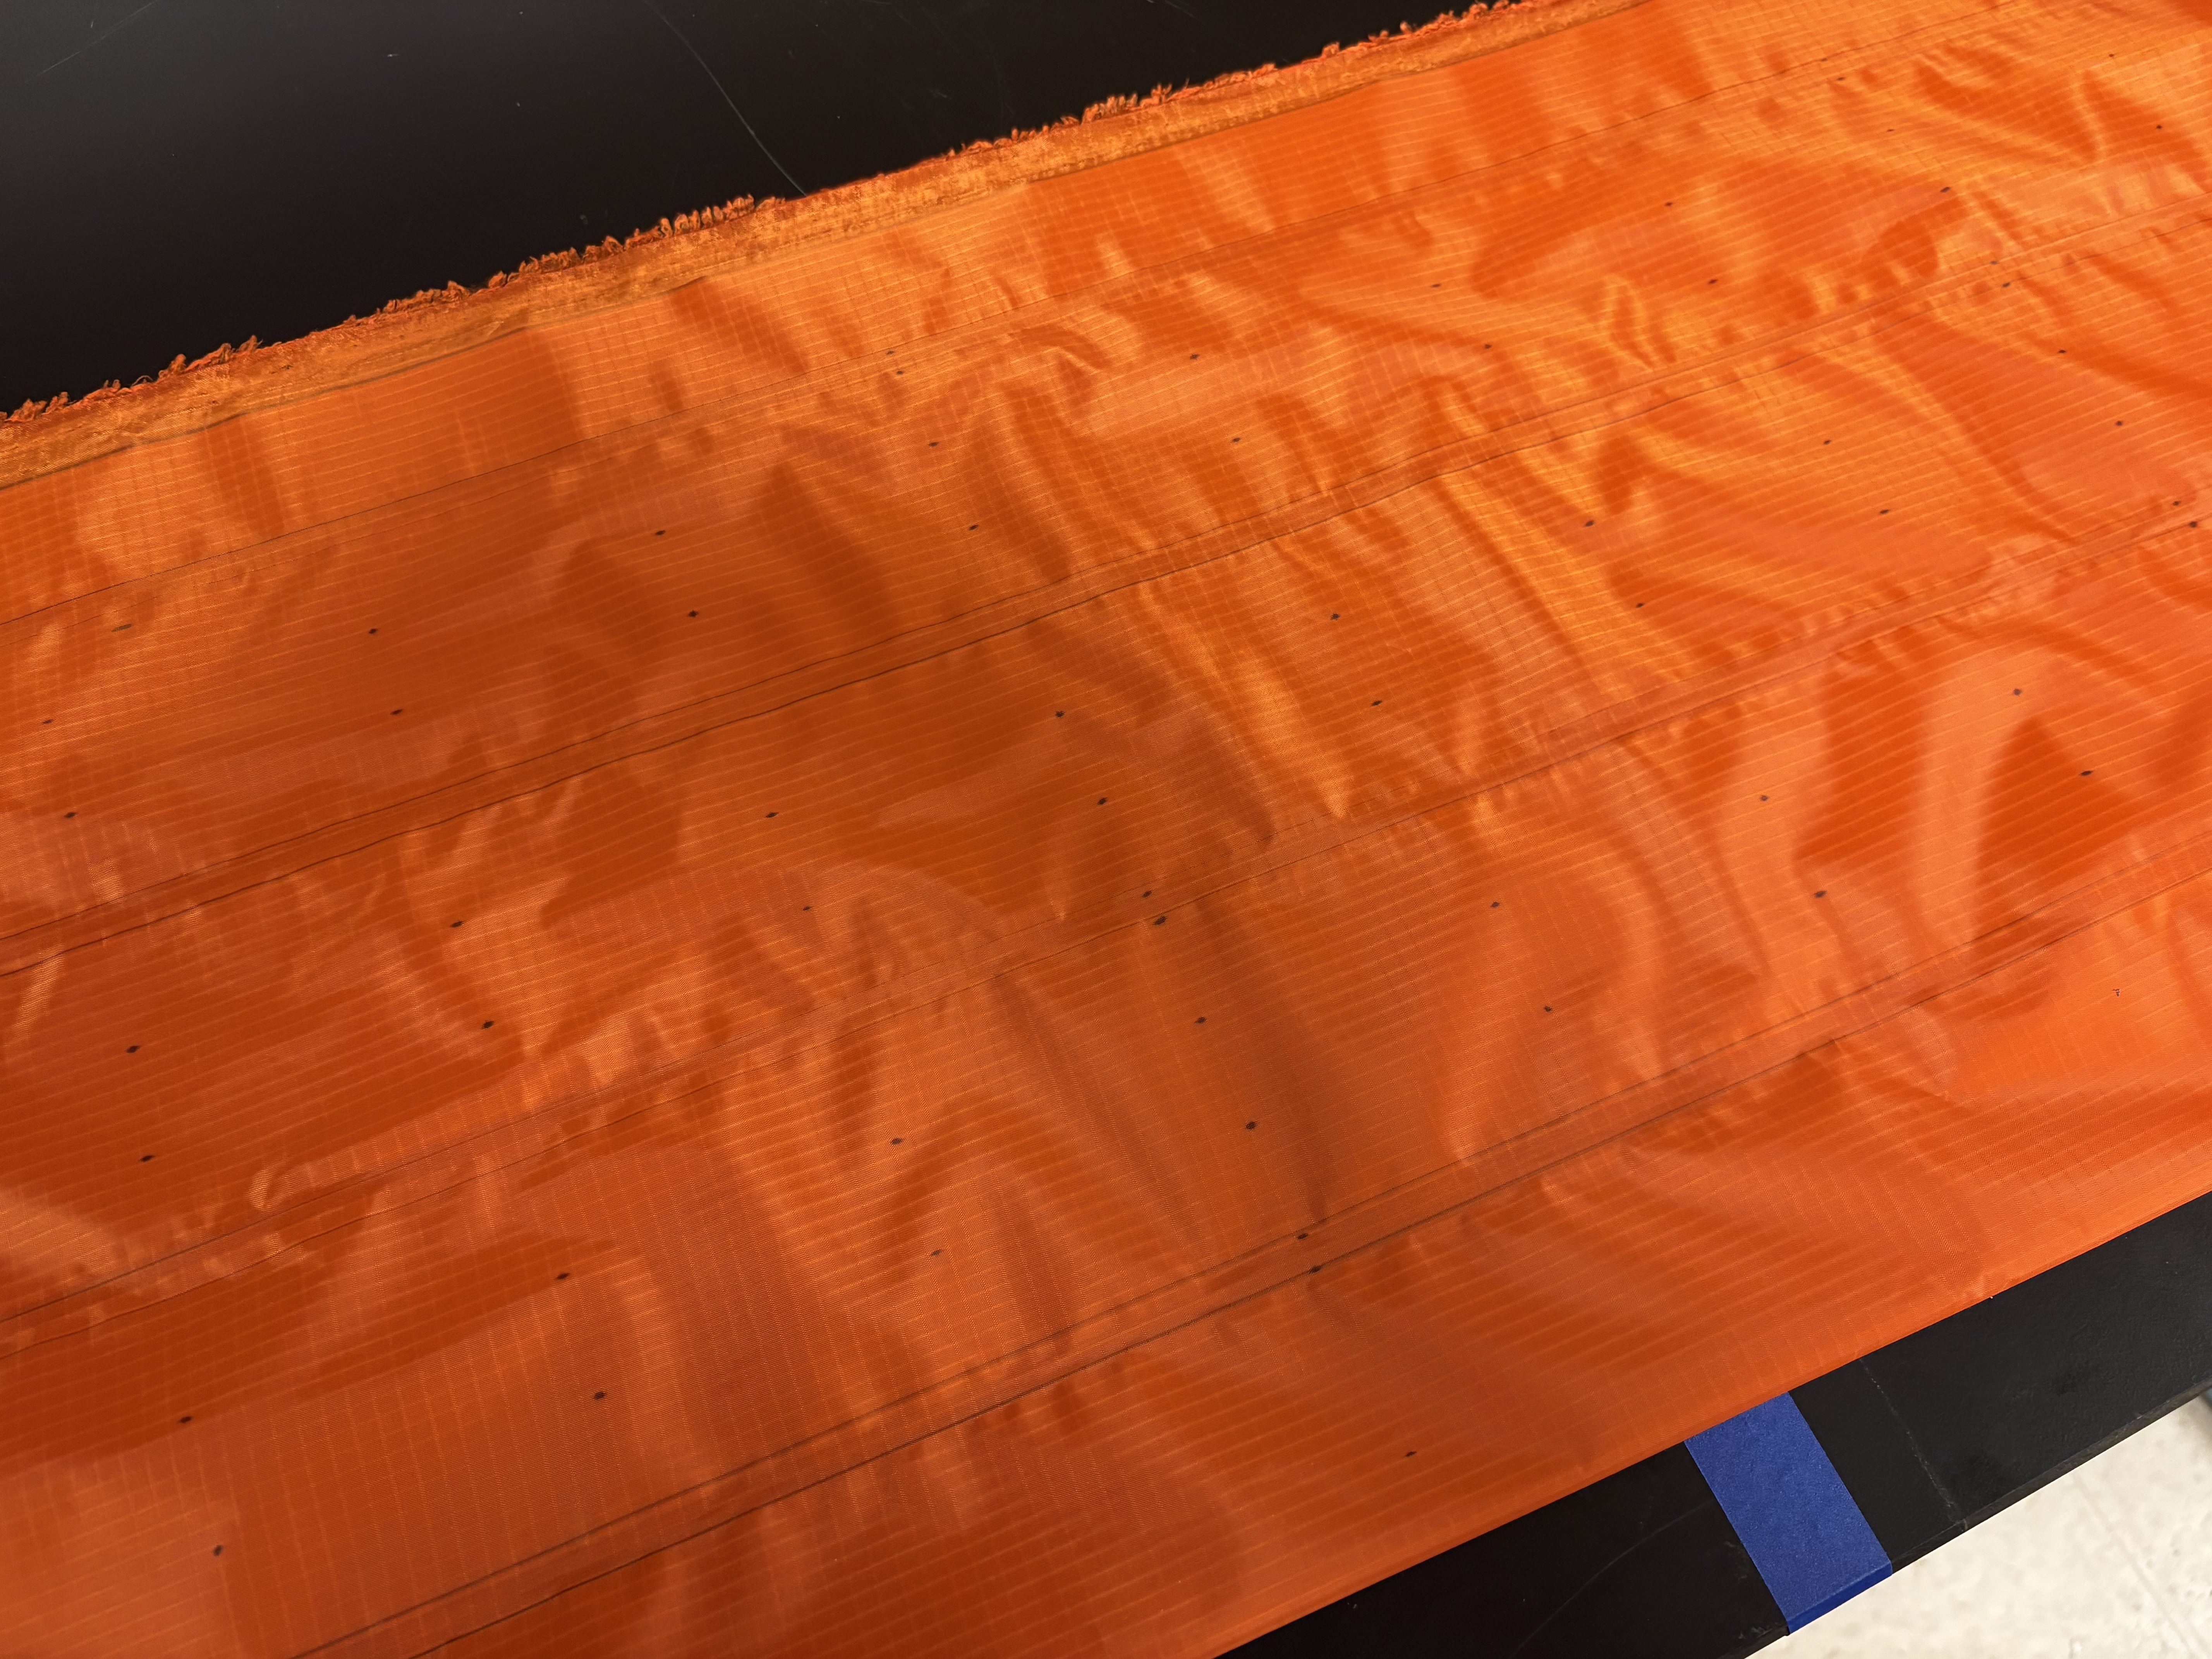
(Optional) Use the yard stick or straight edge to mark the lines shown in the stencil. The end product should look as below.
Step 2: Heat sealing fabric
Lengthwise heat seals
-
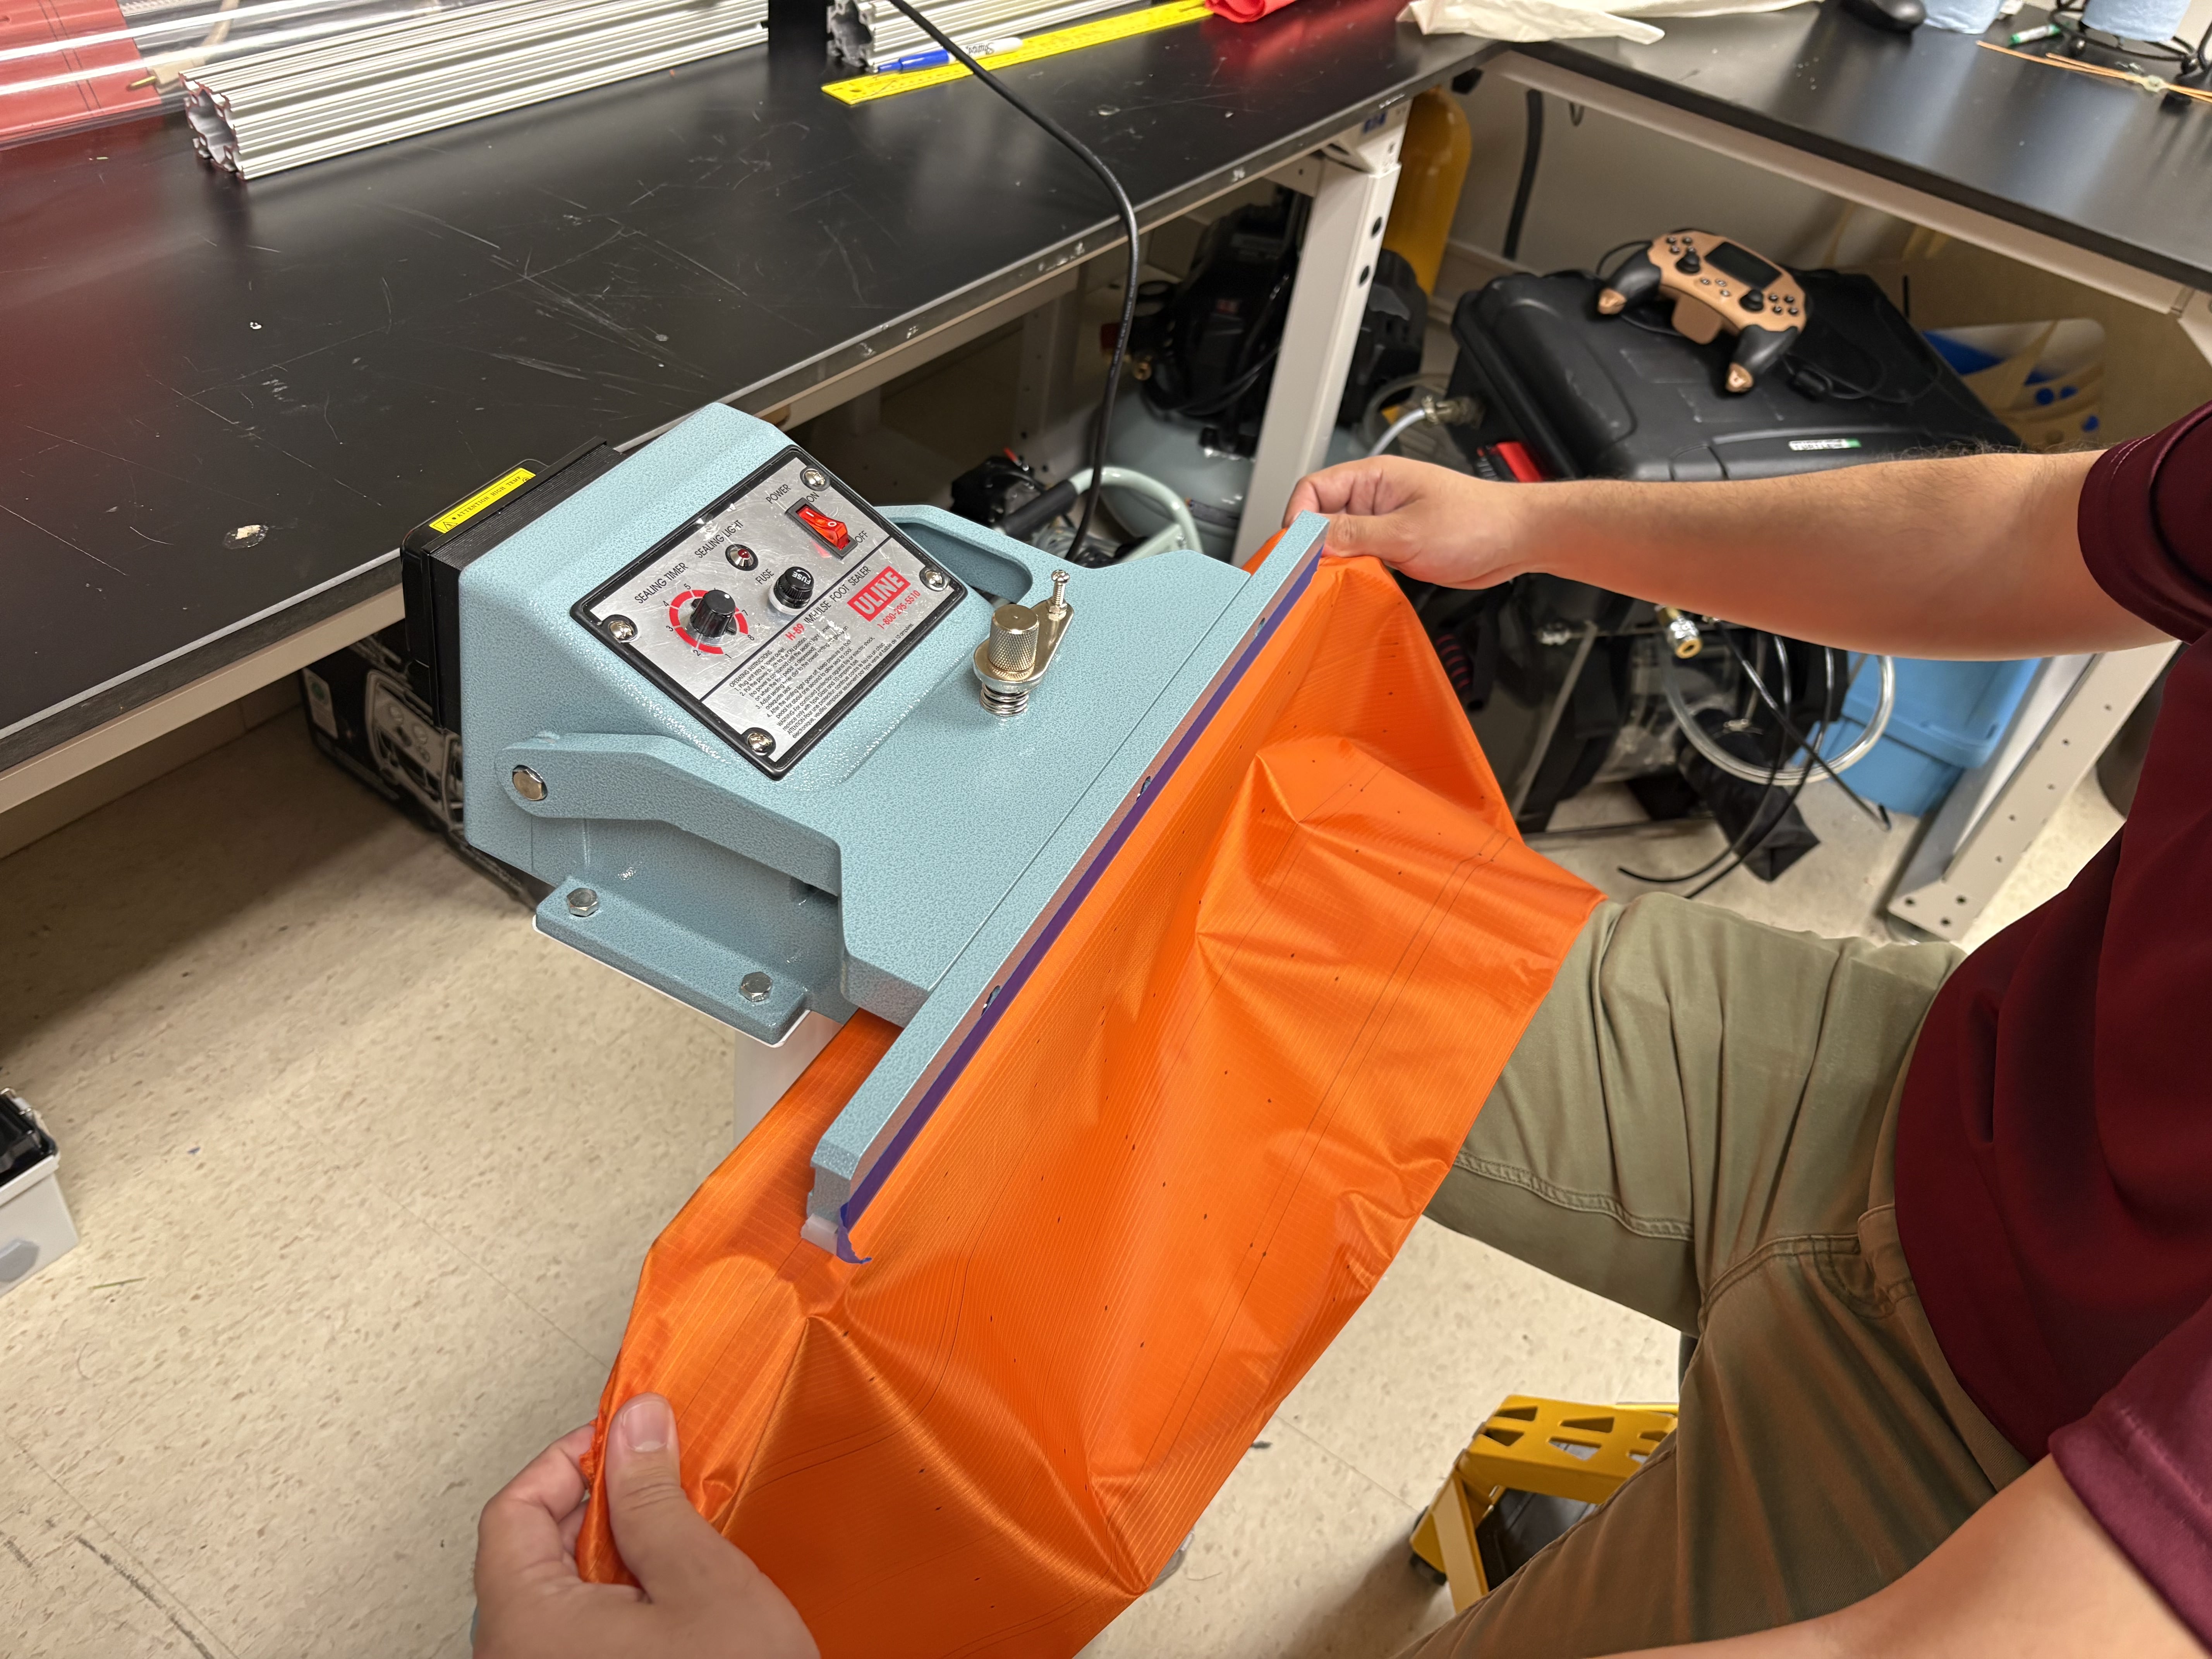
With the fabric folded, grab the edges carefully to keep them aligned. Place the fabric in the impulse sealer, holding it aligned with the lengthwise mark closest to the edge, and press the sealer.
-
Repeat the process for the remaining lengthwise marks (4 total).
-
One edge of the fabric (width-wise) should be closed due to the fold. Open this end with scissors so it has two flaps like the other end.
Pouch motor line heat seals
-
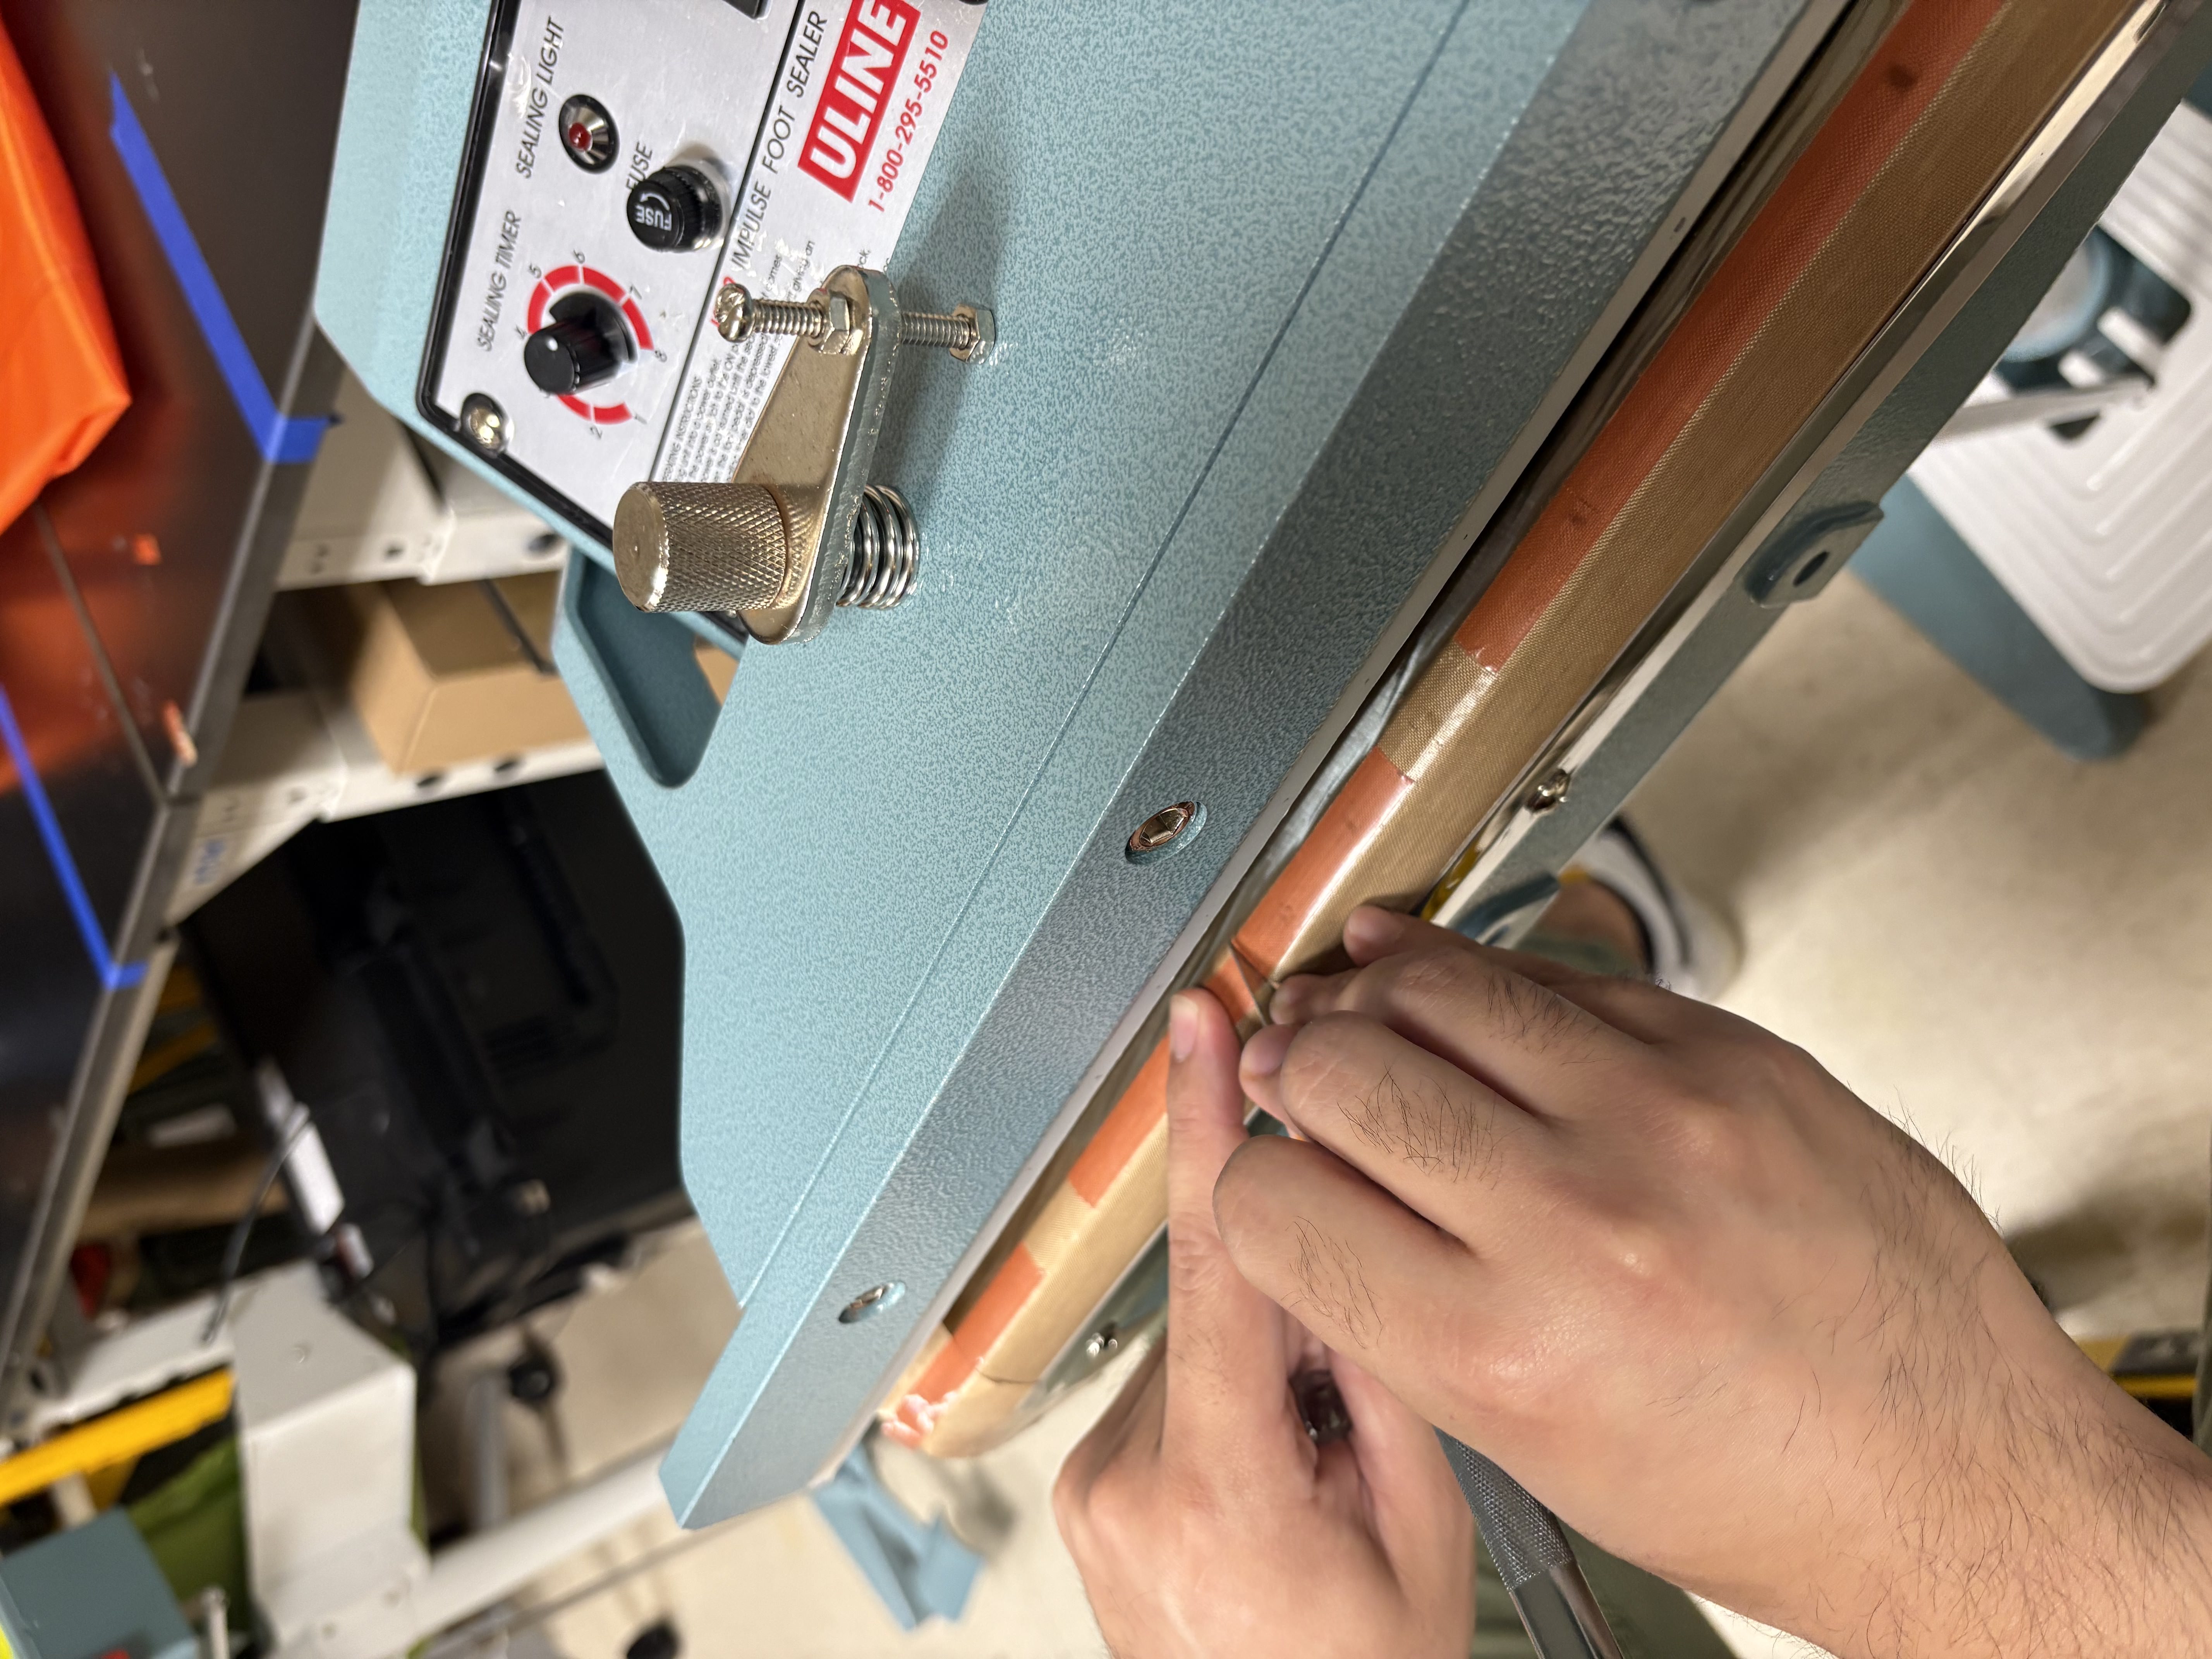
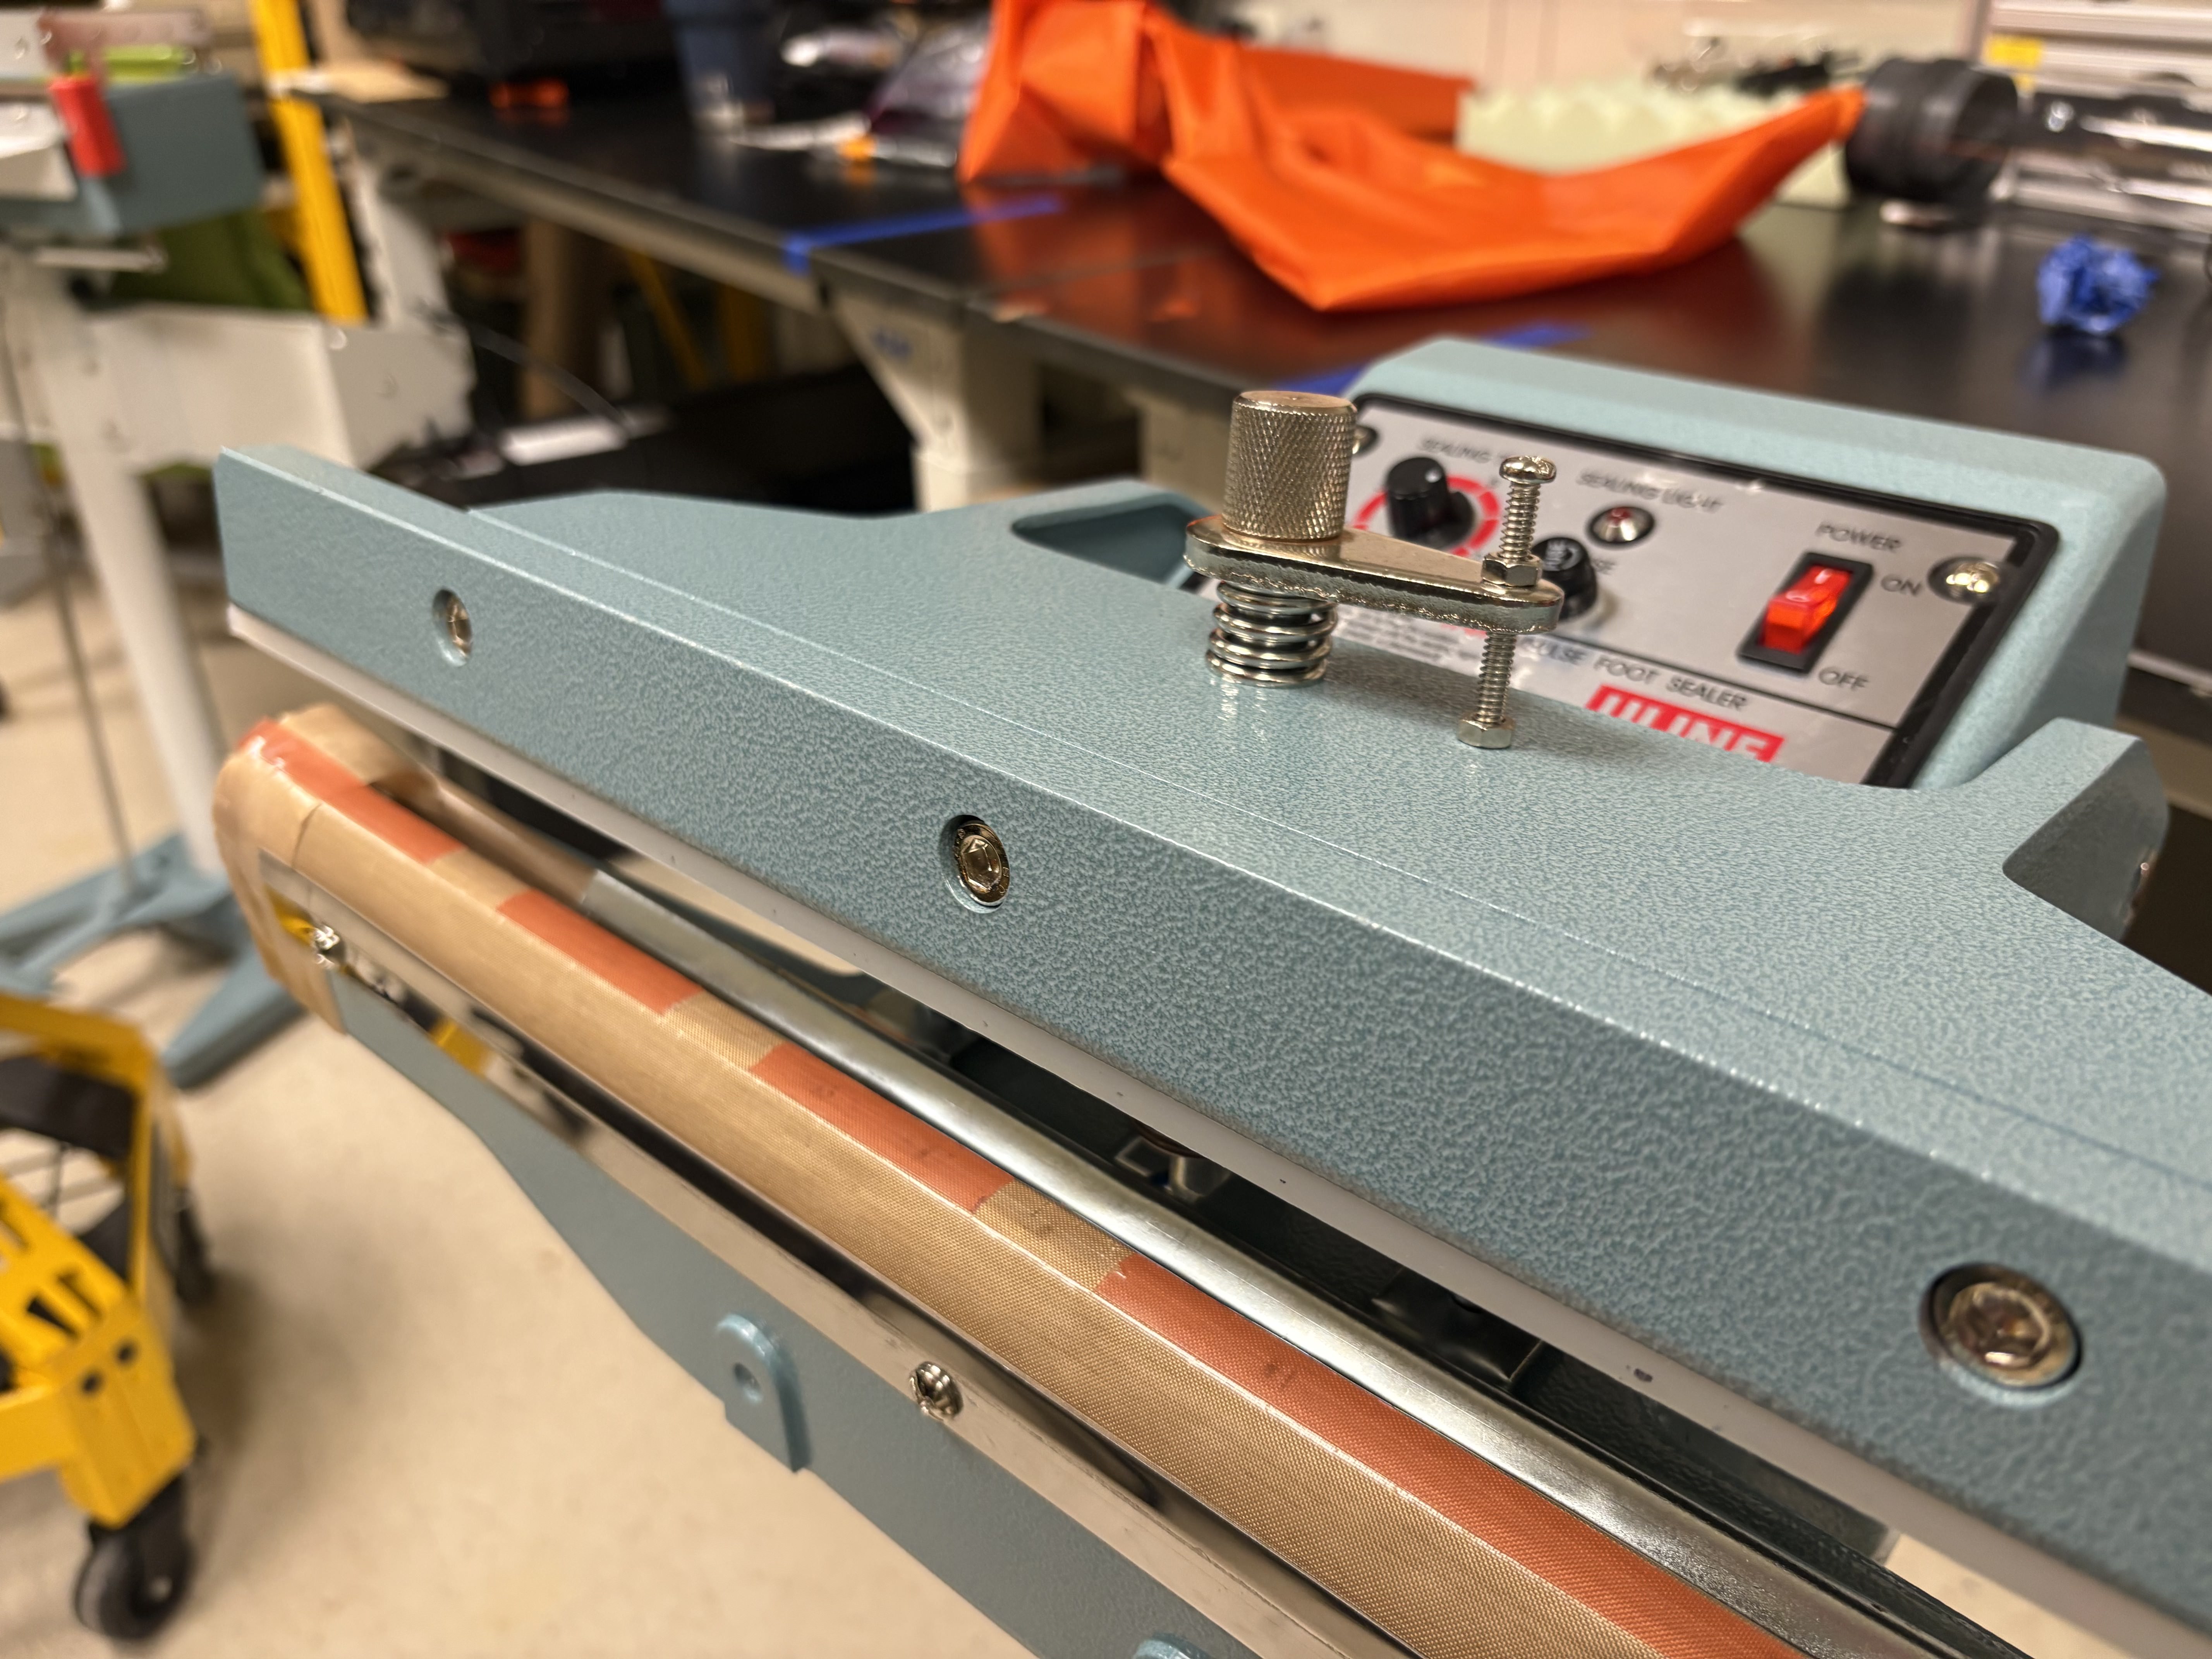
Stick a piece of heat-resistant red tape along the length of the impulse sealer. Use the stencil to mark the width of the pouch motor lines.
-
Use the X-Acto knife to cut the tape at the marked locations, so the spots where a heat seal is desired are tape-free.
-
Grab the fabric width-wise and hold it tight at both edges. Line up the fabric so the pouch motor line markings align with the tape on the sealer, and press the sealer.
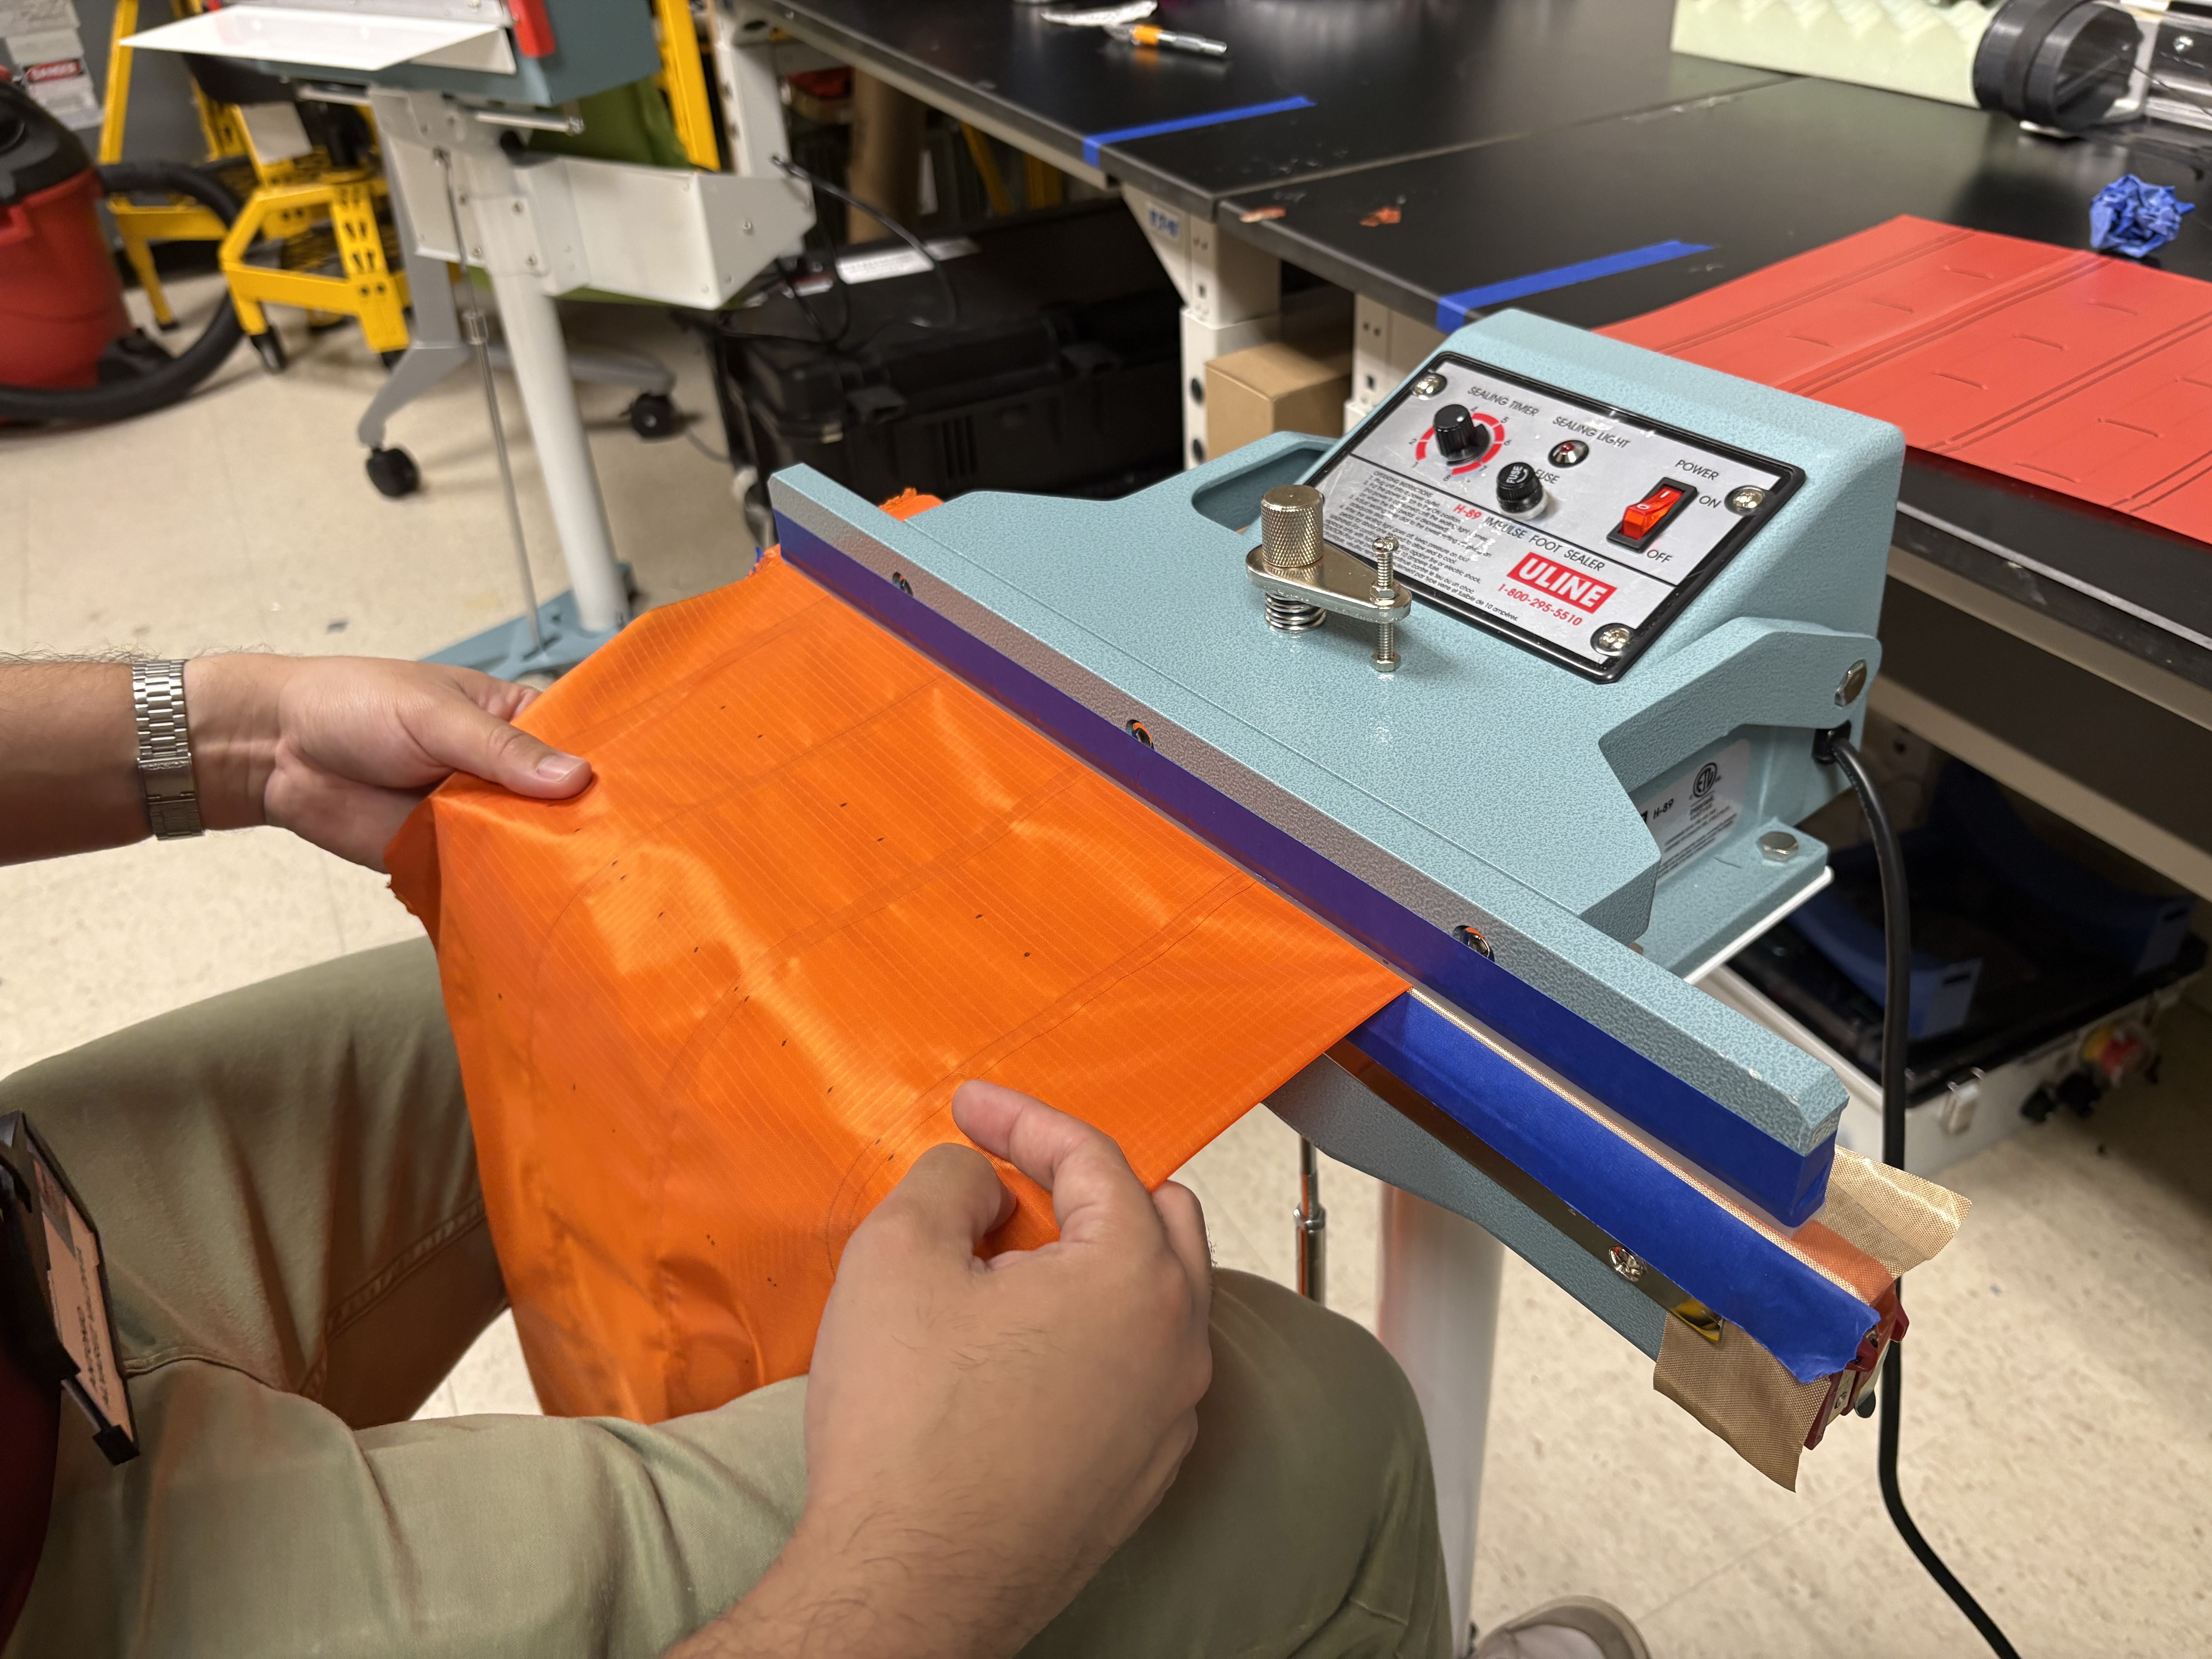
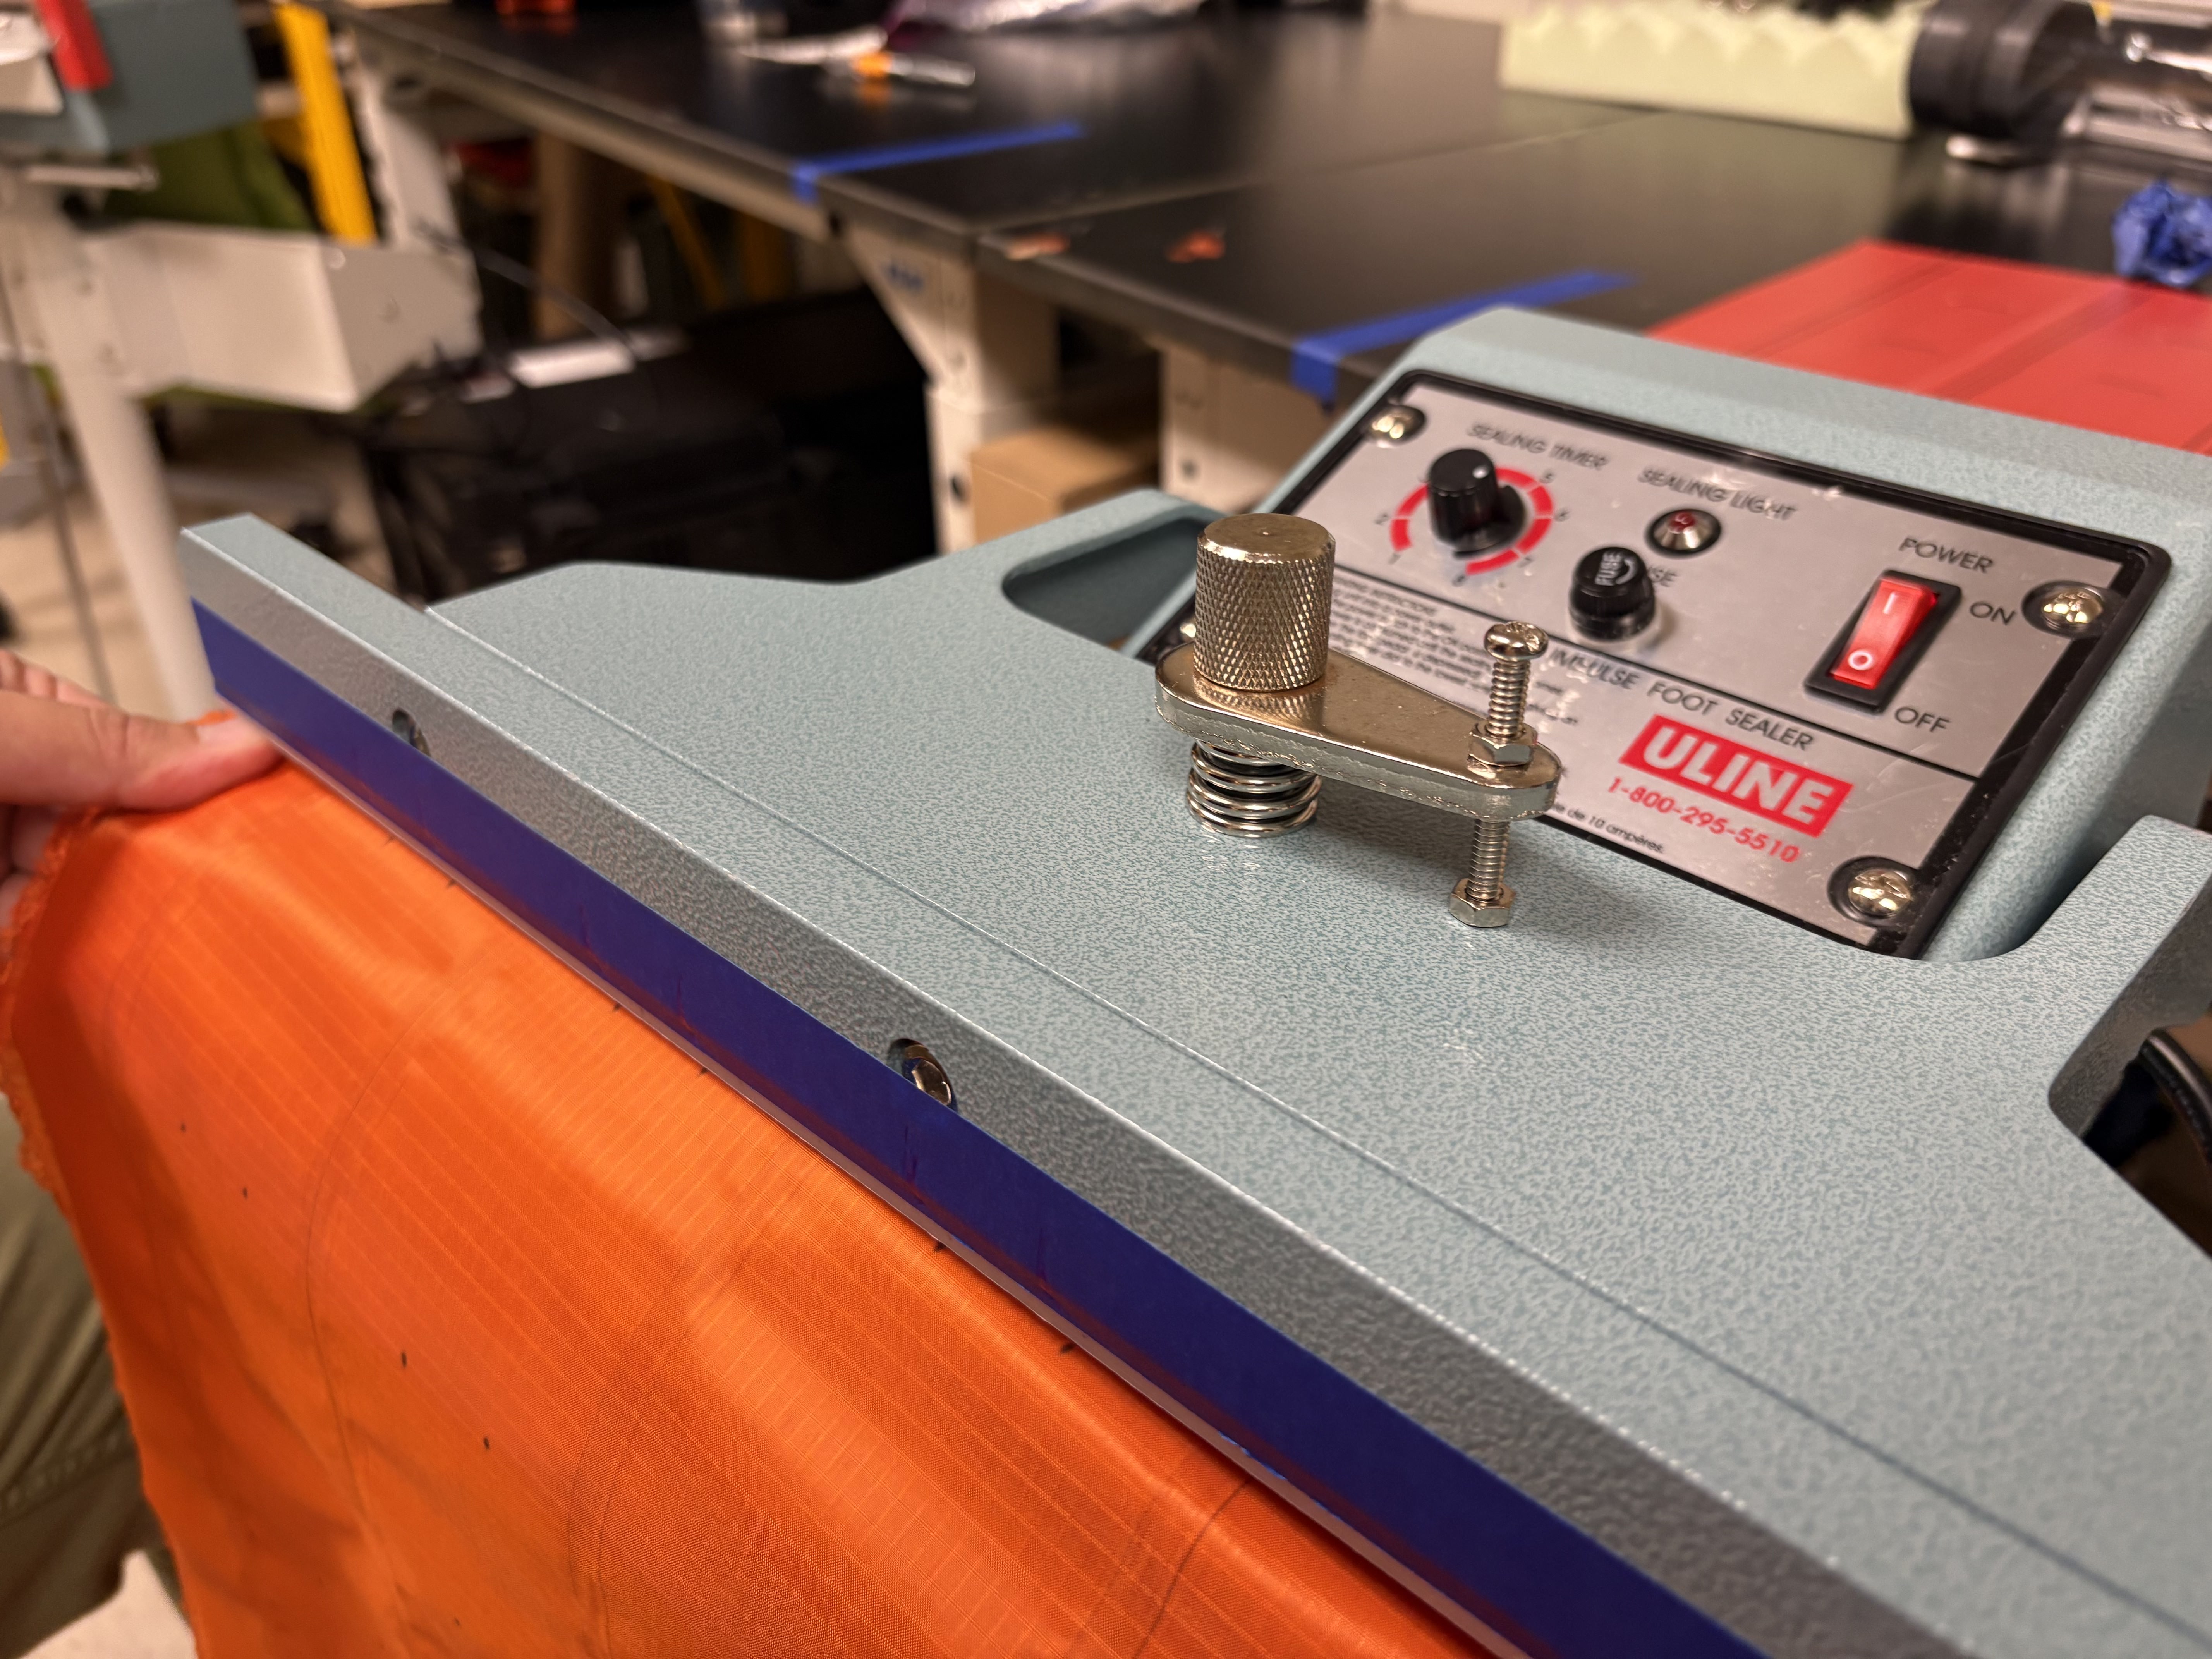
Placing a piece of painter’s tape on the top edge of the sealer clamp and marking it with the stencil can help with alignment during pouch motor sealing.
-
Continue sealing the pouch motor lines along the whole length of the robot.
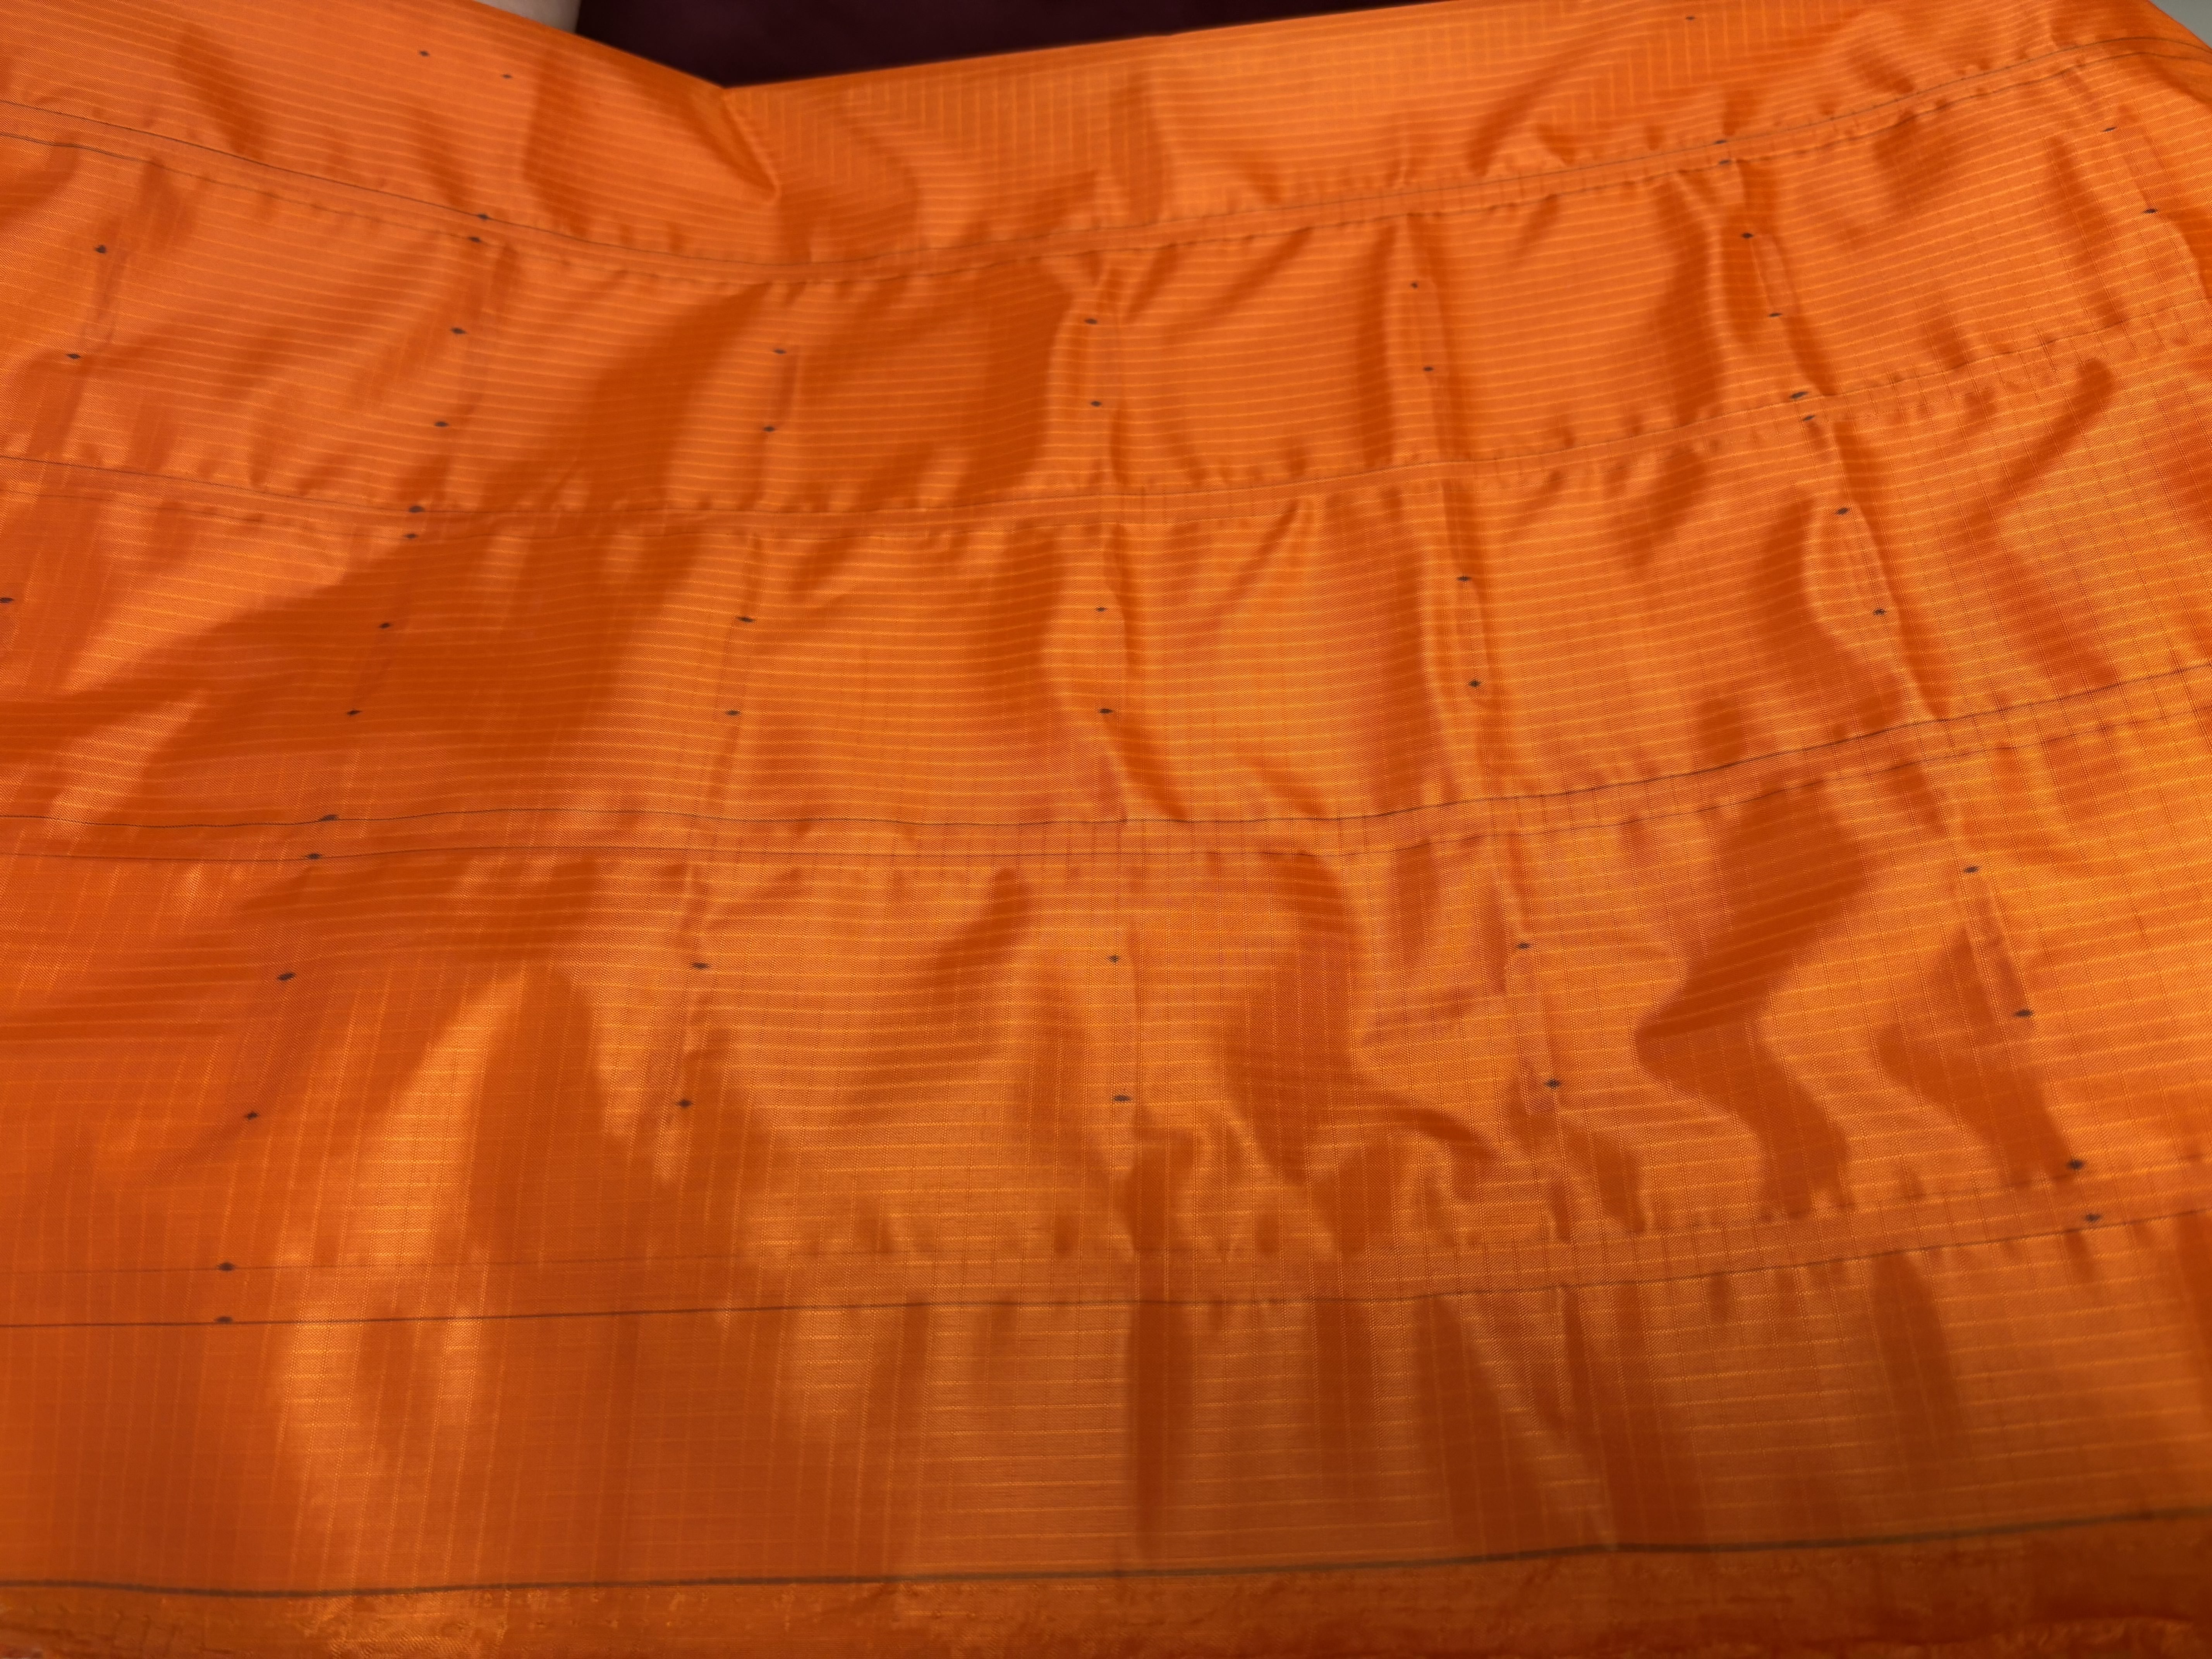
Leave one end of the robot with approximately 6in of fabric without pouch motor seals. This end will have the push-to-connect adapters used to actuate each pouch motor line.
-
Once done, remove the tape markings from the sealer.
-
Inspect the pouch motor seals for weak seams or unintended bonding in regions protected by heat-resistant tape. Some residual bonding may occur where heat spreads beyond the intended seal area; these bonds are typically weak and can be separated by gently pinching and pulling the fabric apart.
Join the longitudinal seam
-
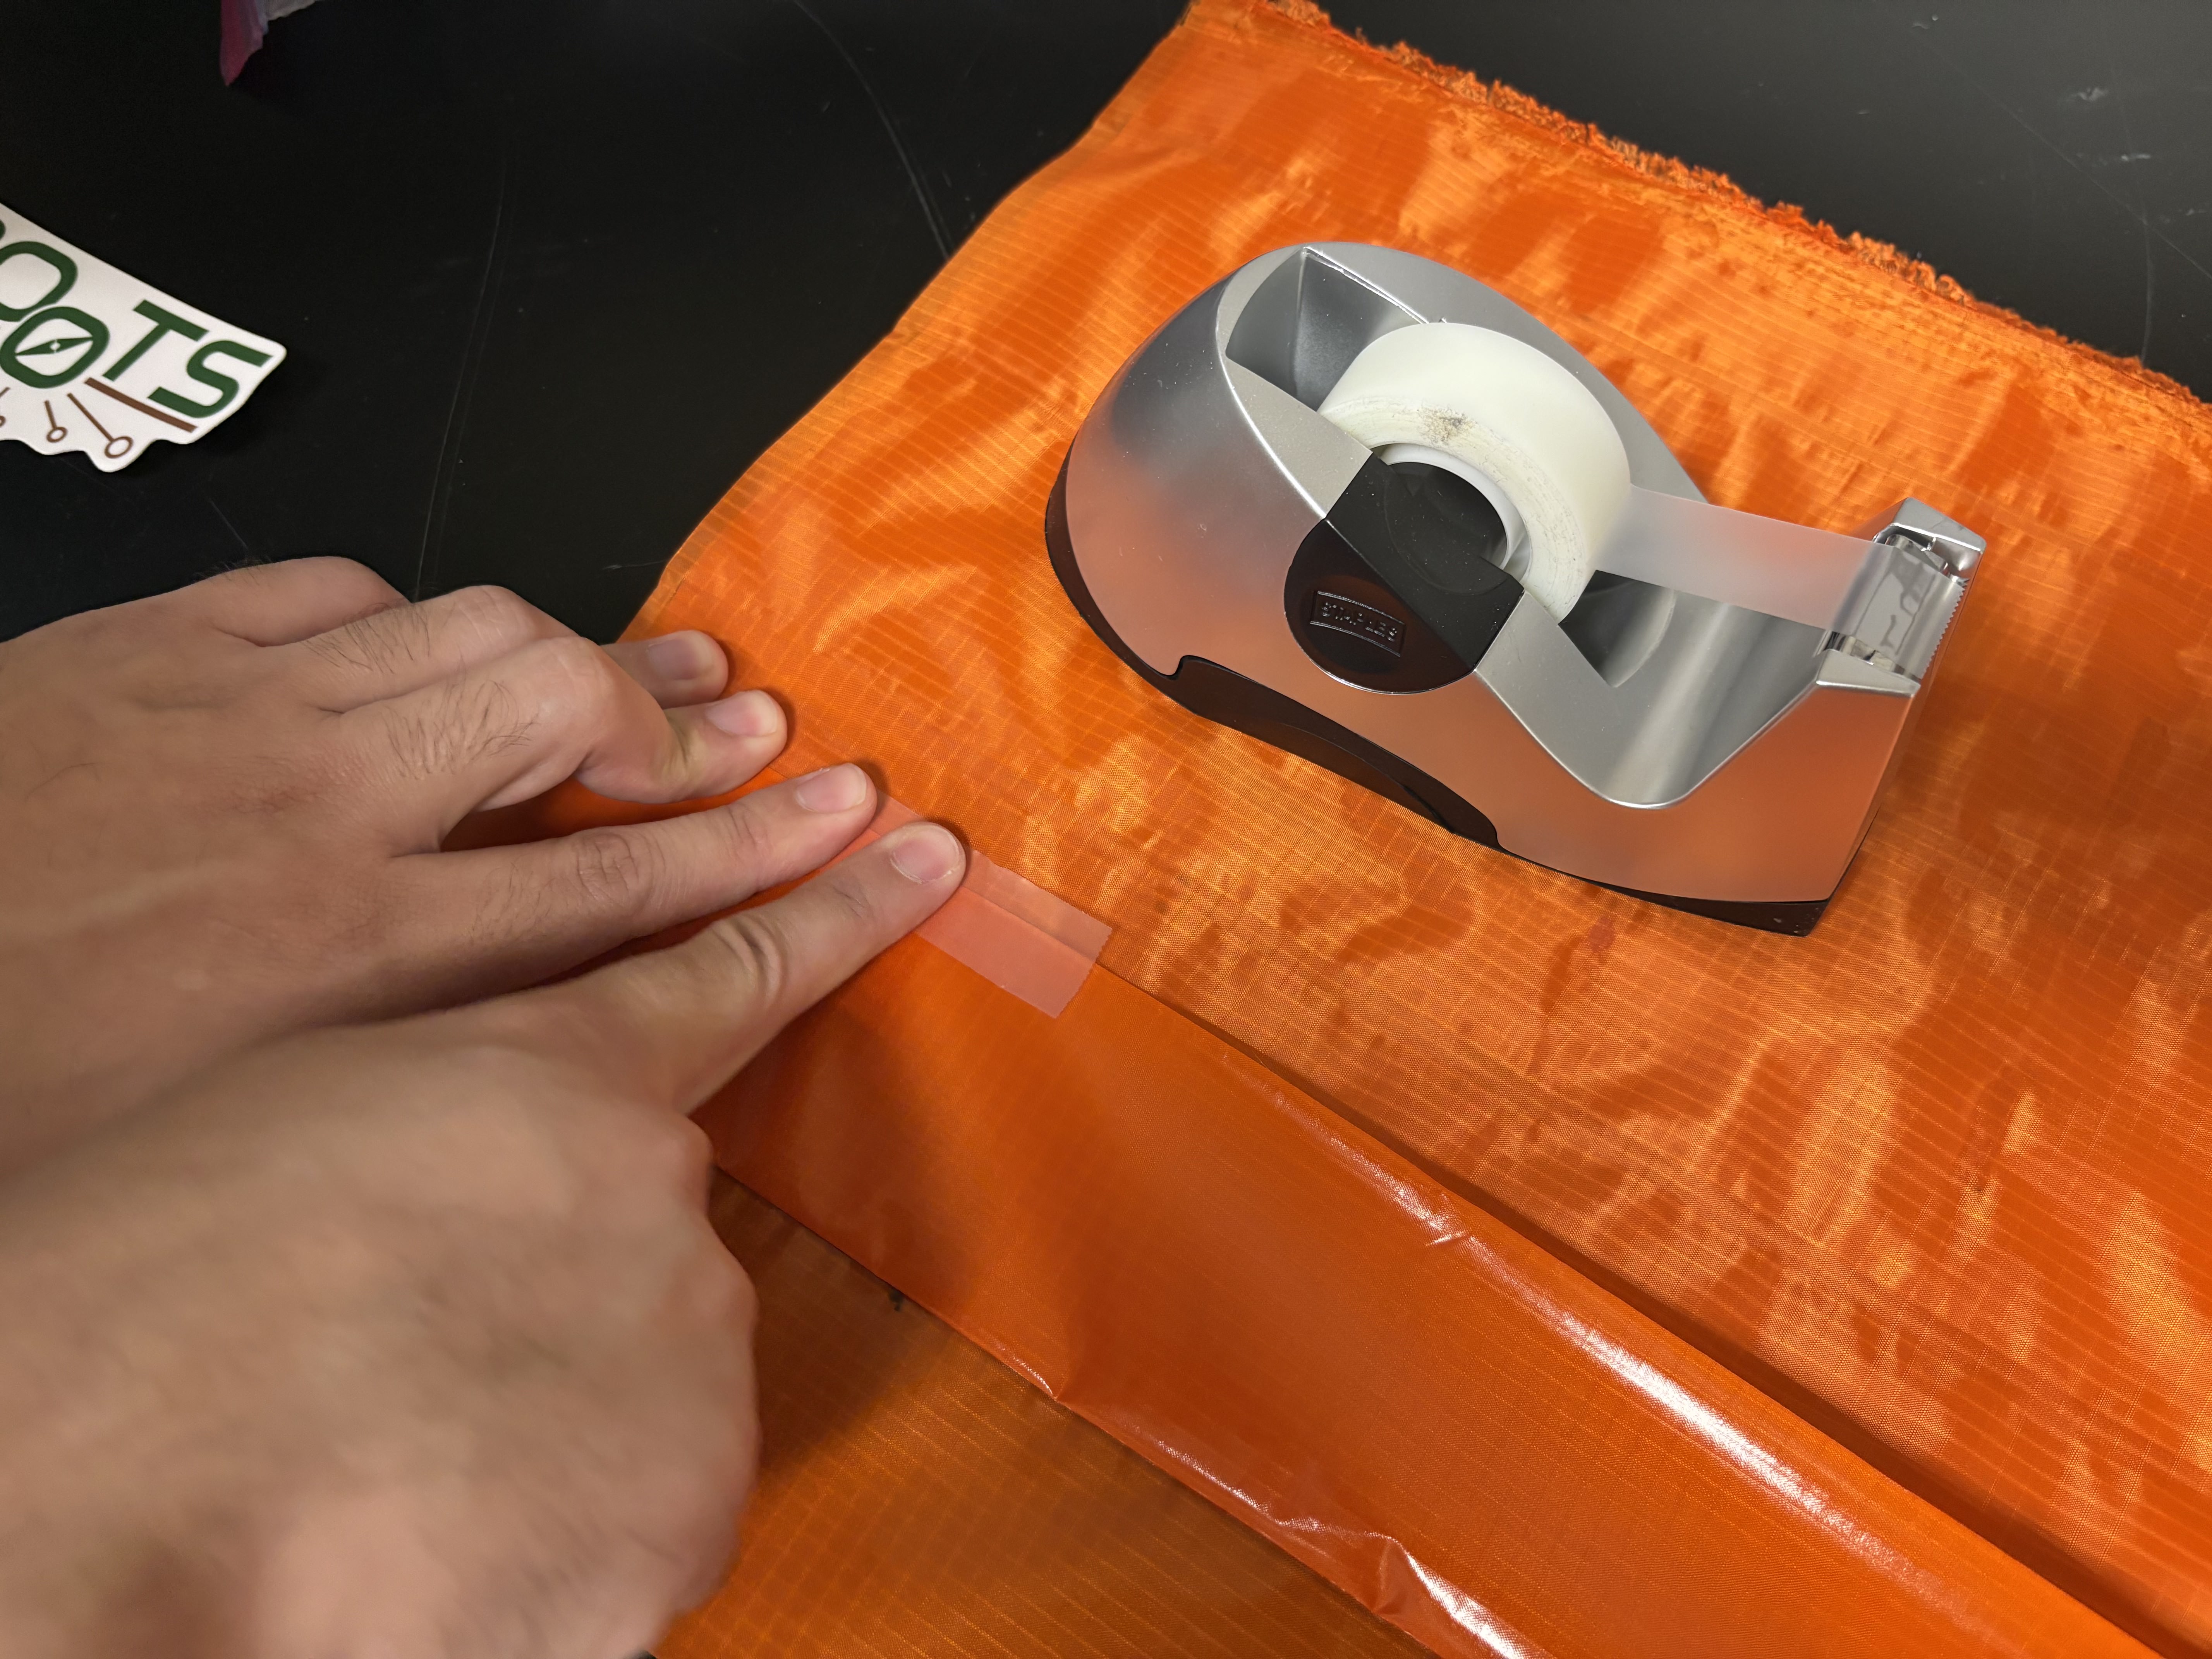
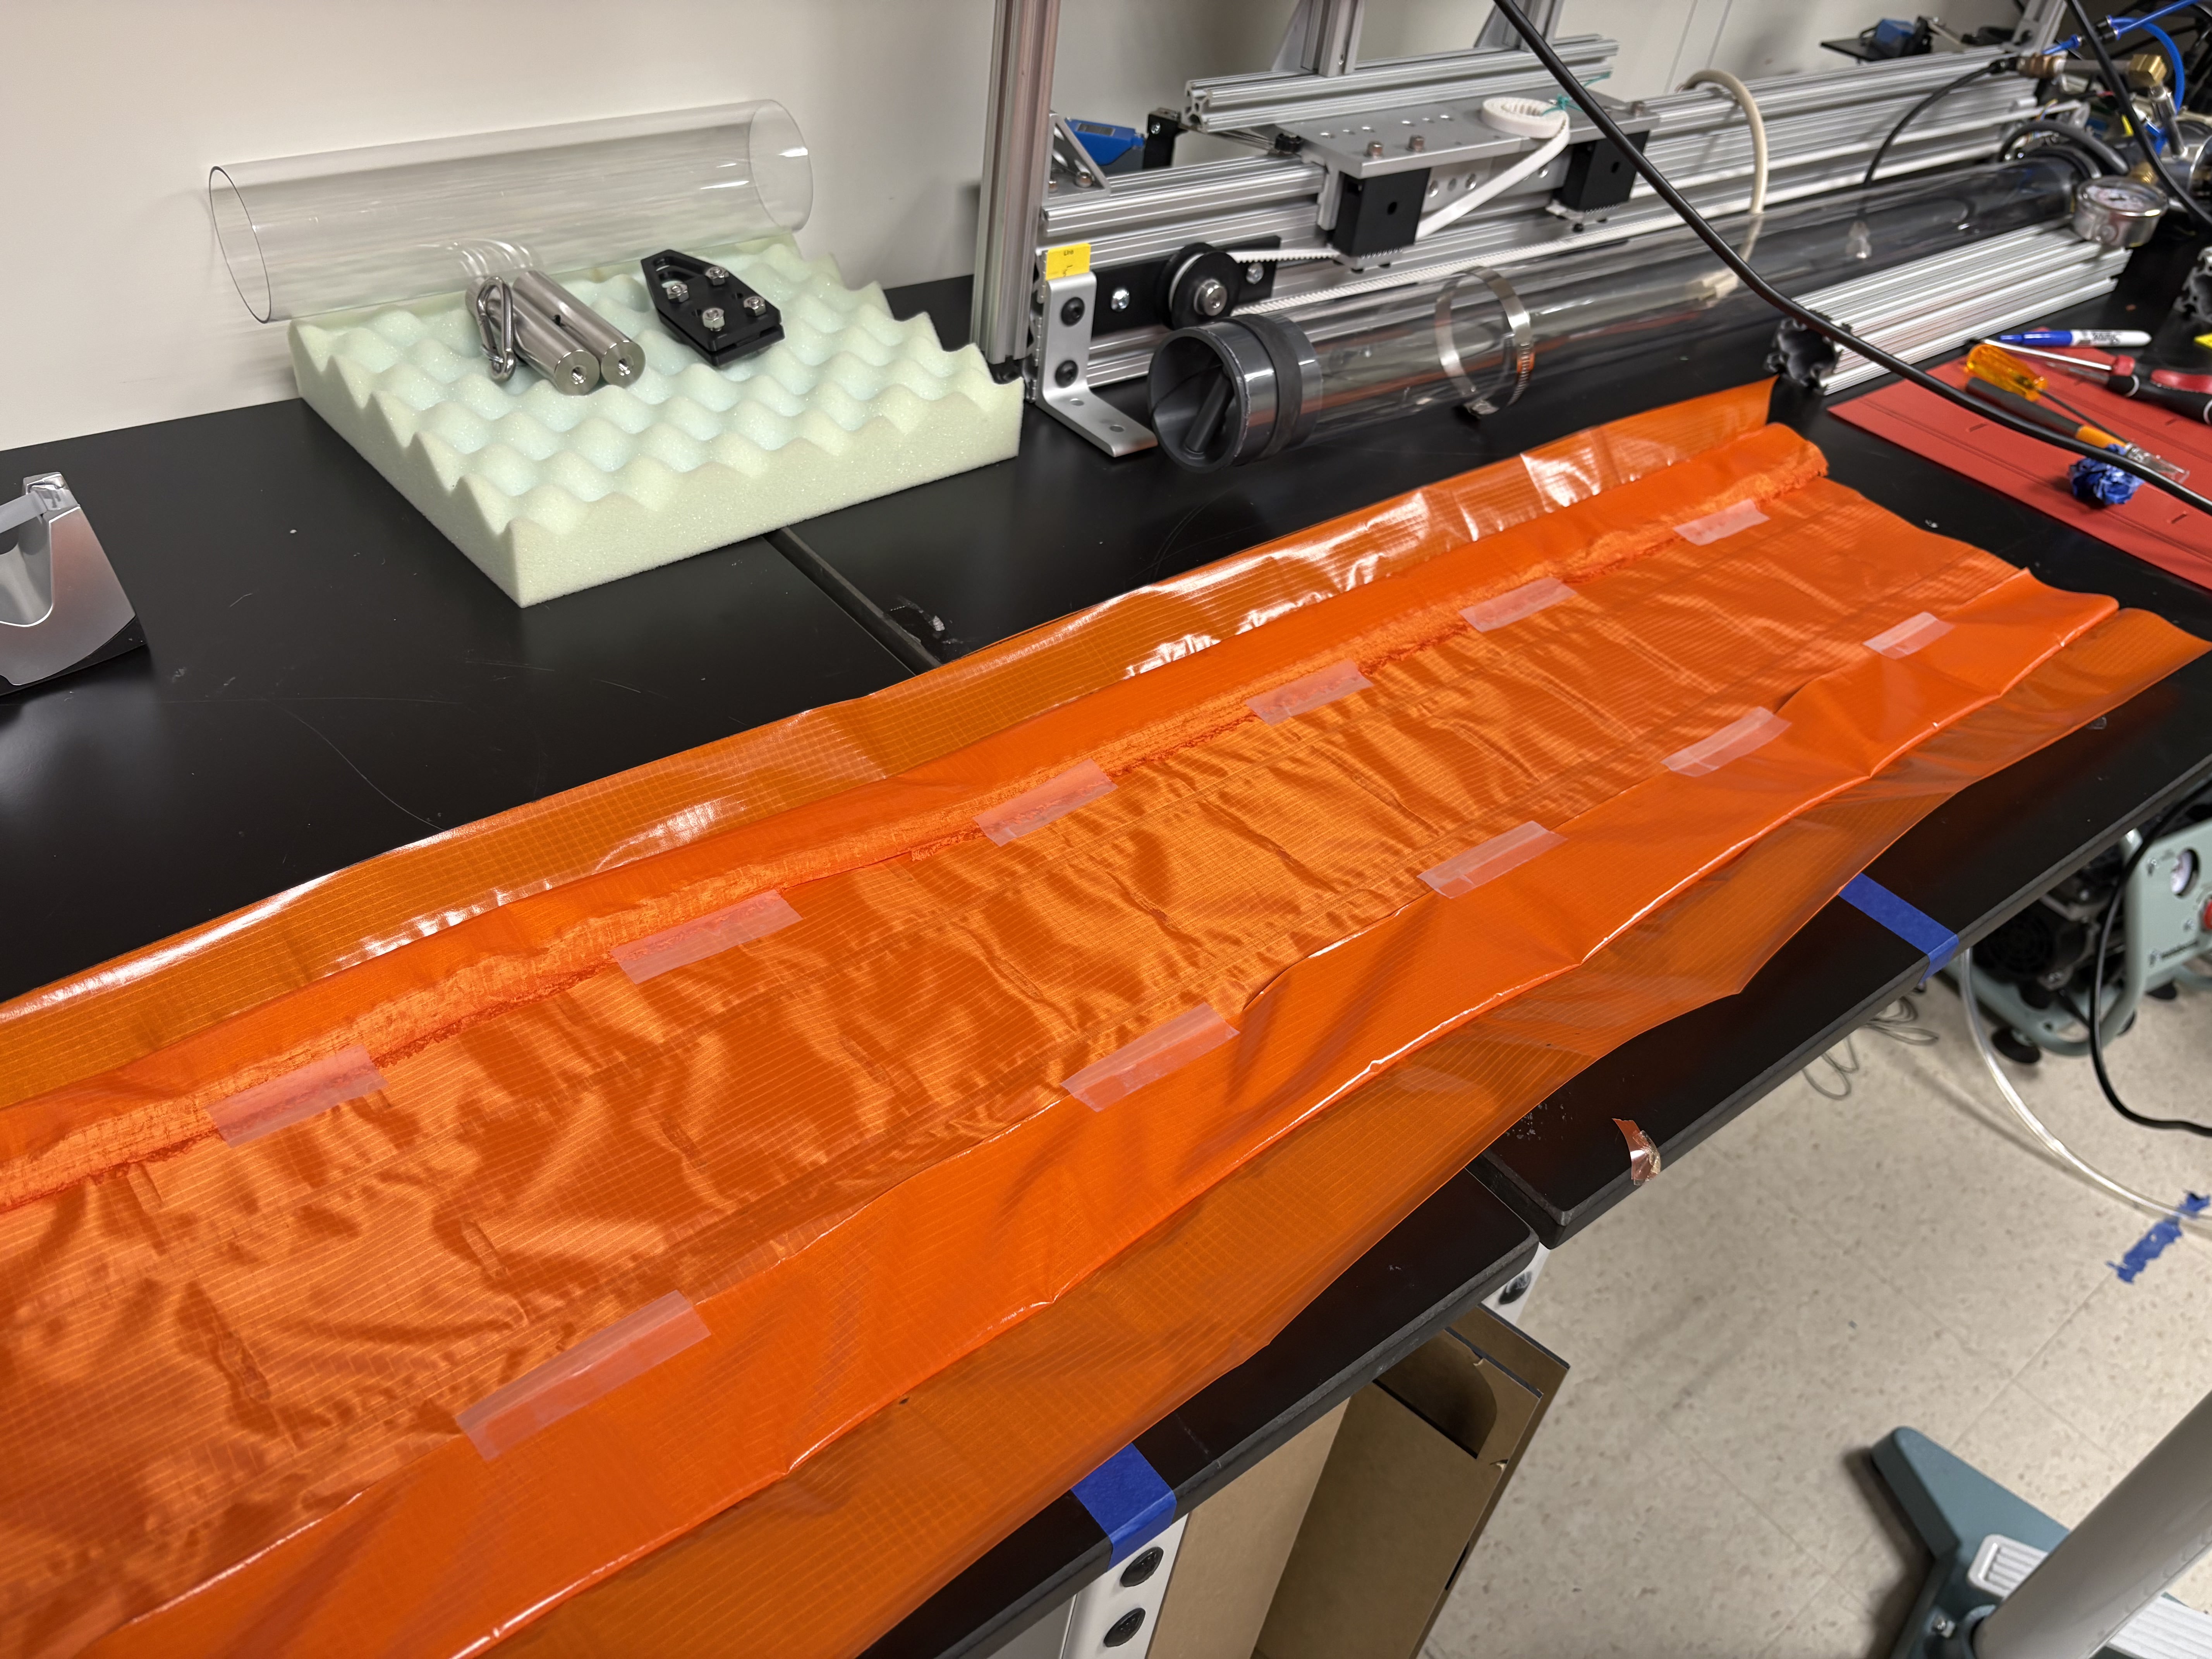
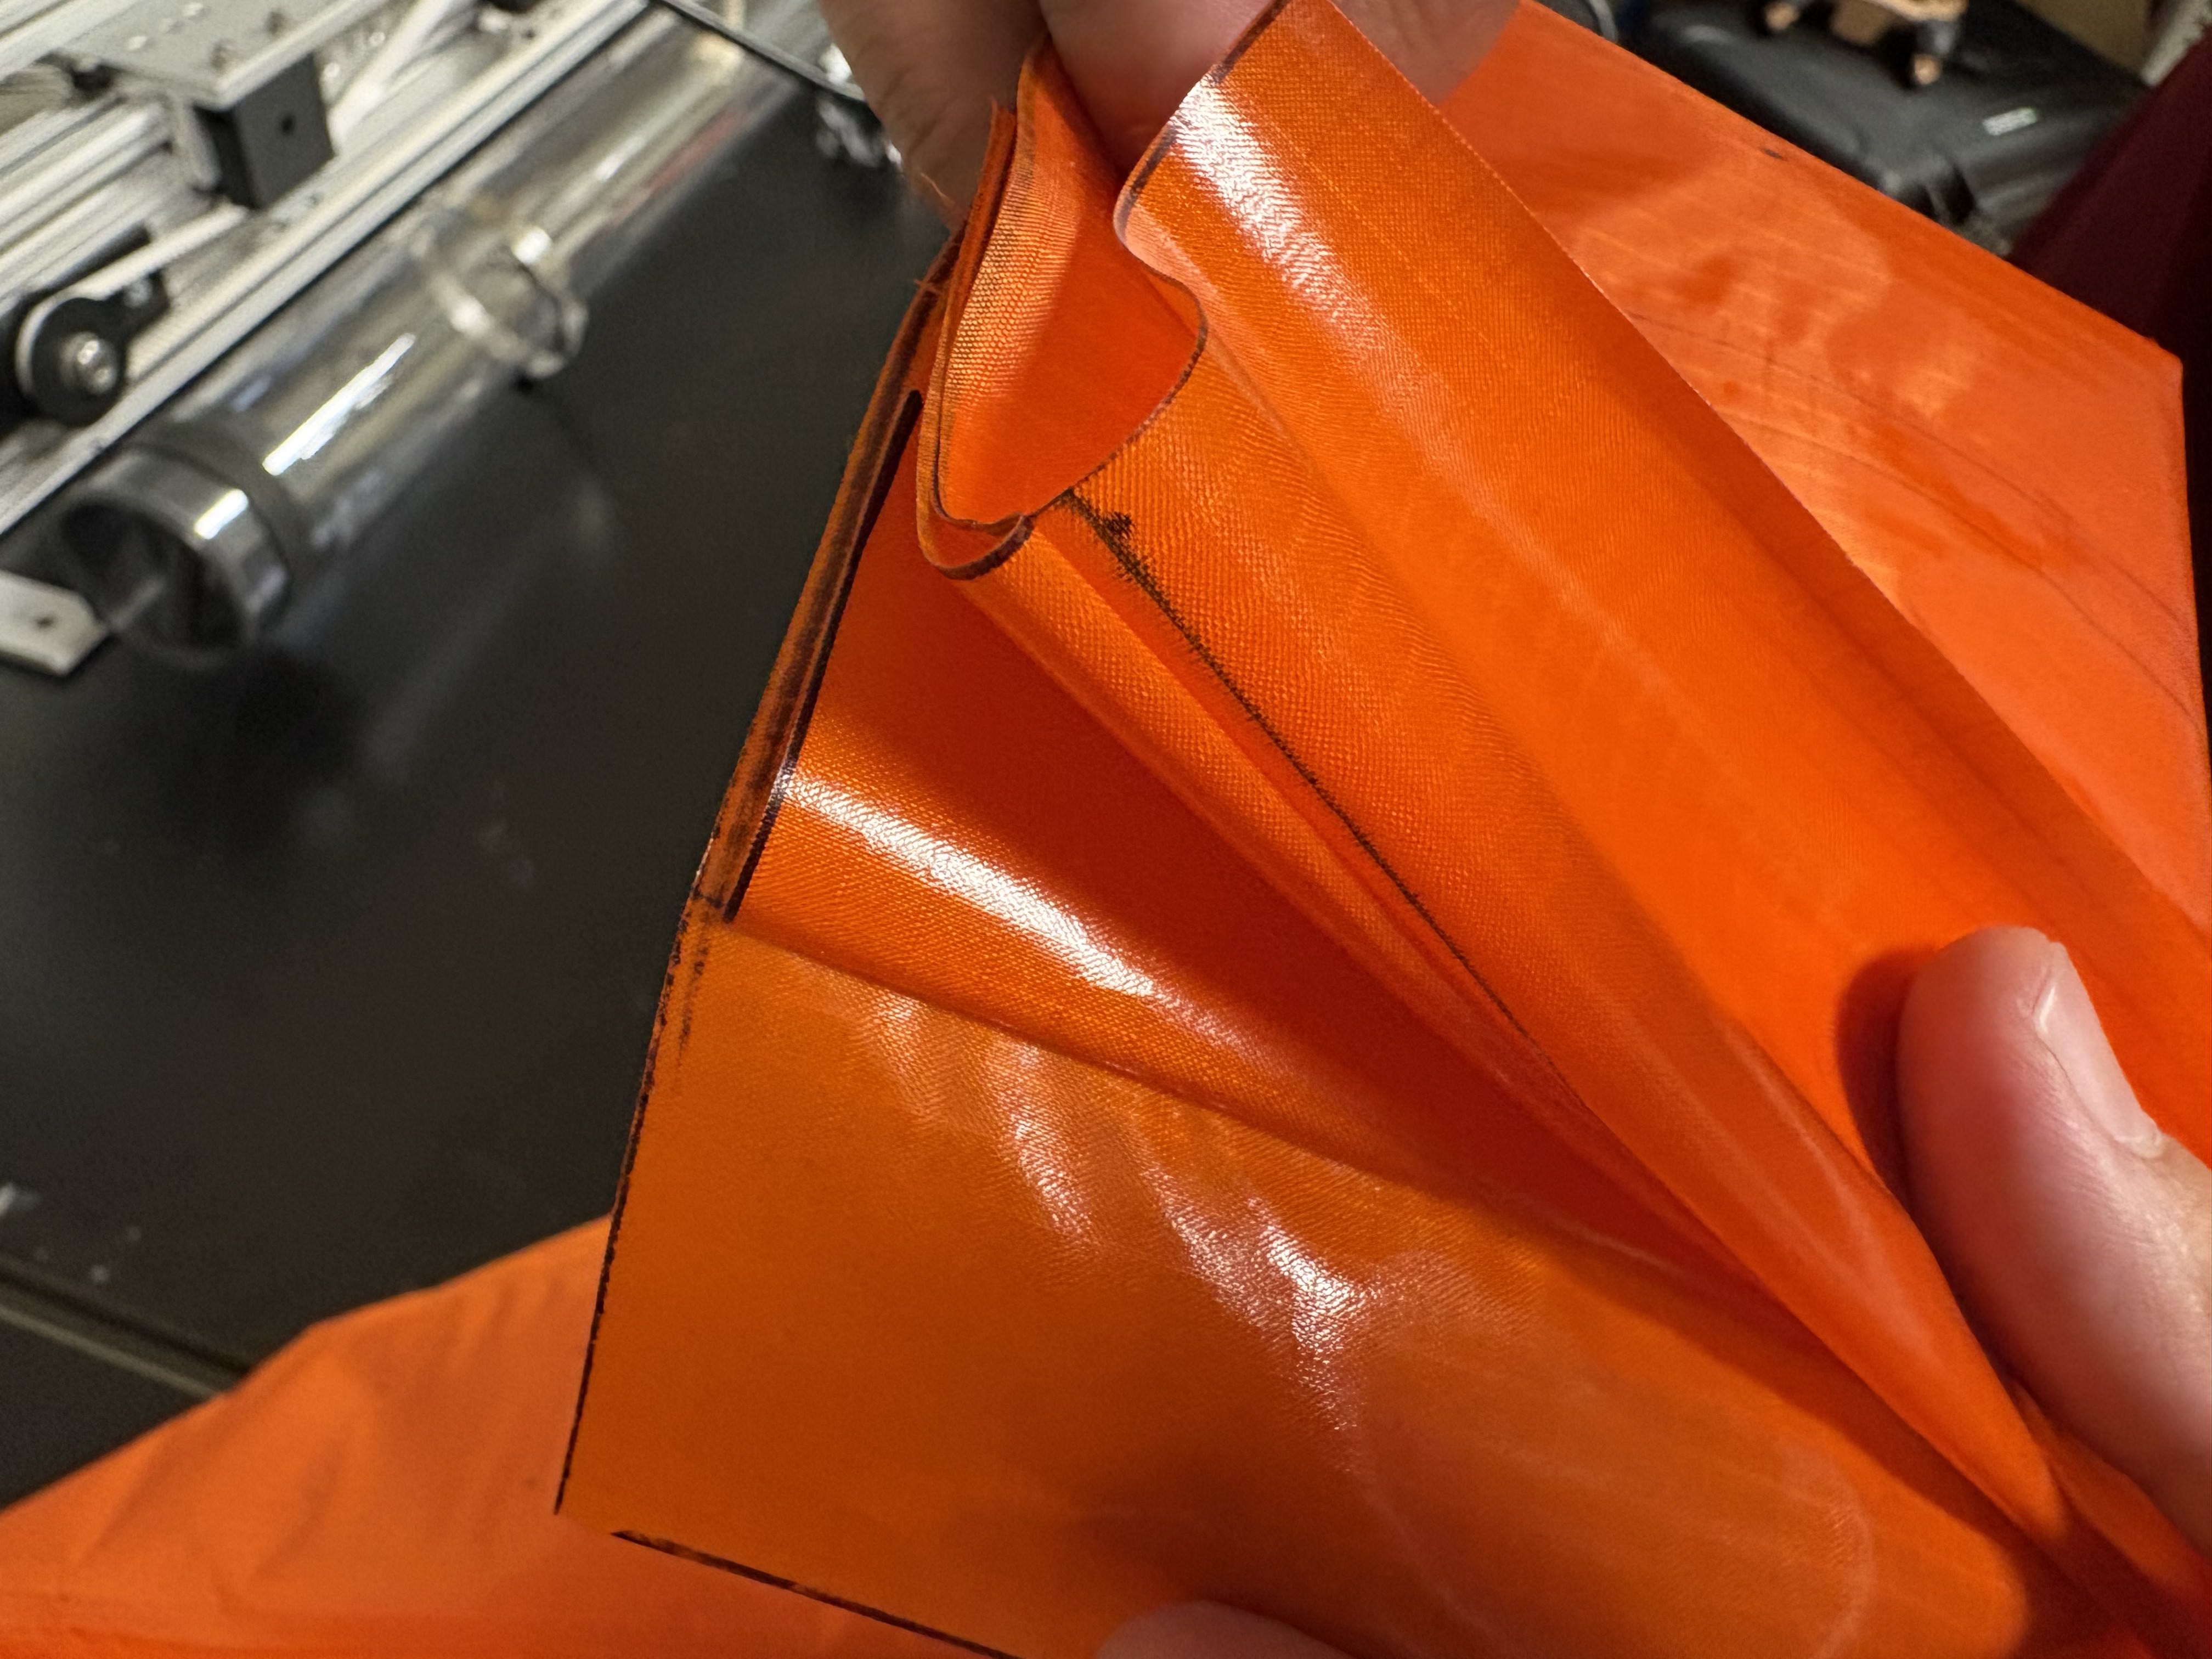
Lay the fabric flat. On each side, fold the top flap completely inward, lay it flat, and tape it down with the magic tape.
-
The exposed TPU on each edge will be joined with the sealer. On one end of the robot fabric, grab the edges, fold the fabric, and line the edges up so the exposed TPU sides face each other.
-
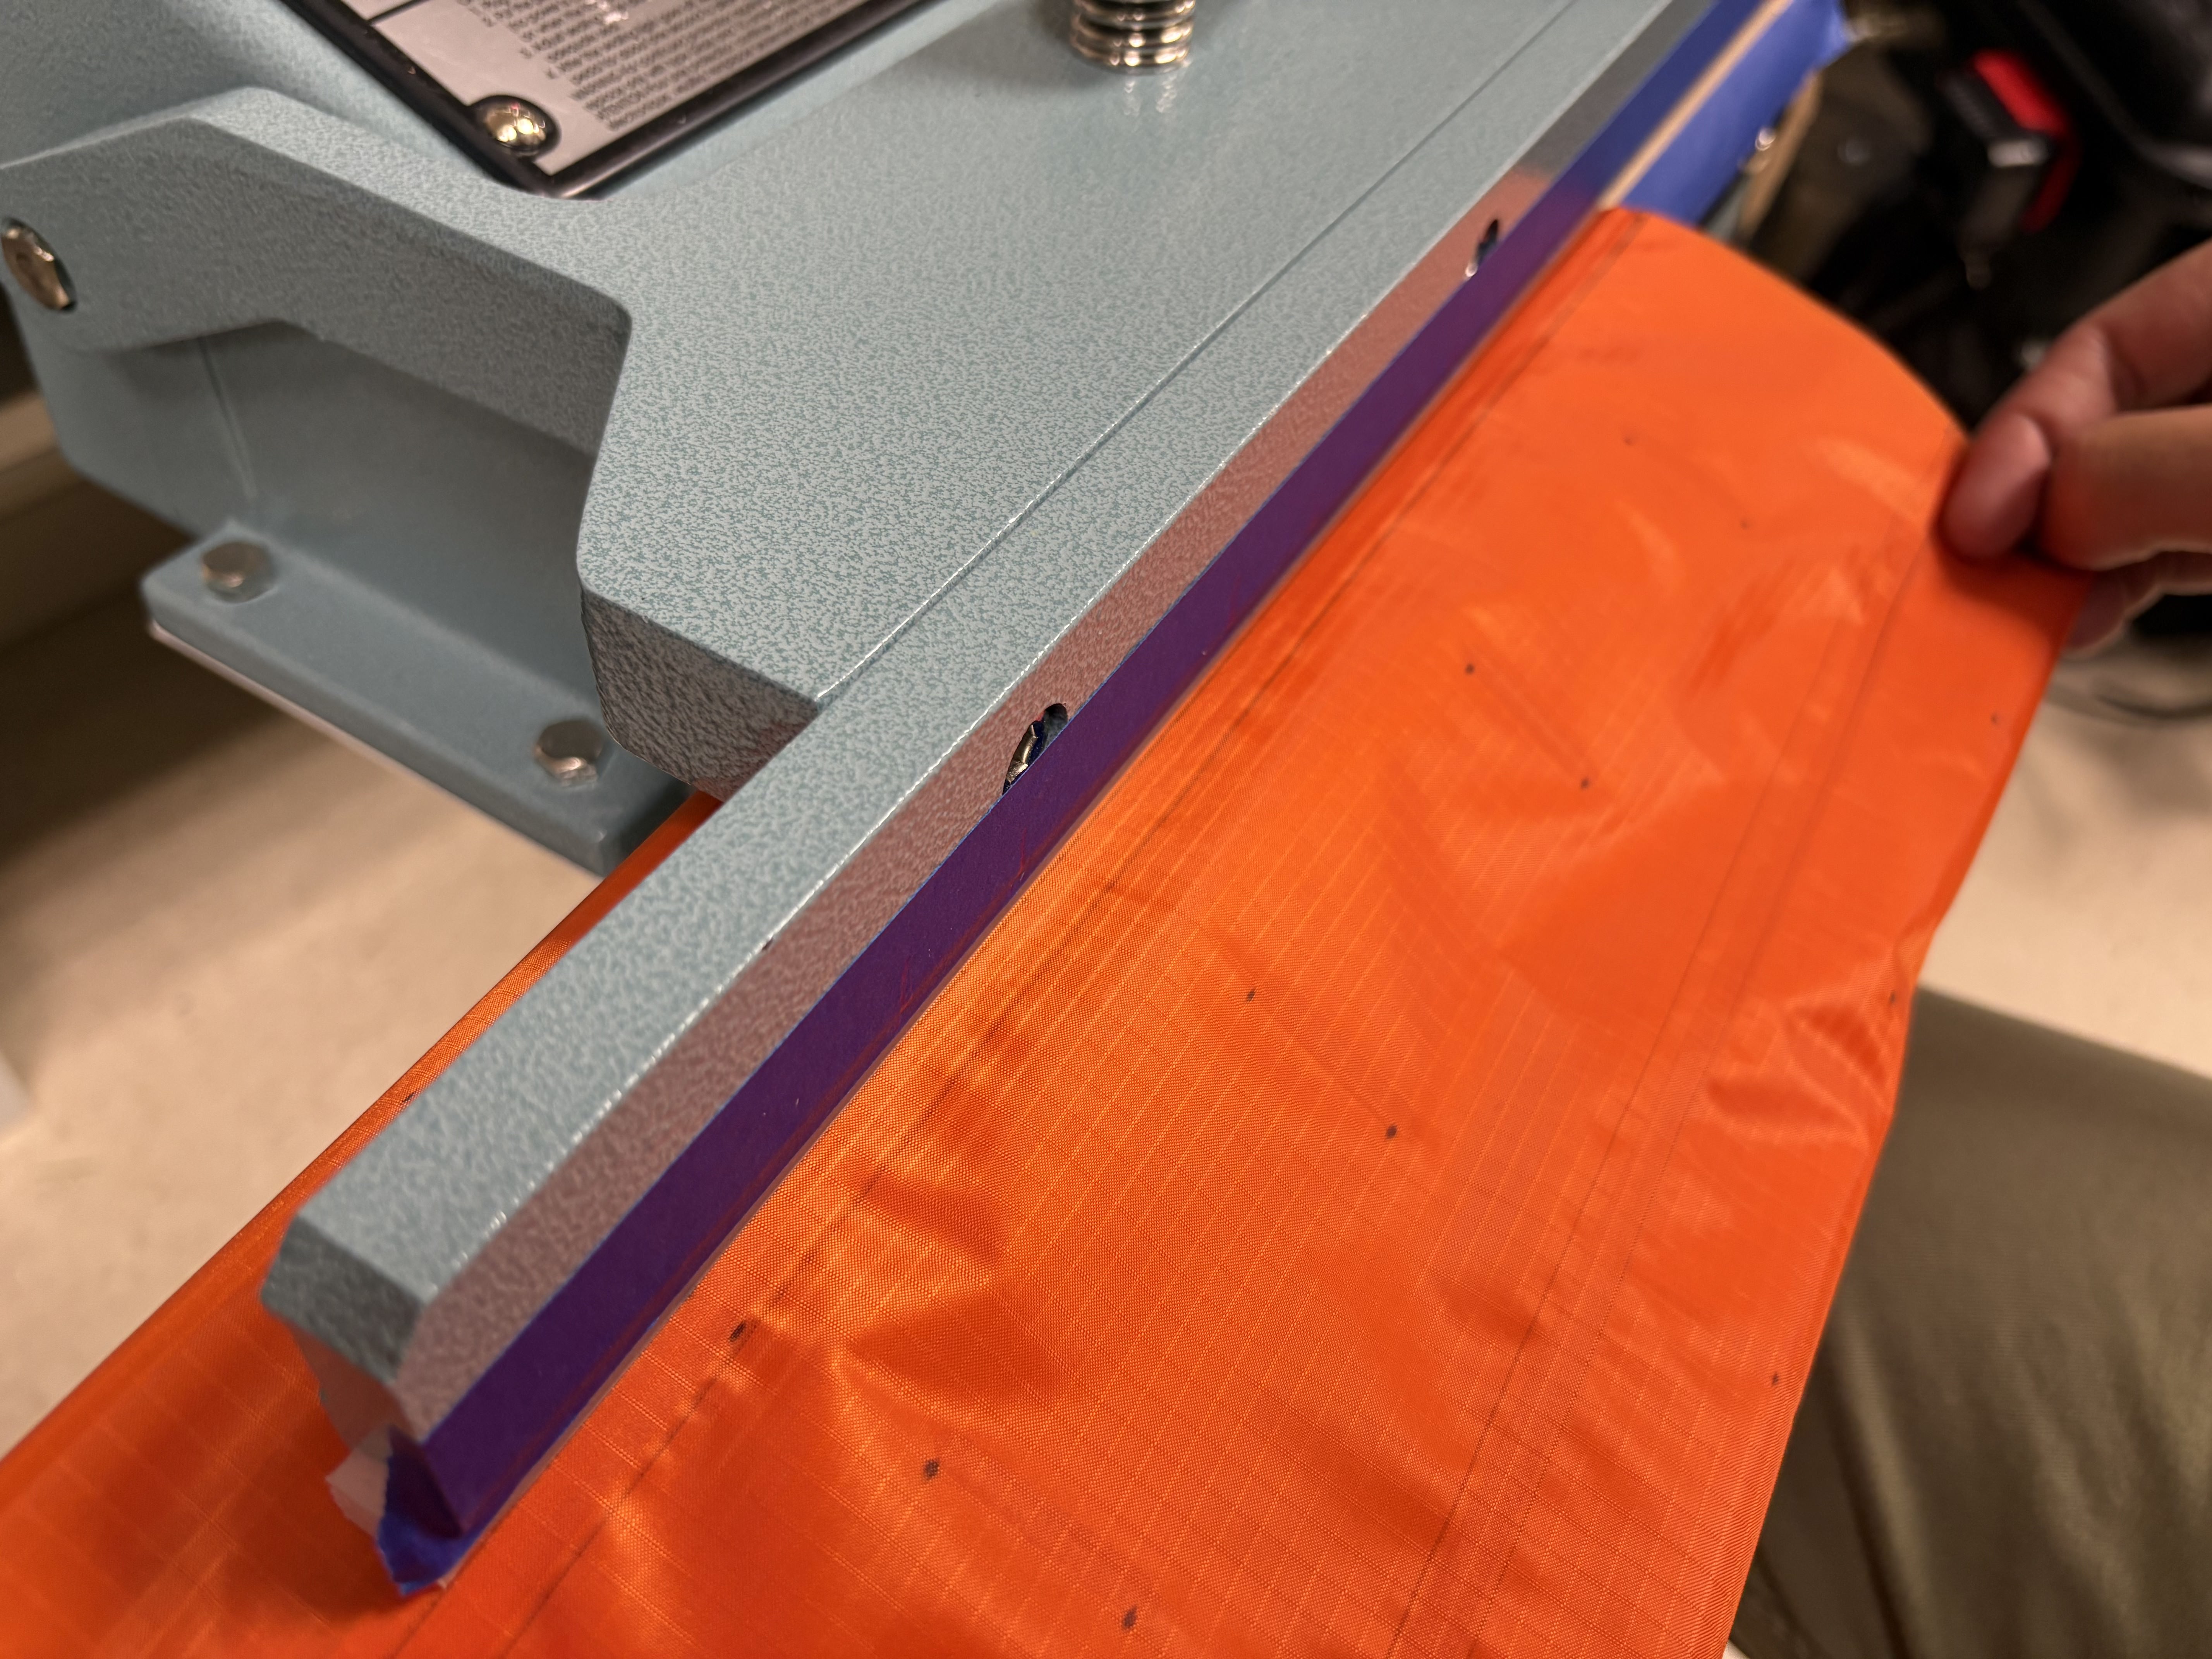
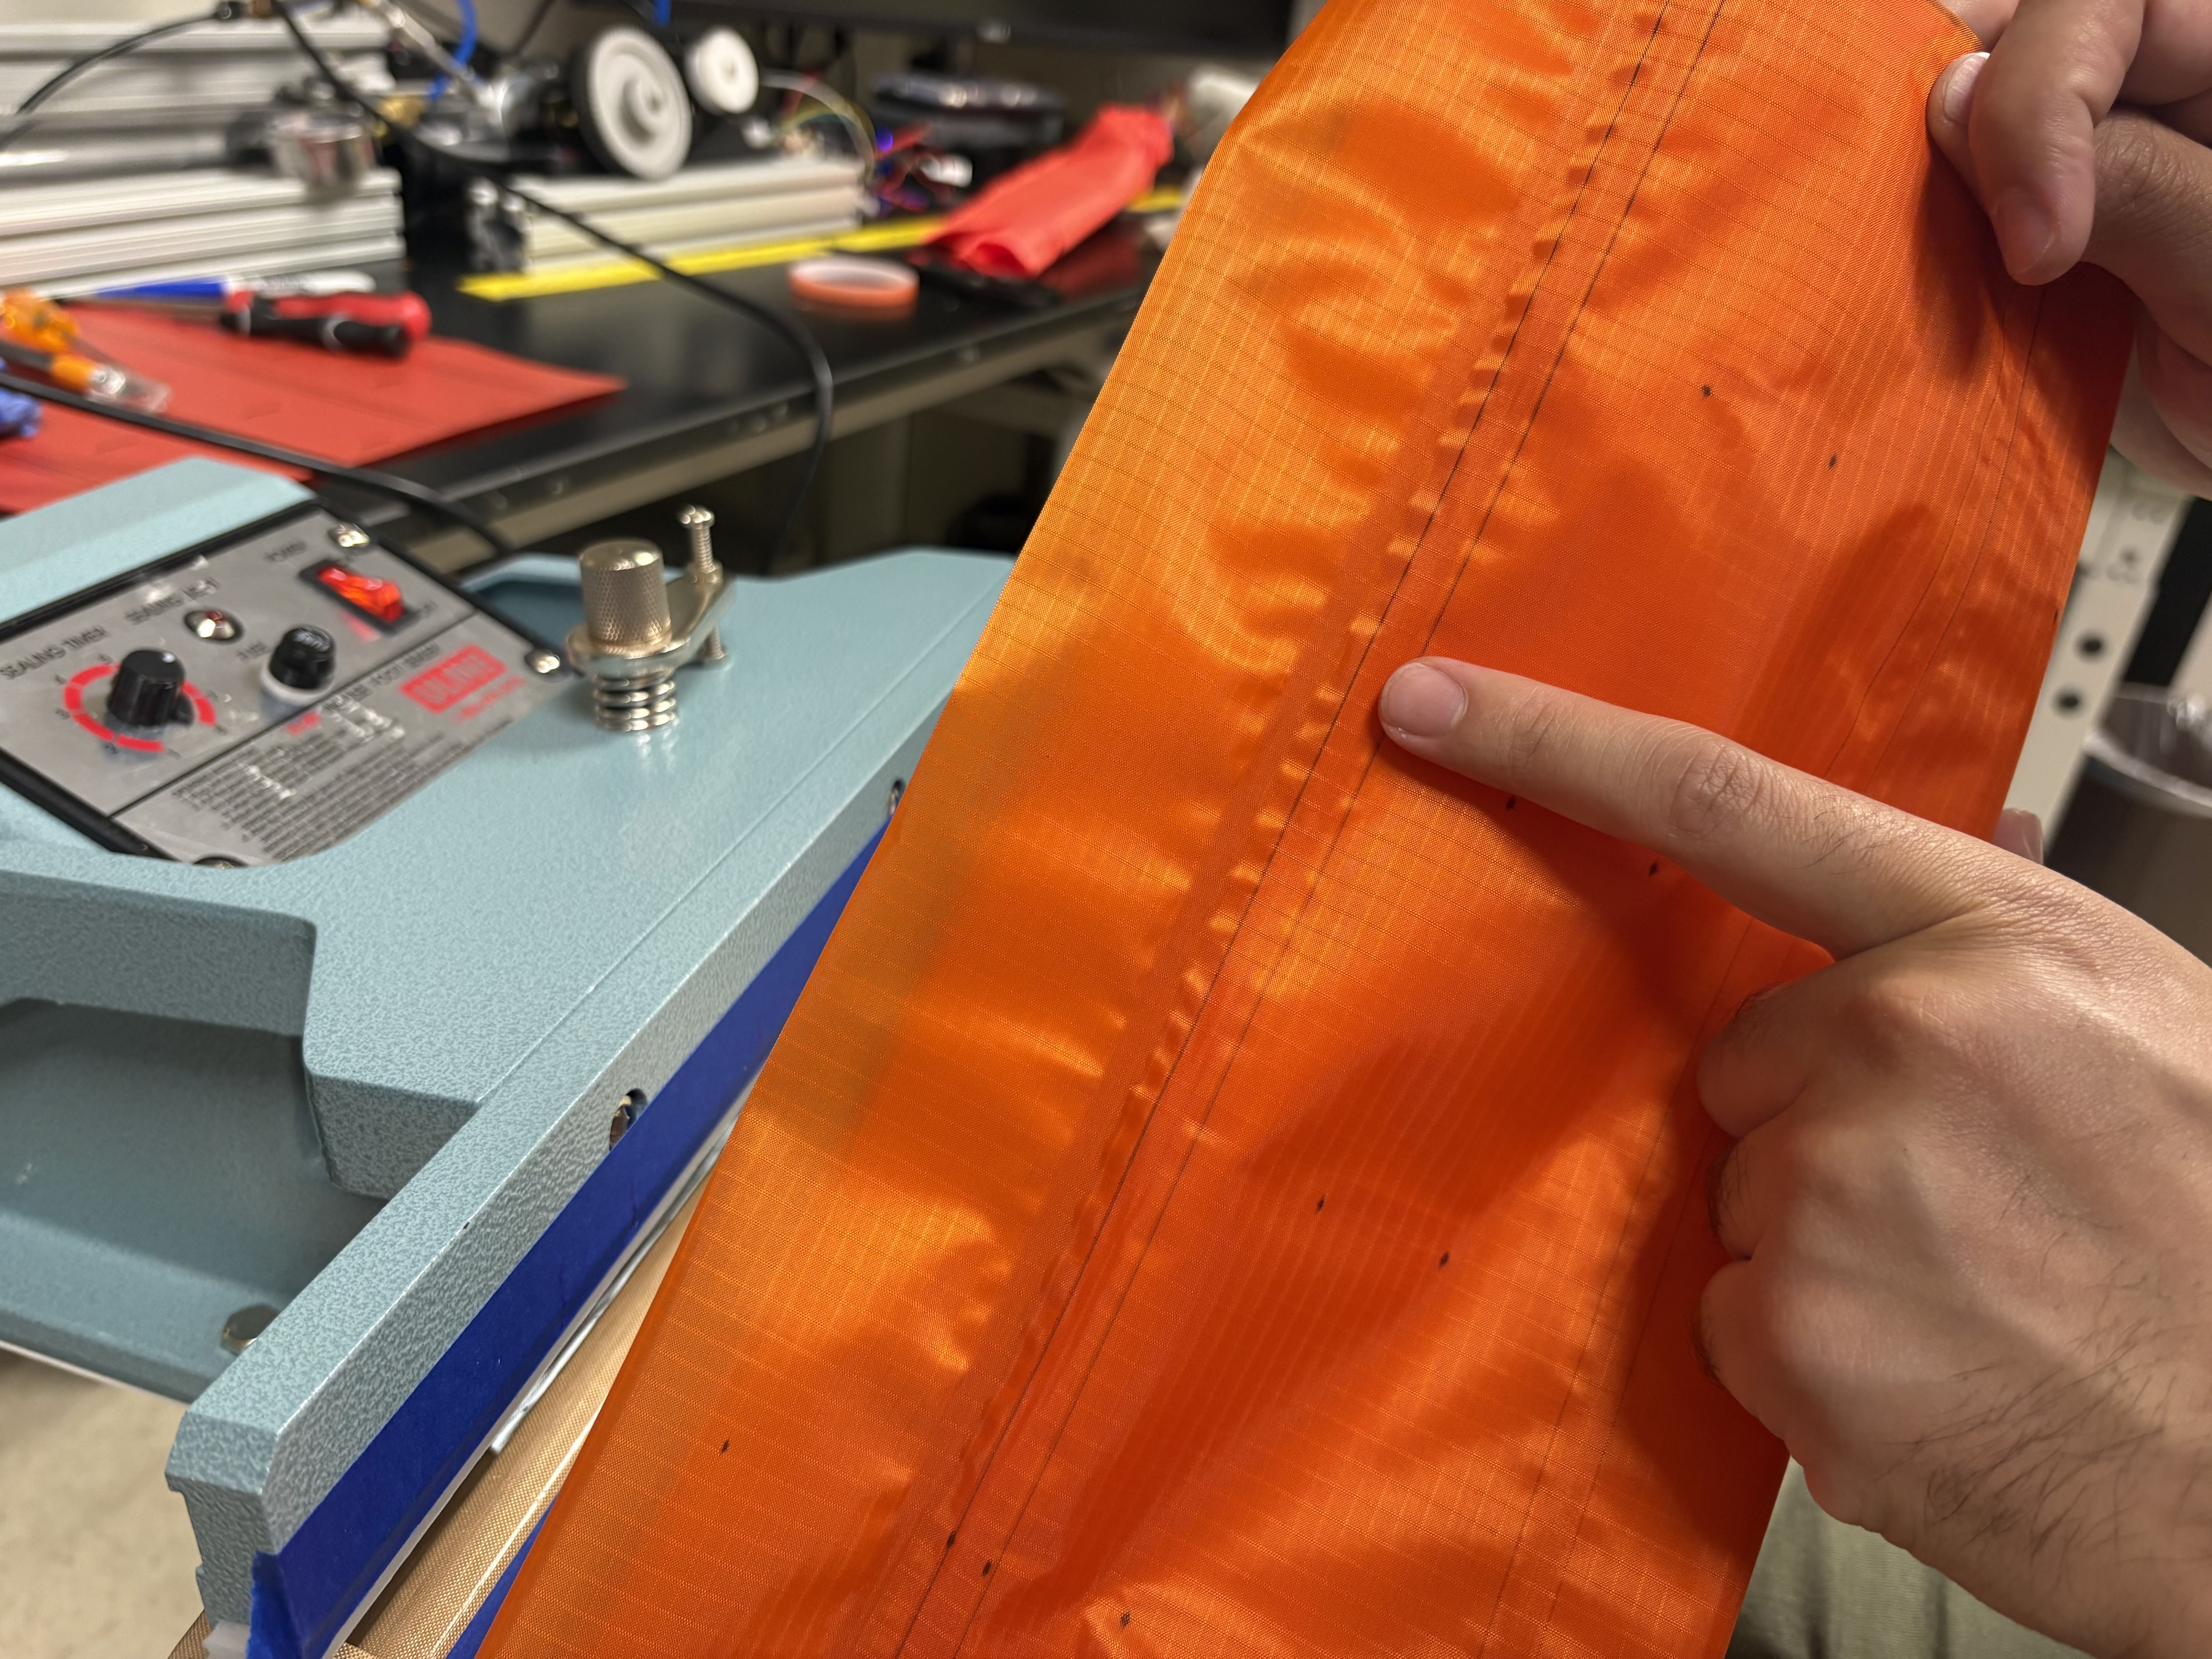
Carefully line up the fabric in the sealer lengthwise, just above the outermost marking, and press the sealer.
-
Repeating this process a couple more times above the previous sealed line can reinforce the body by adding more sealed surface area lengthwise.
-
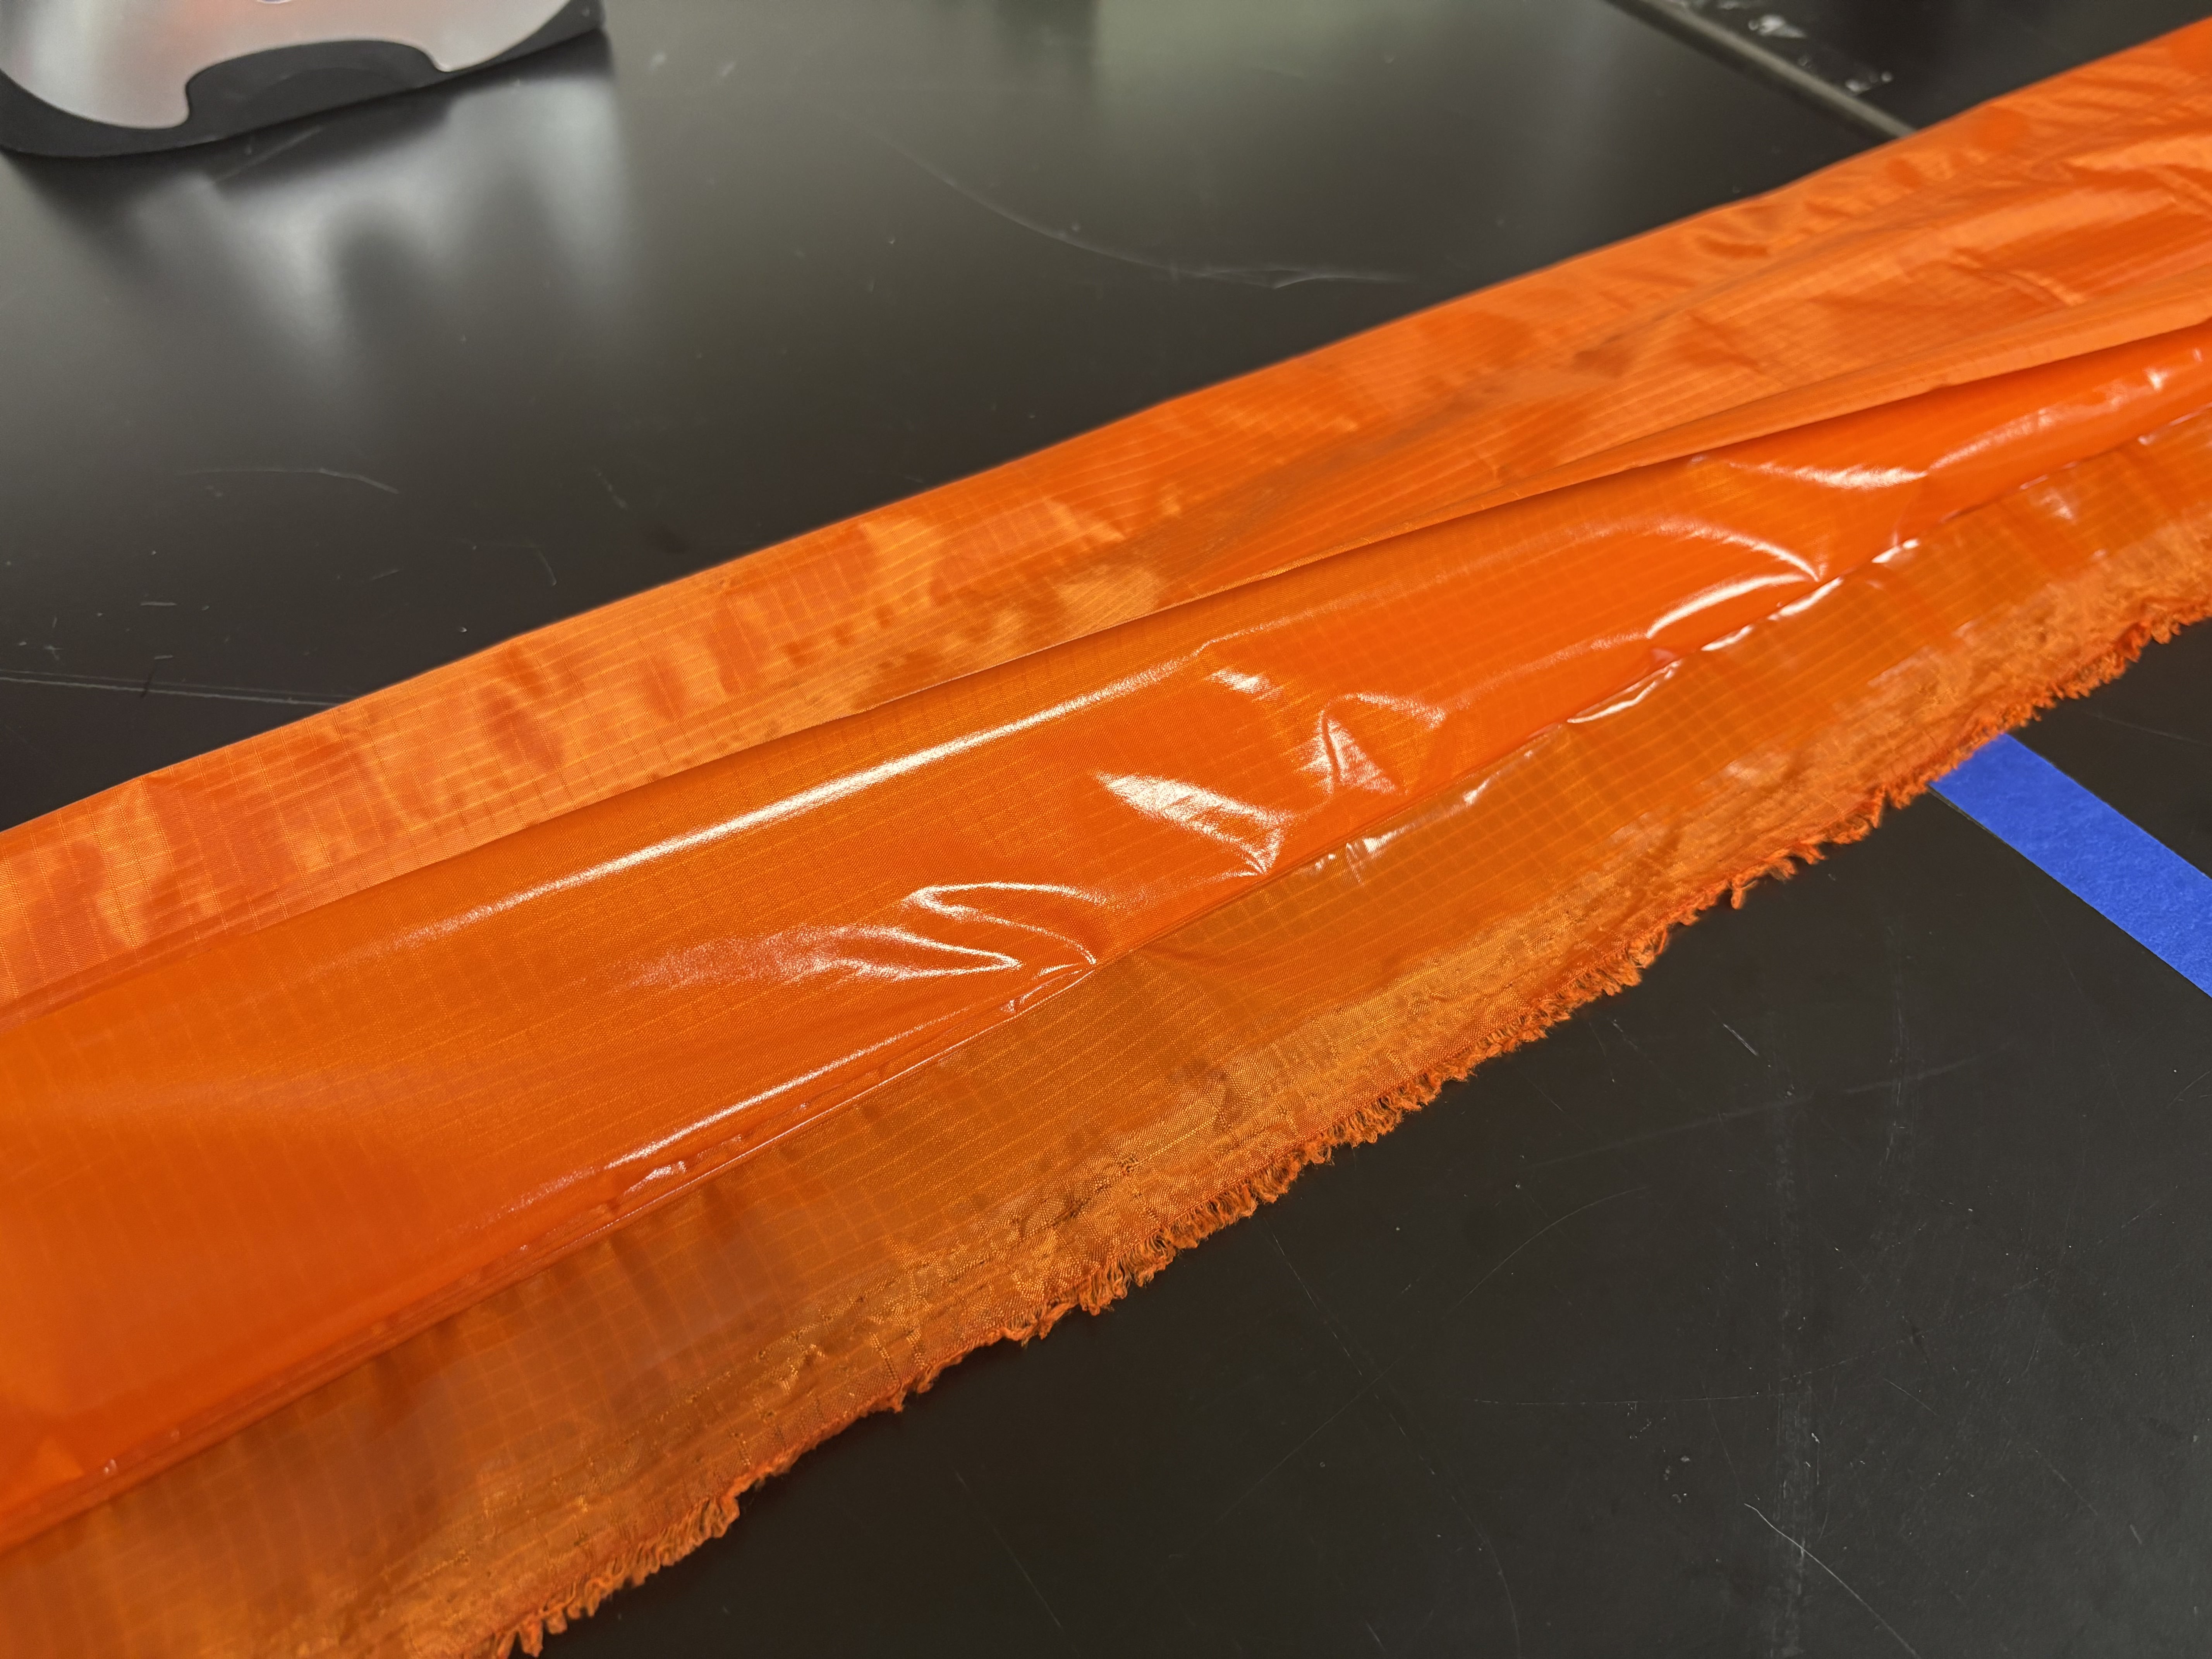
Turn the robot inside out so the taped flaps are on the outside, then remove the tape. The two exposed TPU flaps should now be facing each other.
-
Seal these flaps together along the whole length. The robot now has two sealed edges for extra reinforcement — one inside and one outside.
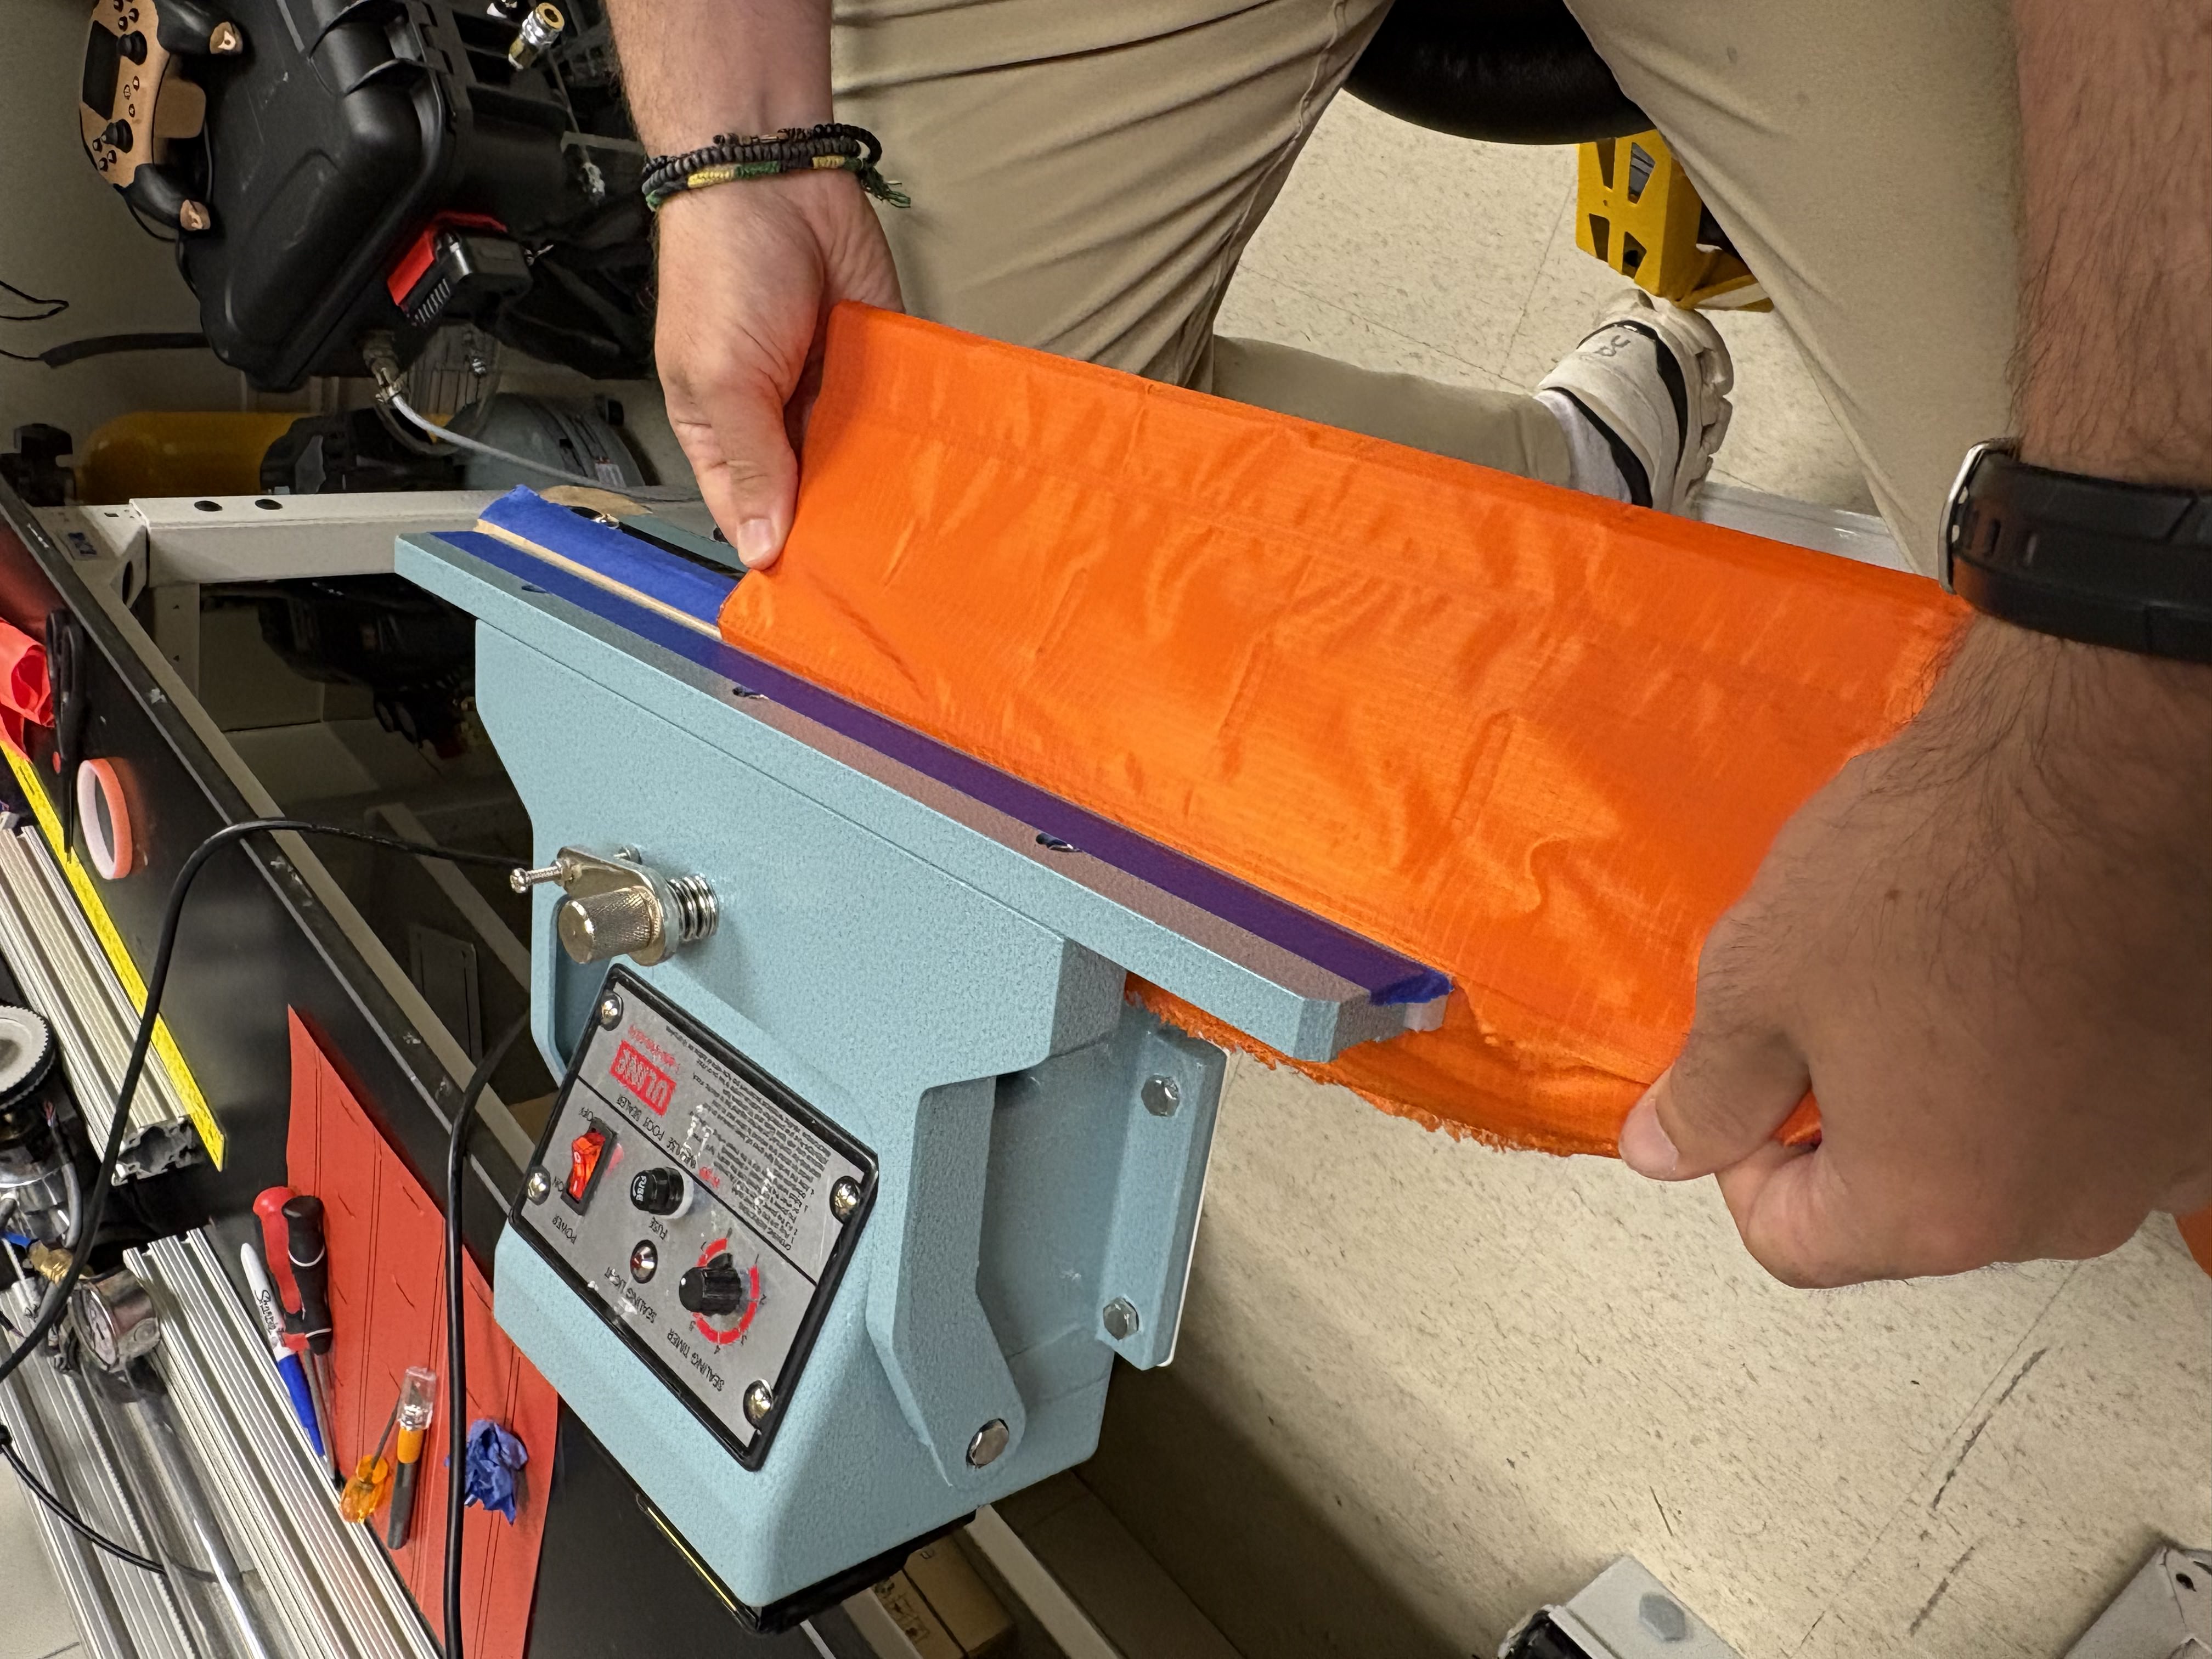
-
At this point, it is a good idea to inspect the seams and reinforce them if needed.
Step 3: Pneumatic fittings
-
A push-to-connect fitting will be added to each of the pouch motor lines.
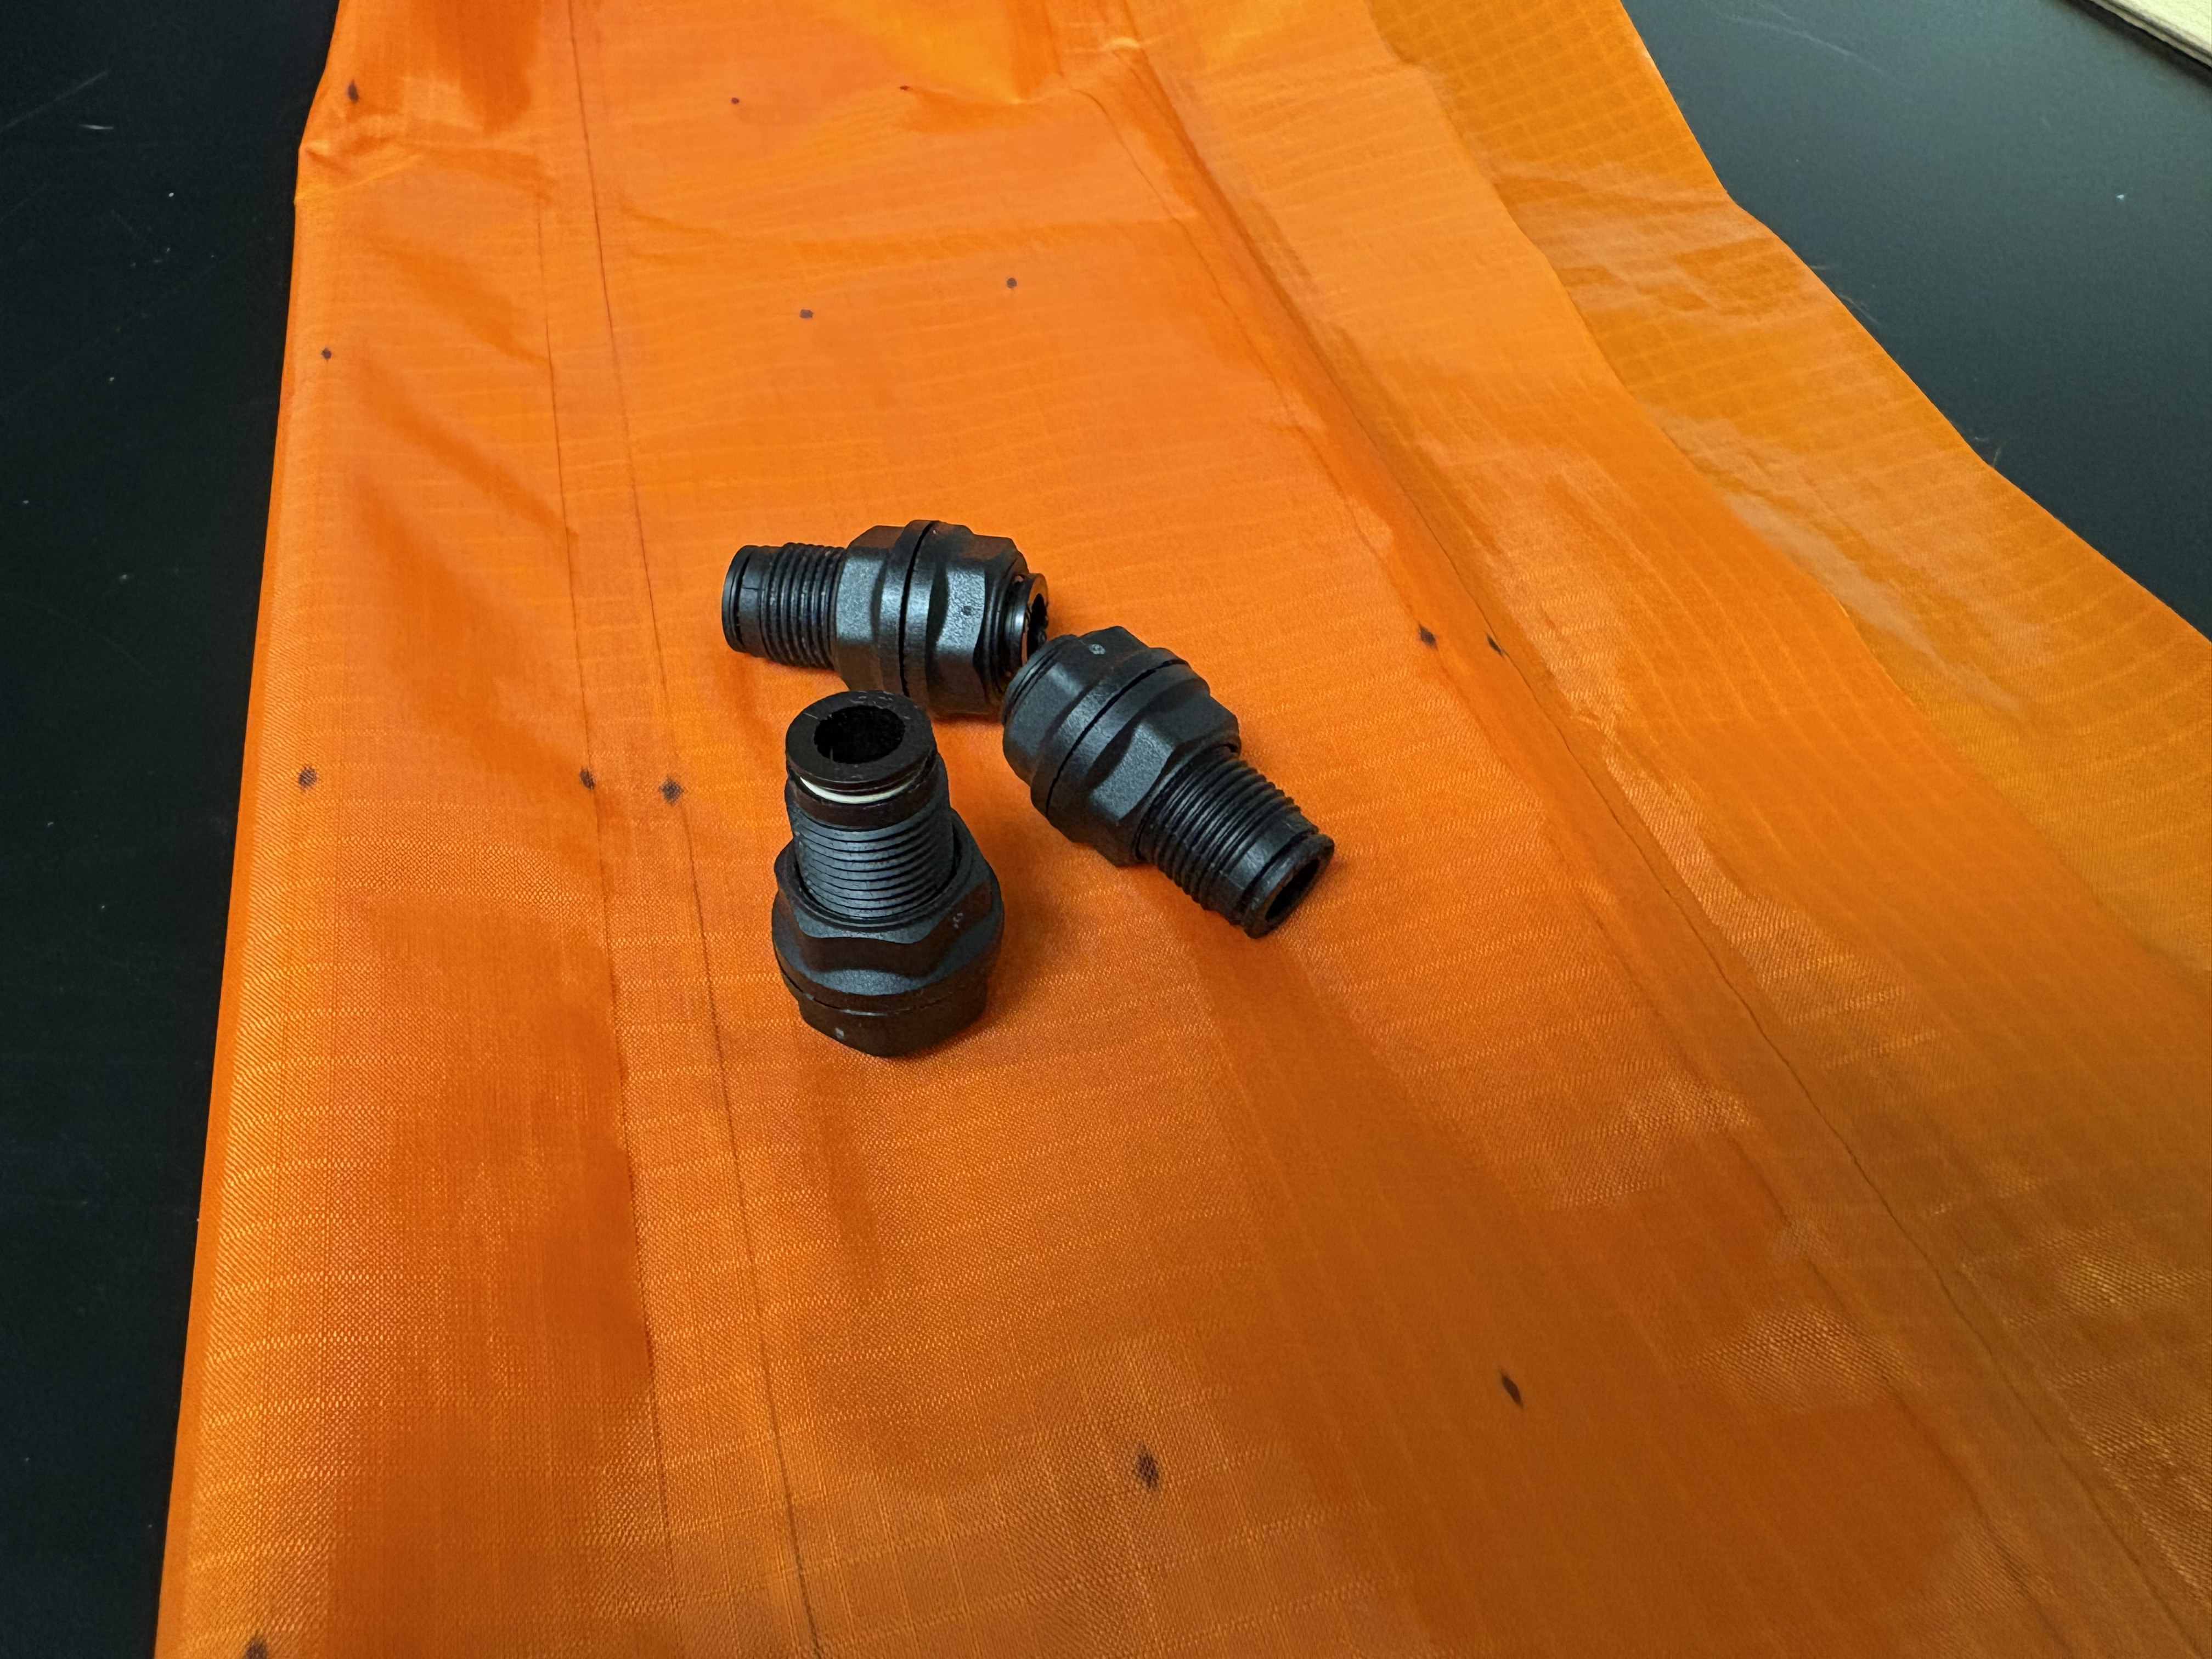
-
Make a horizontal line 6-7cm from the edge on one of the pouch lines.
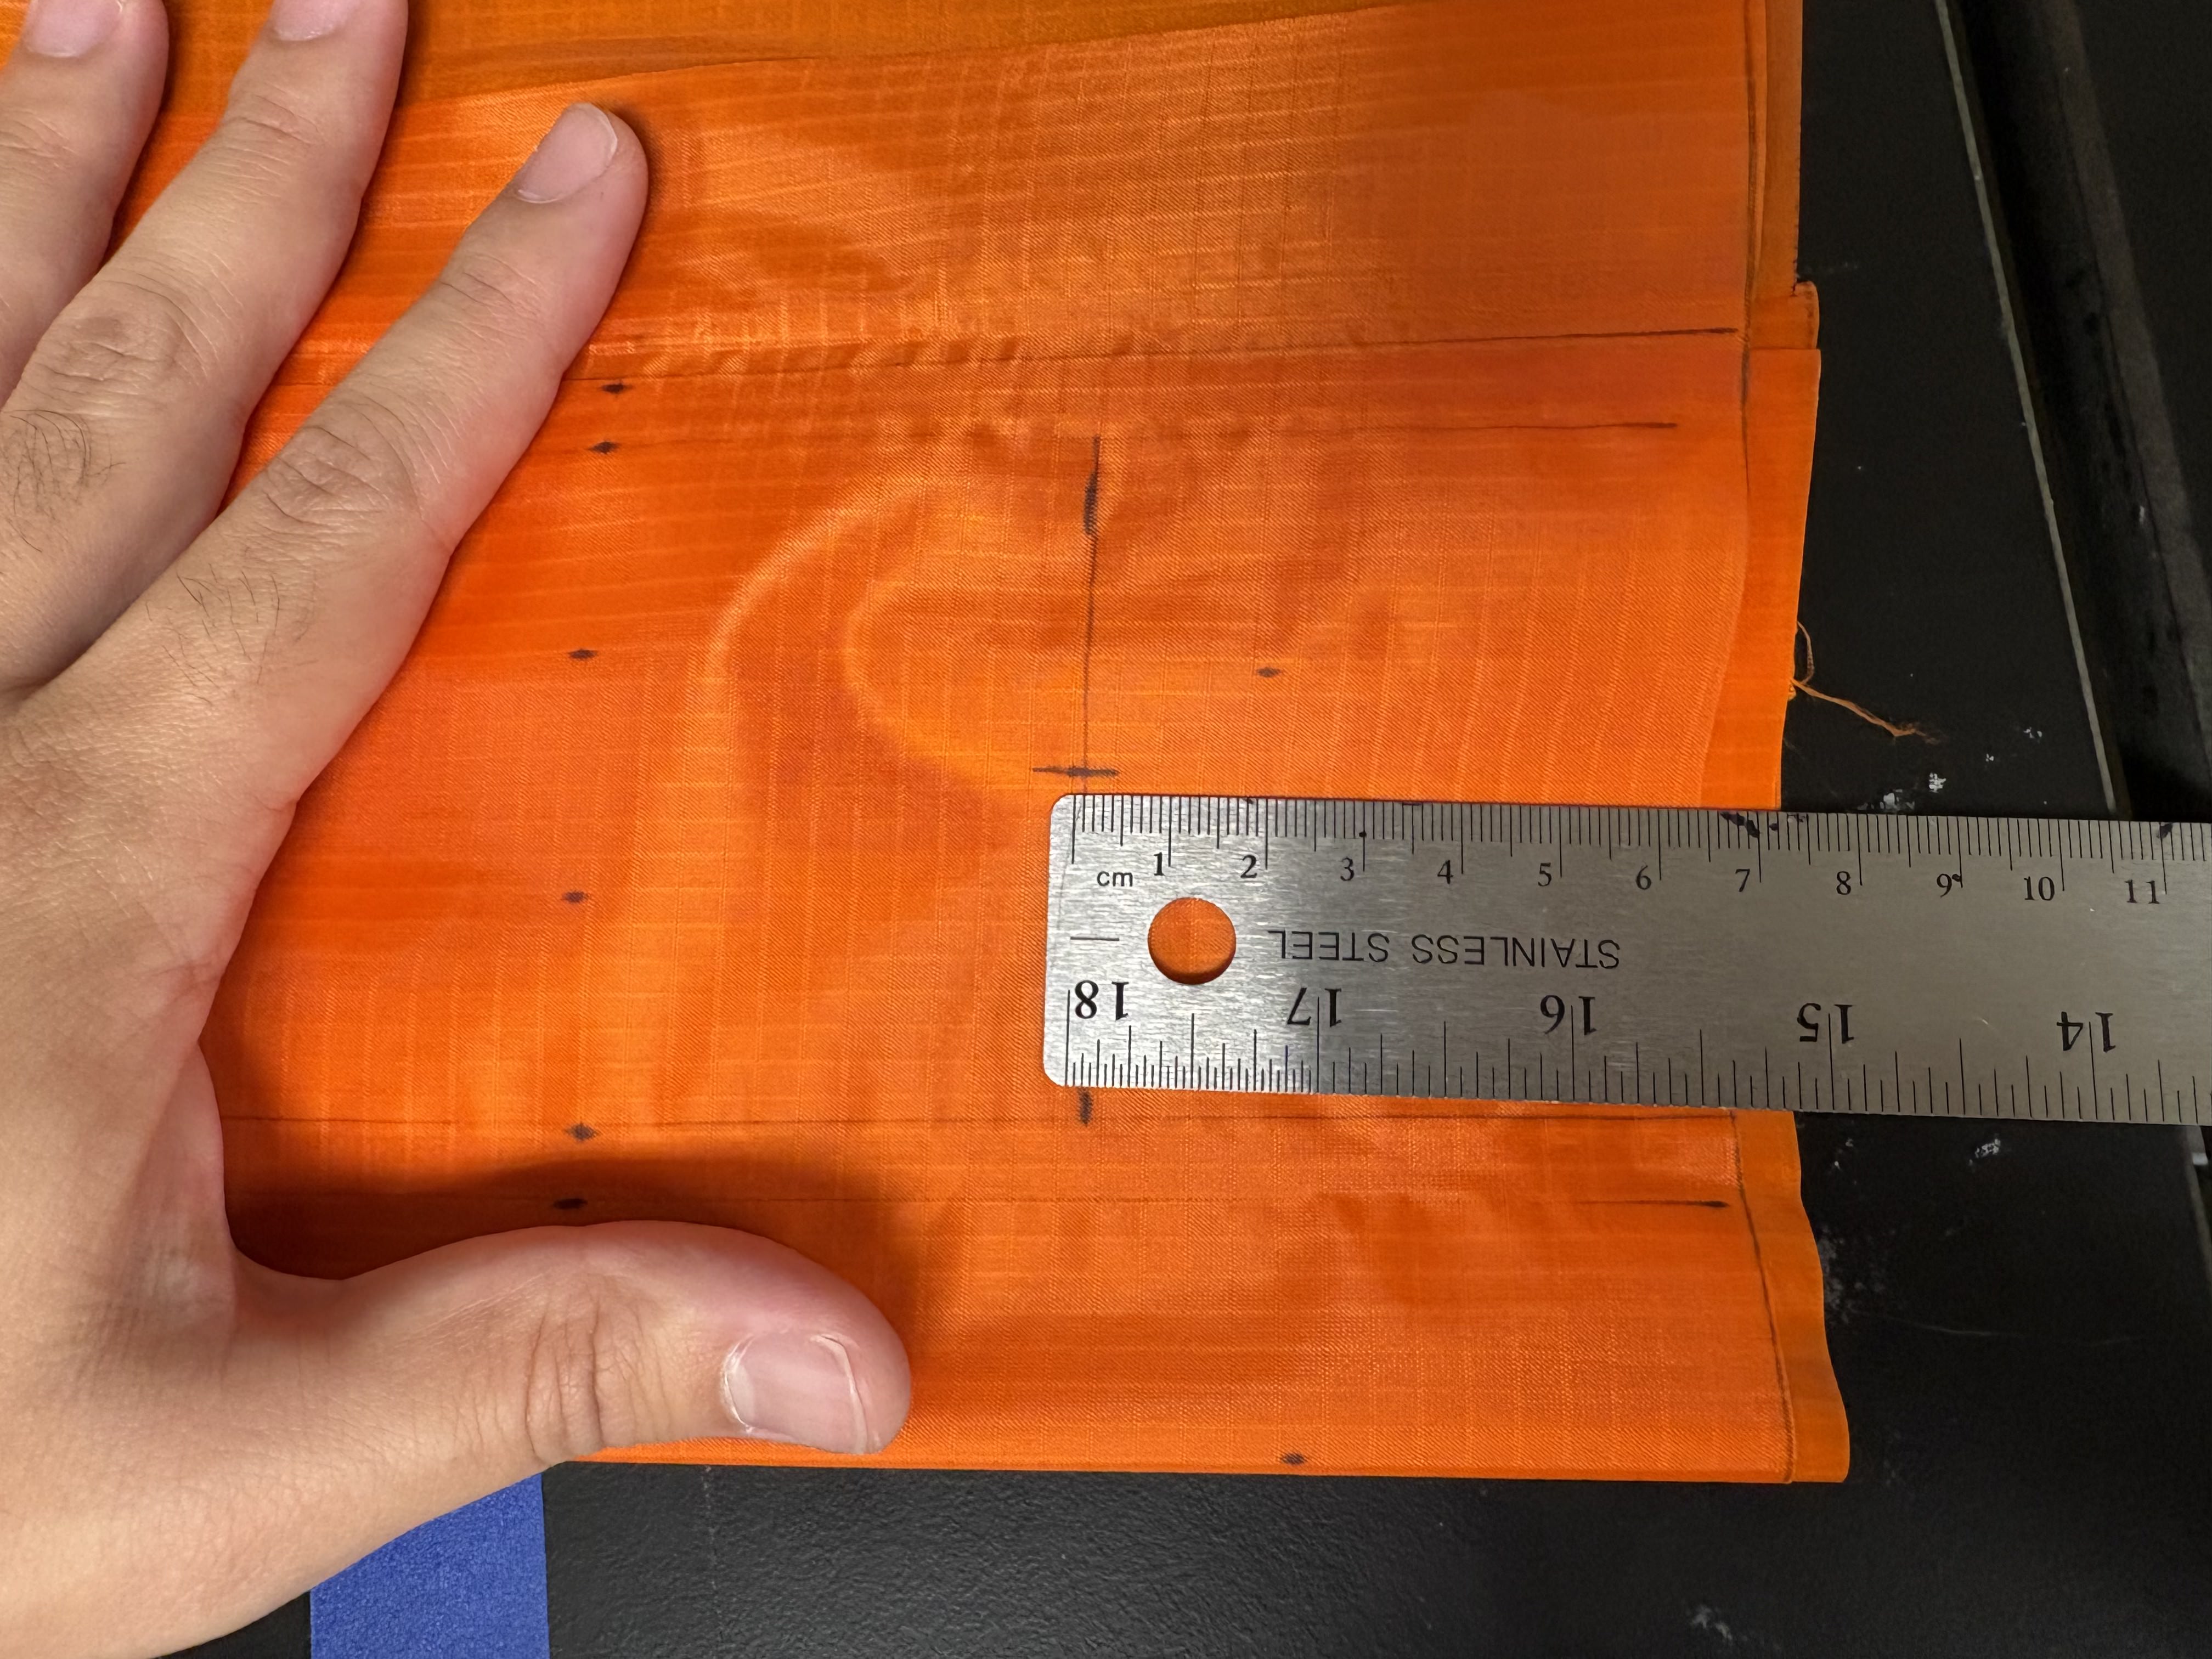
-
Grab a connector and use it to mark a circle right in the middle of the line.
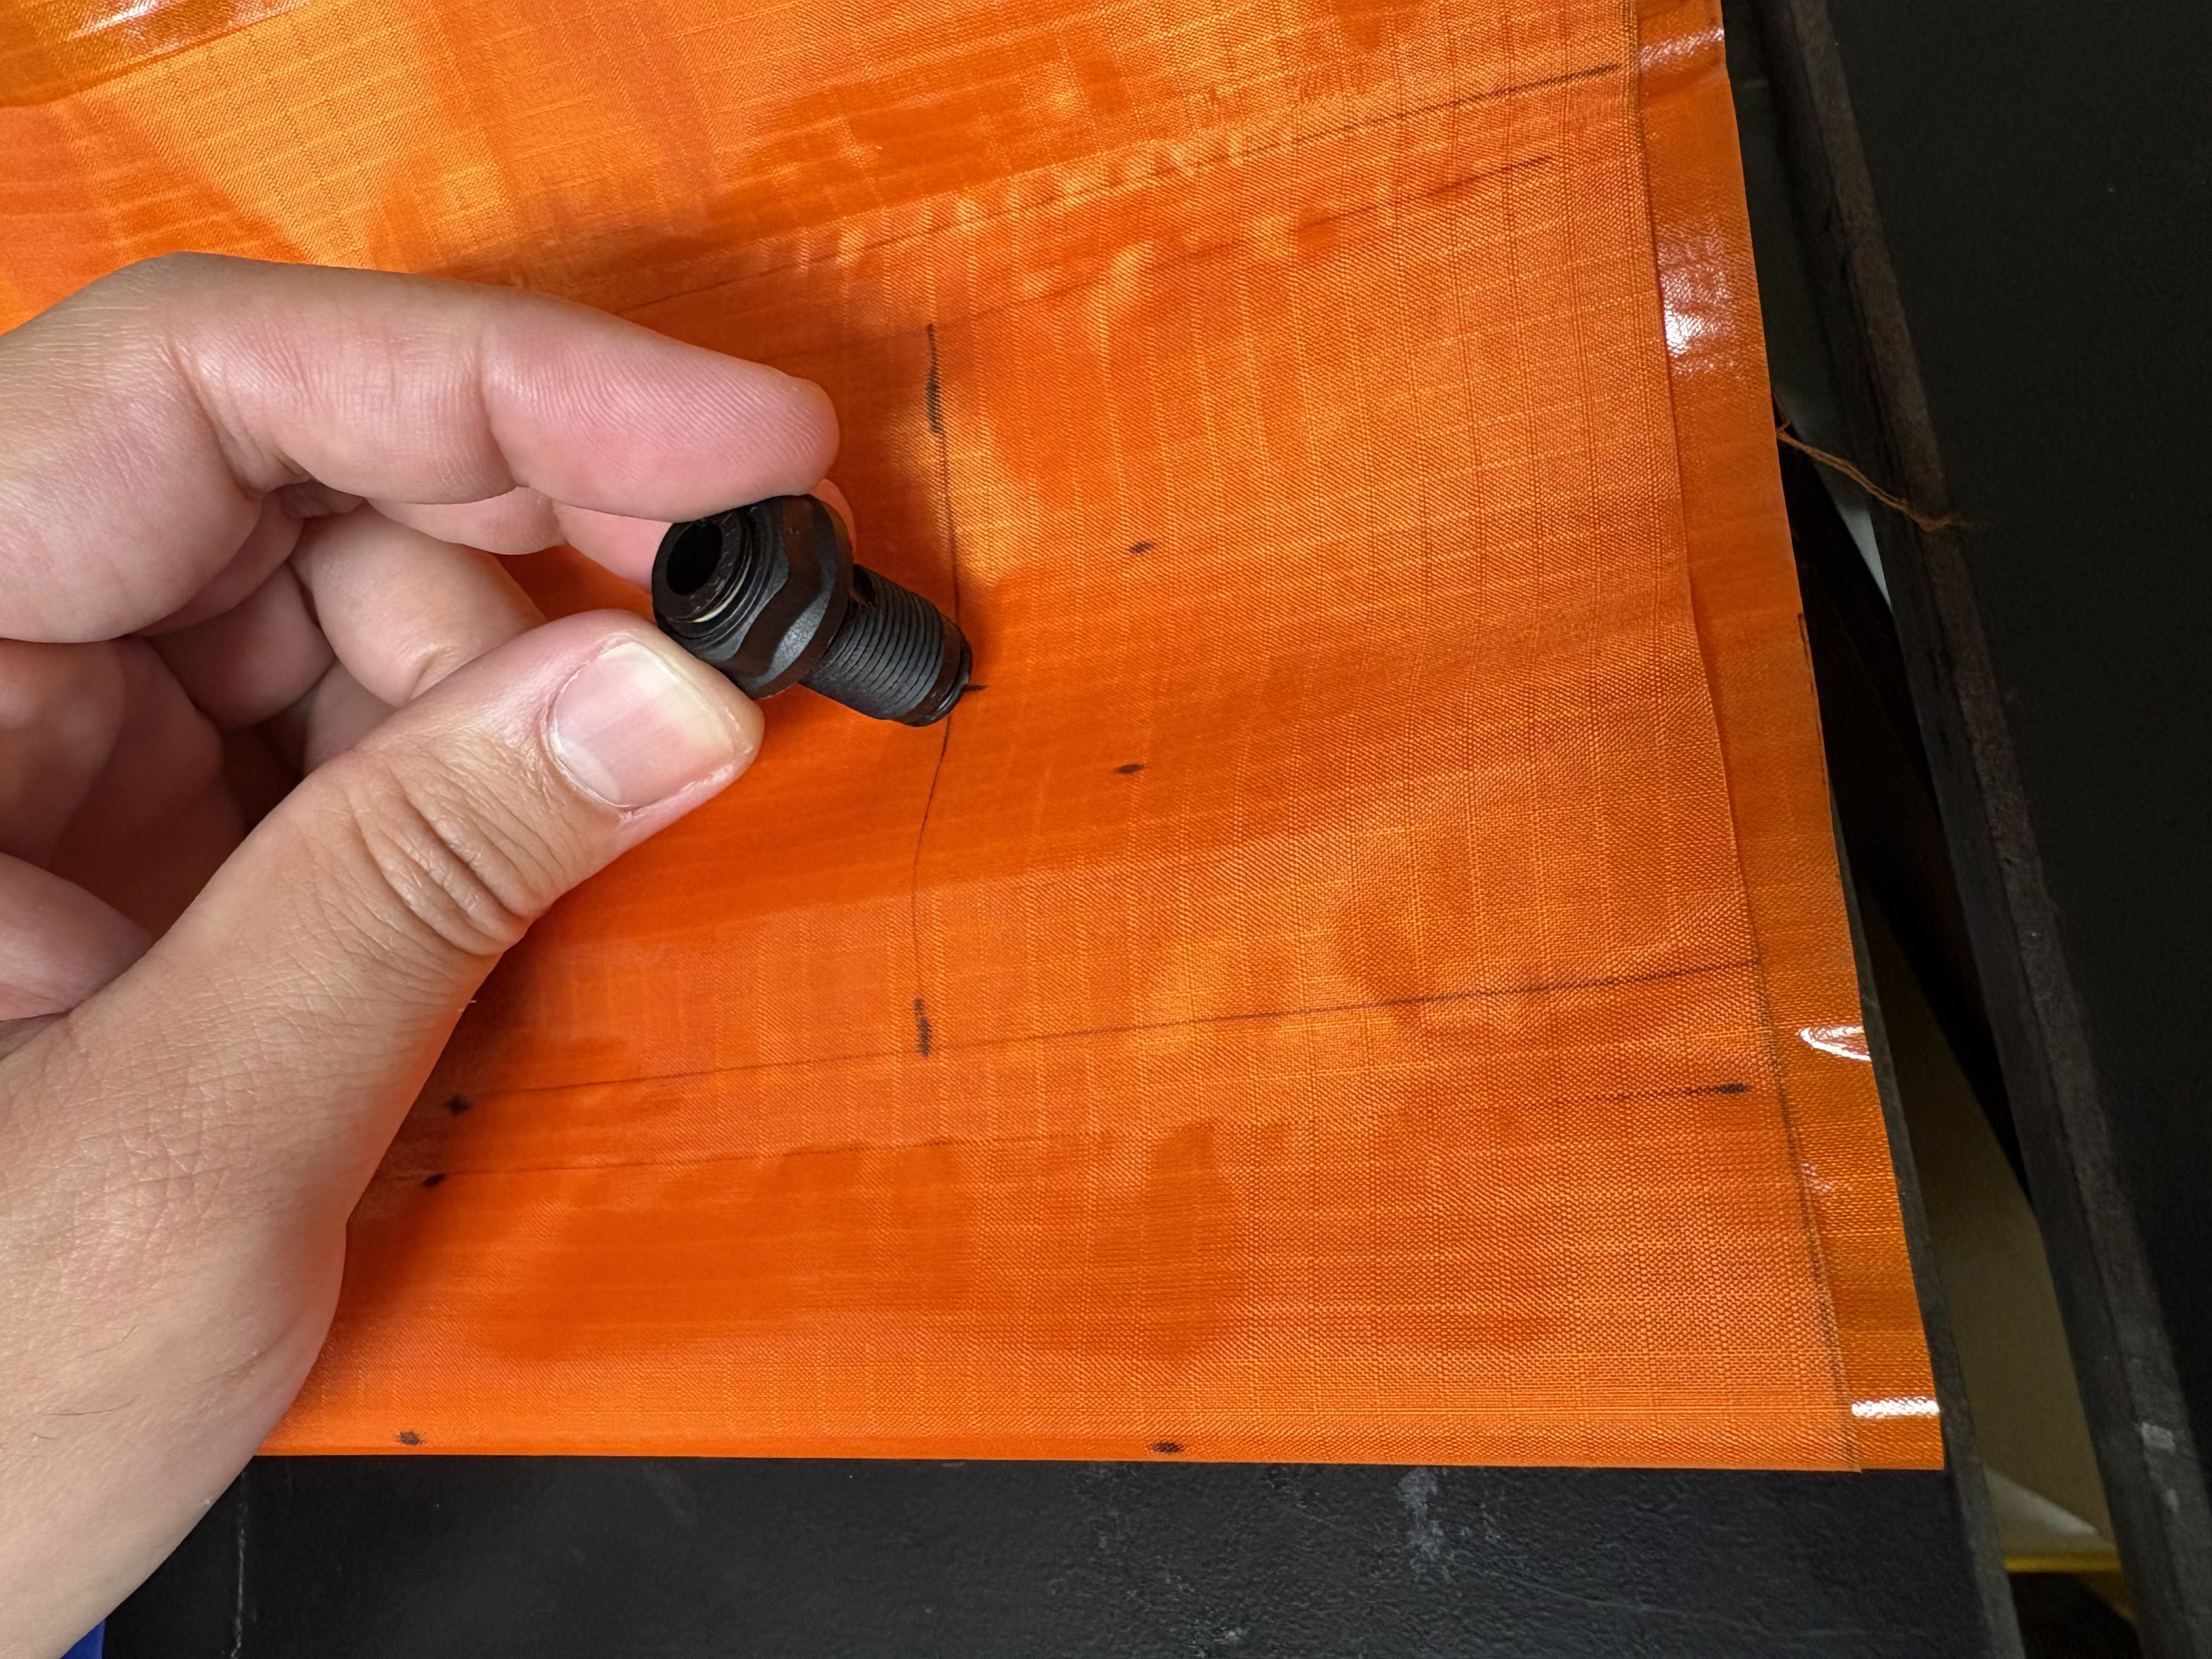
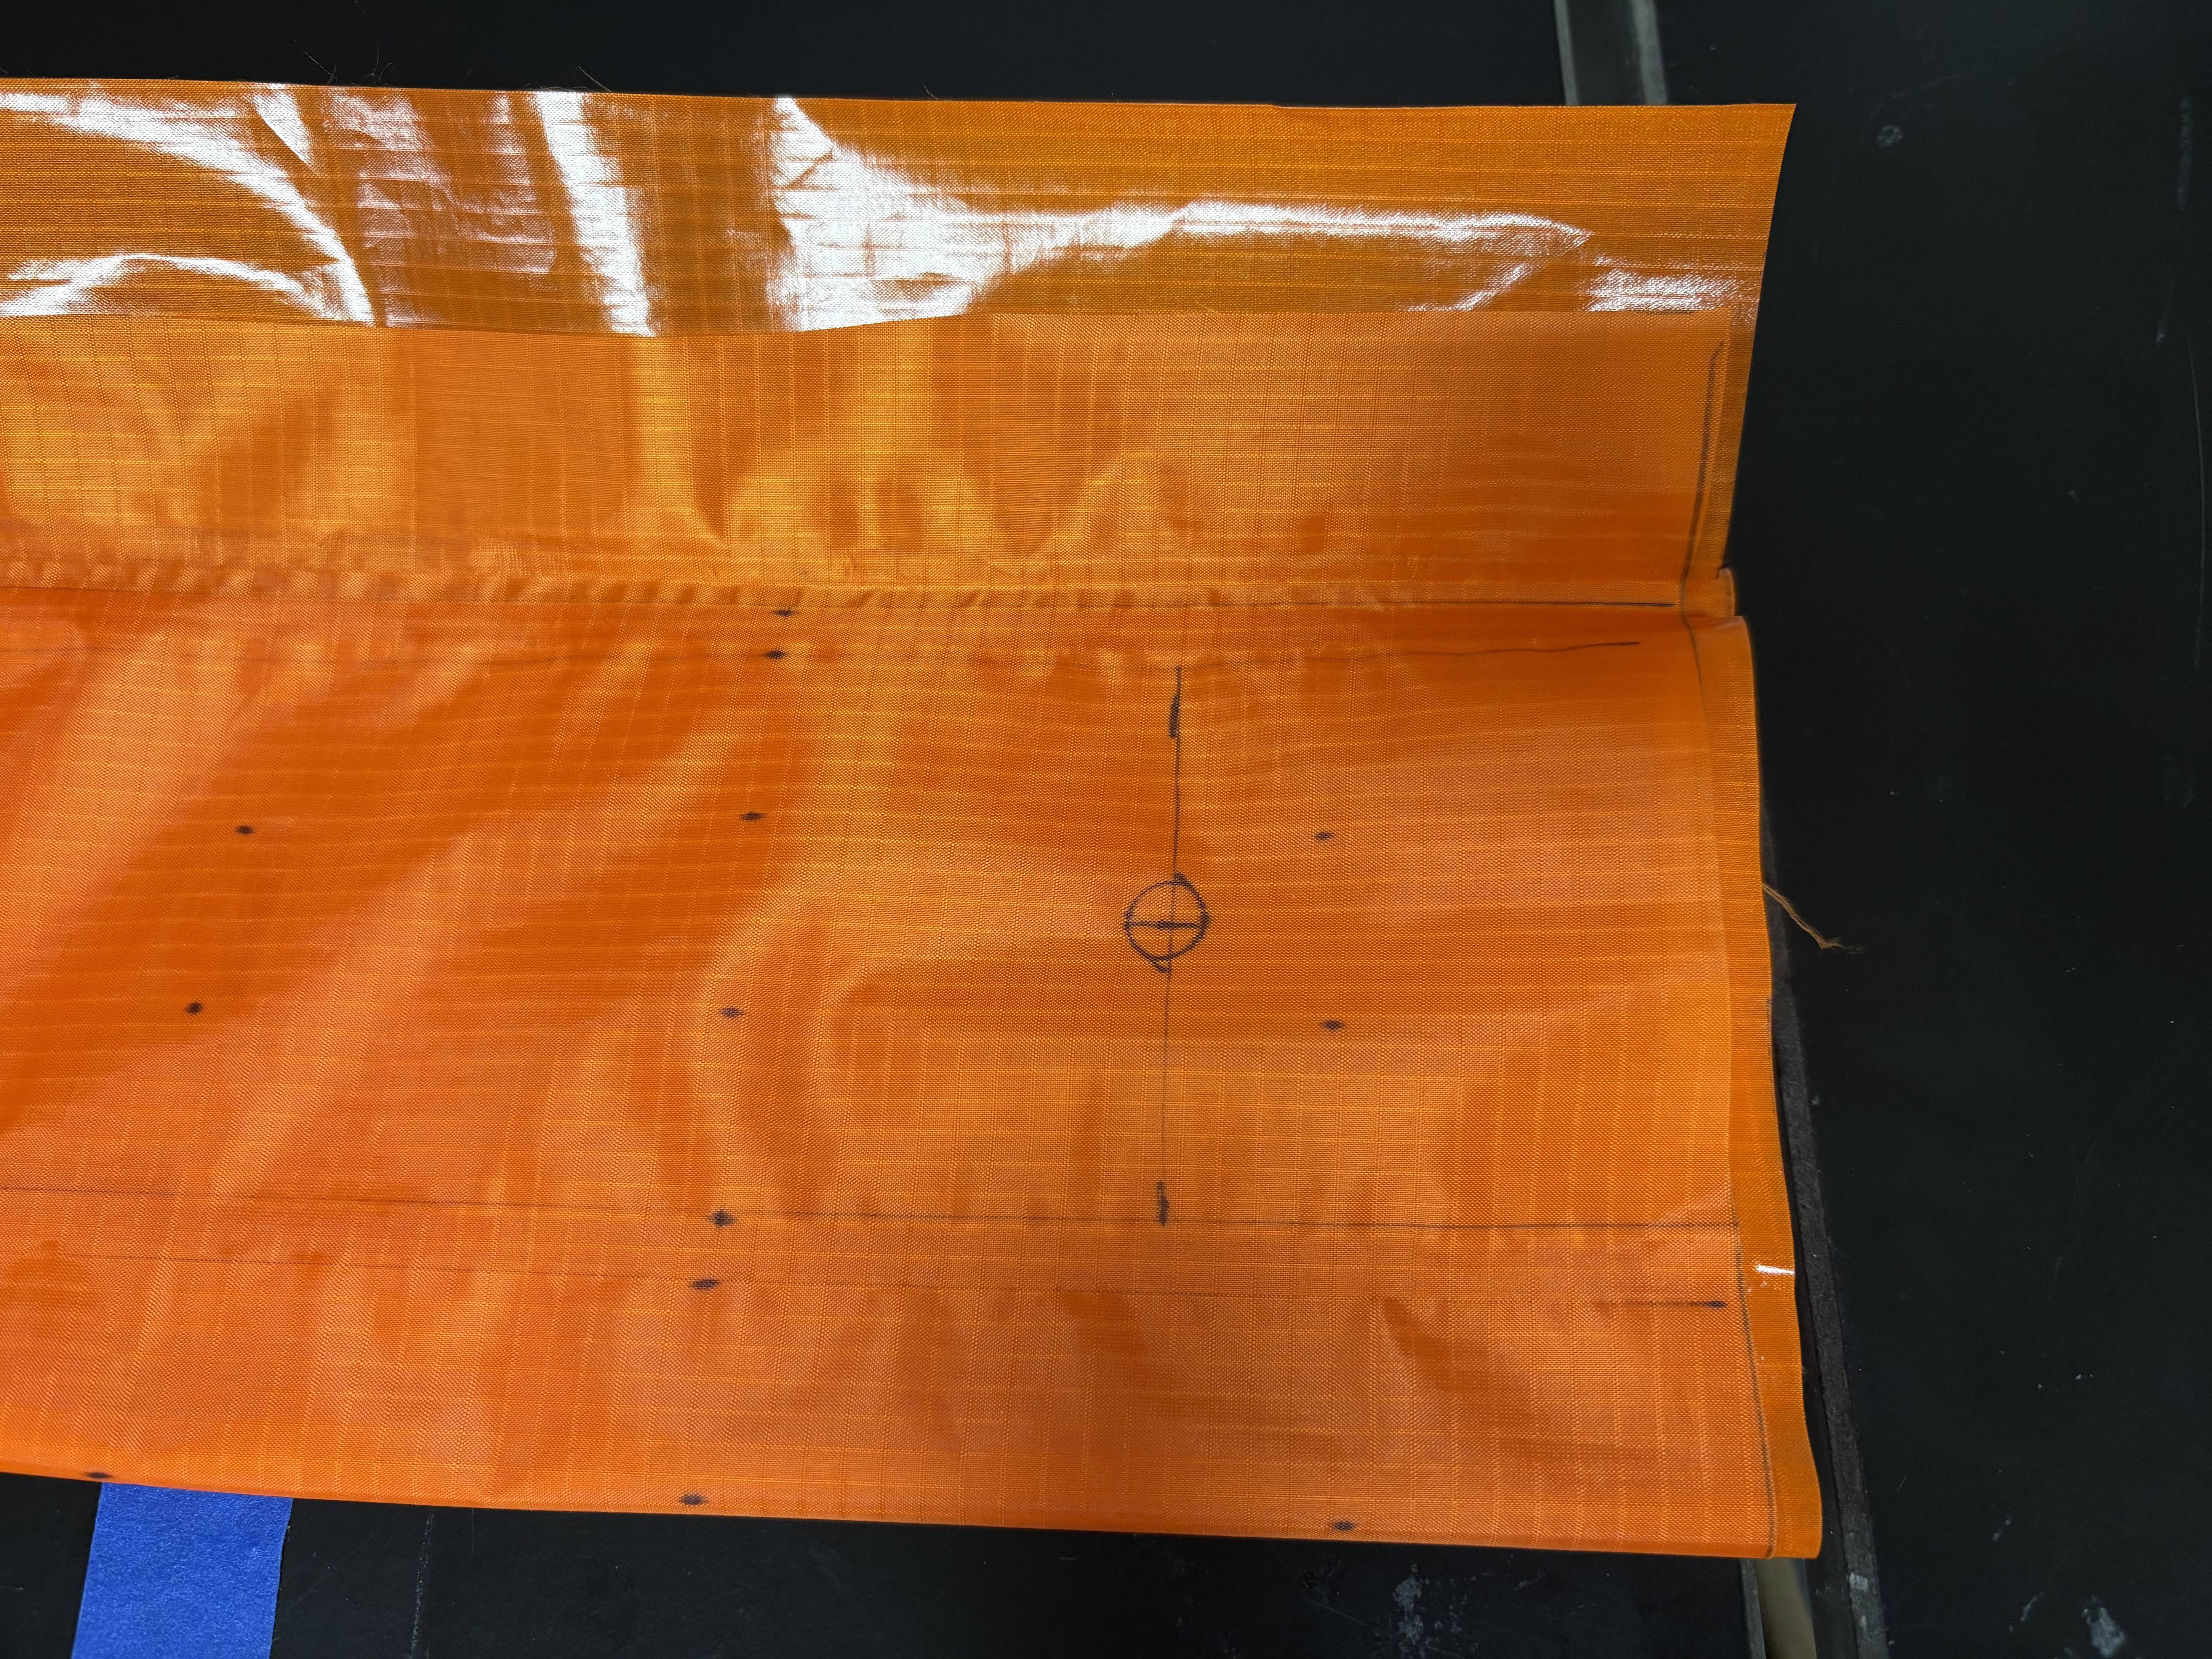
-
Repeat steps 2 and 3 on each pouch motor line.
-
Insert a piece of rubber, wood, or another slender, thick material inside a pouch motor line, then use the X-Acto knife to cut an opening in the marked circle. The slender insert prevents cutting through the inner fabric layers.
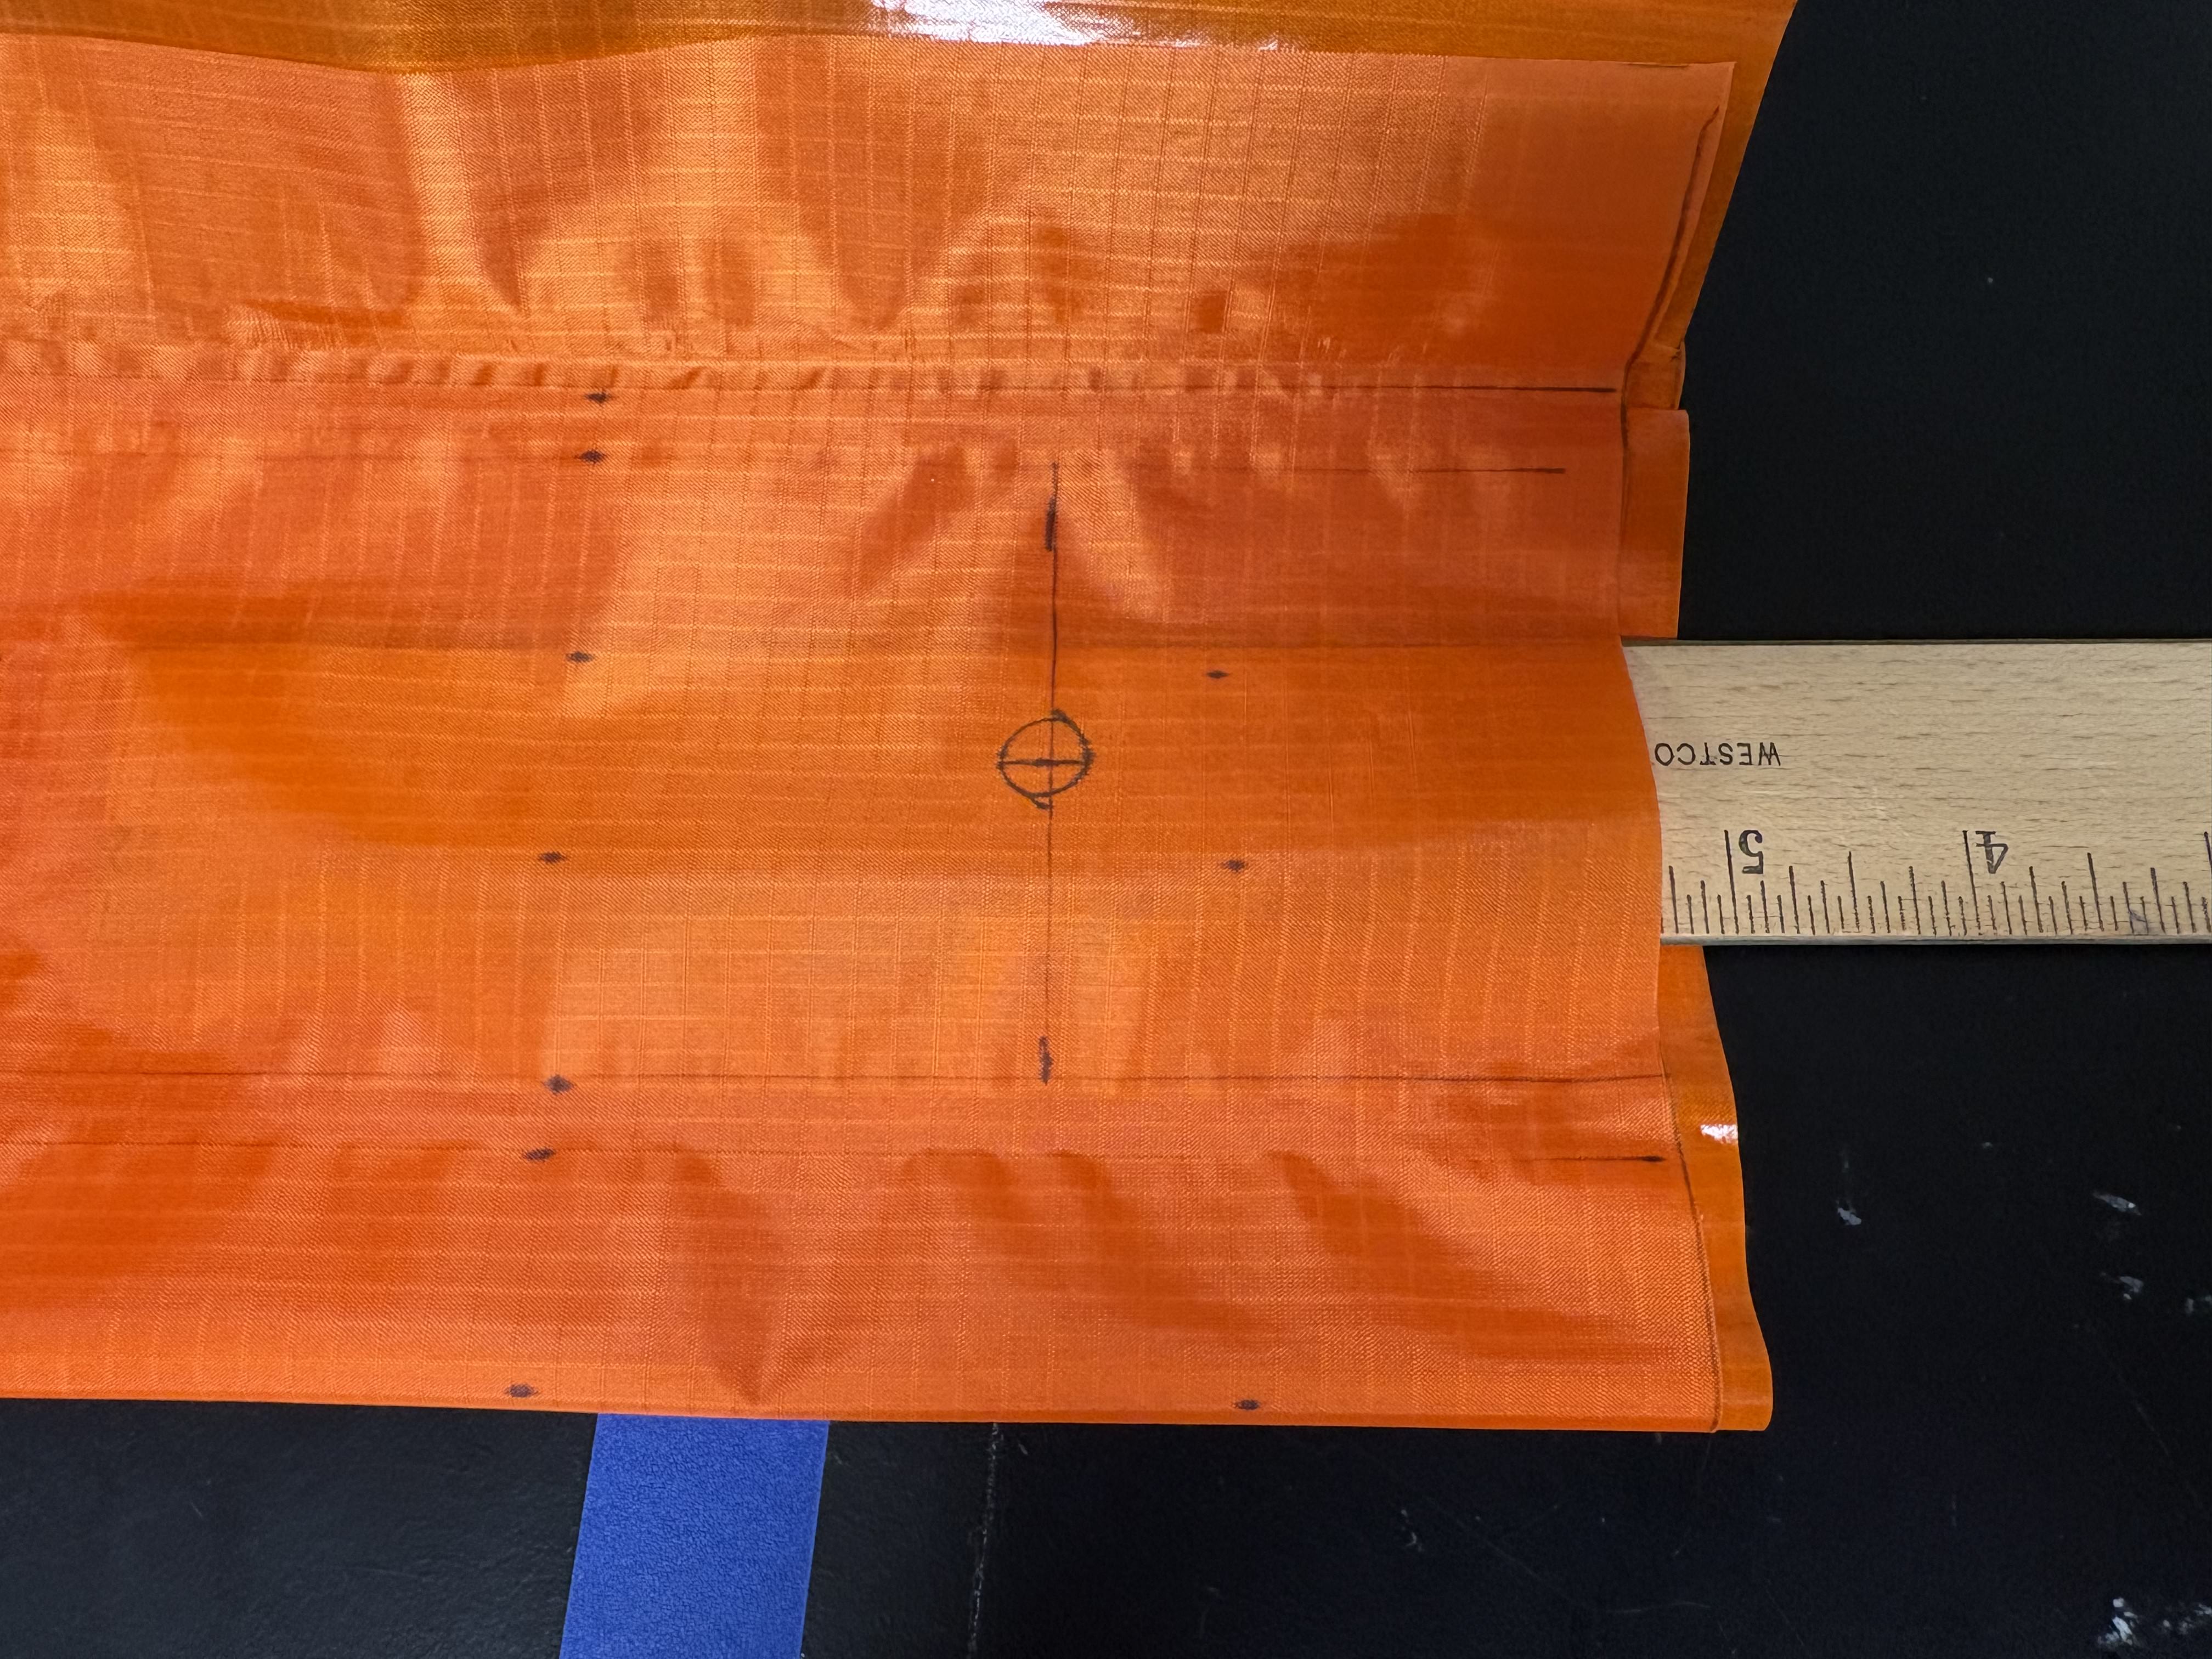
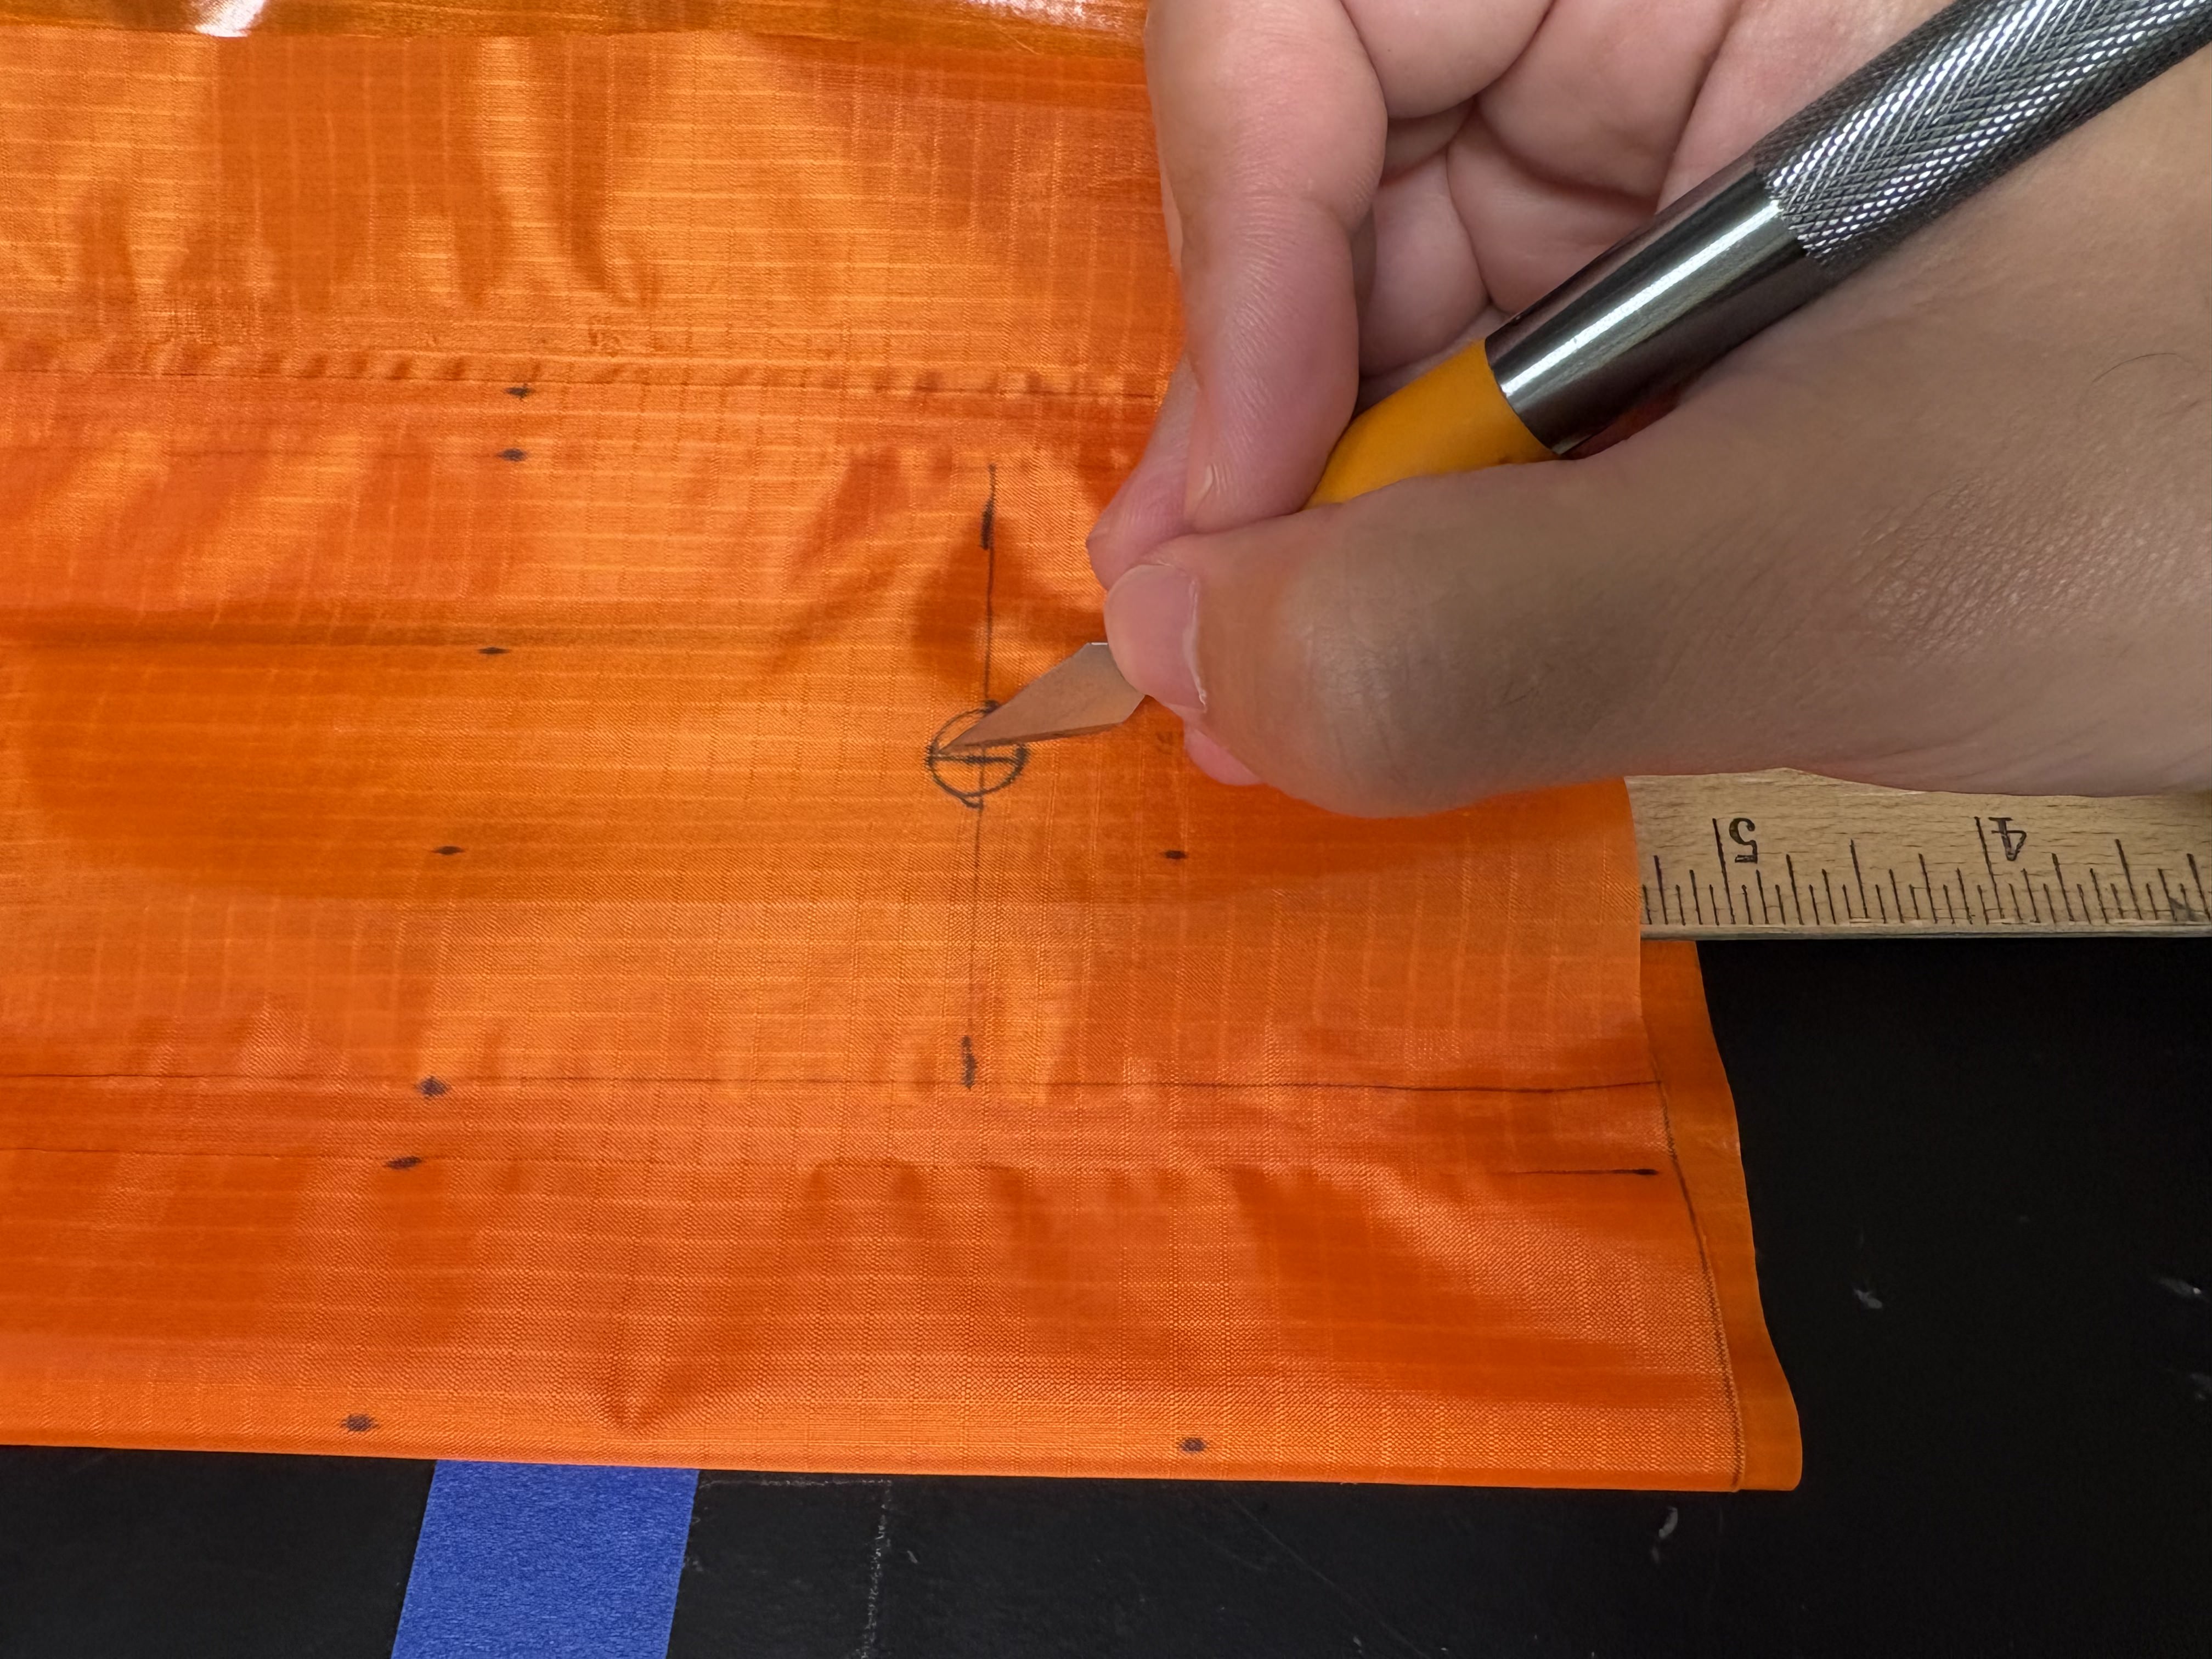
-
Repeat step 5 for all three pouch motor lines.
-
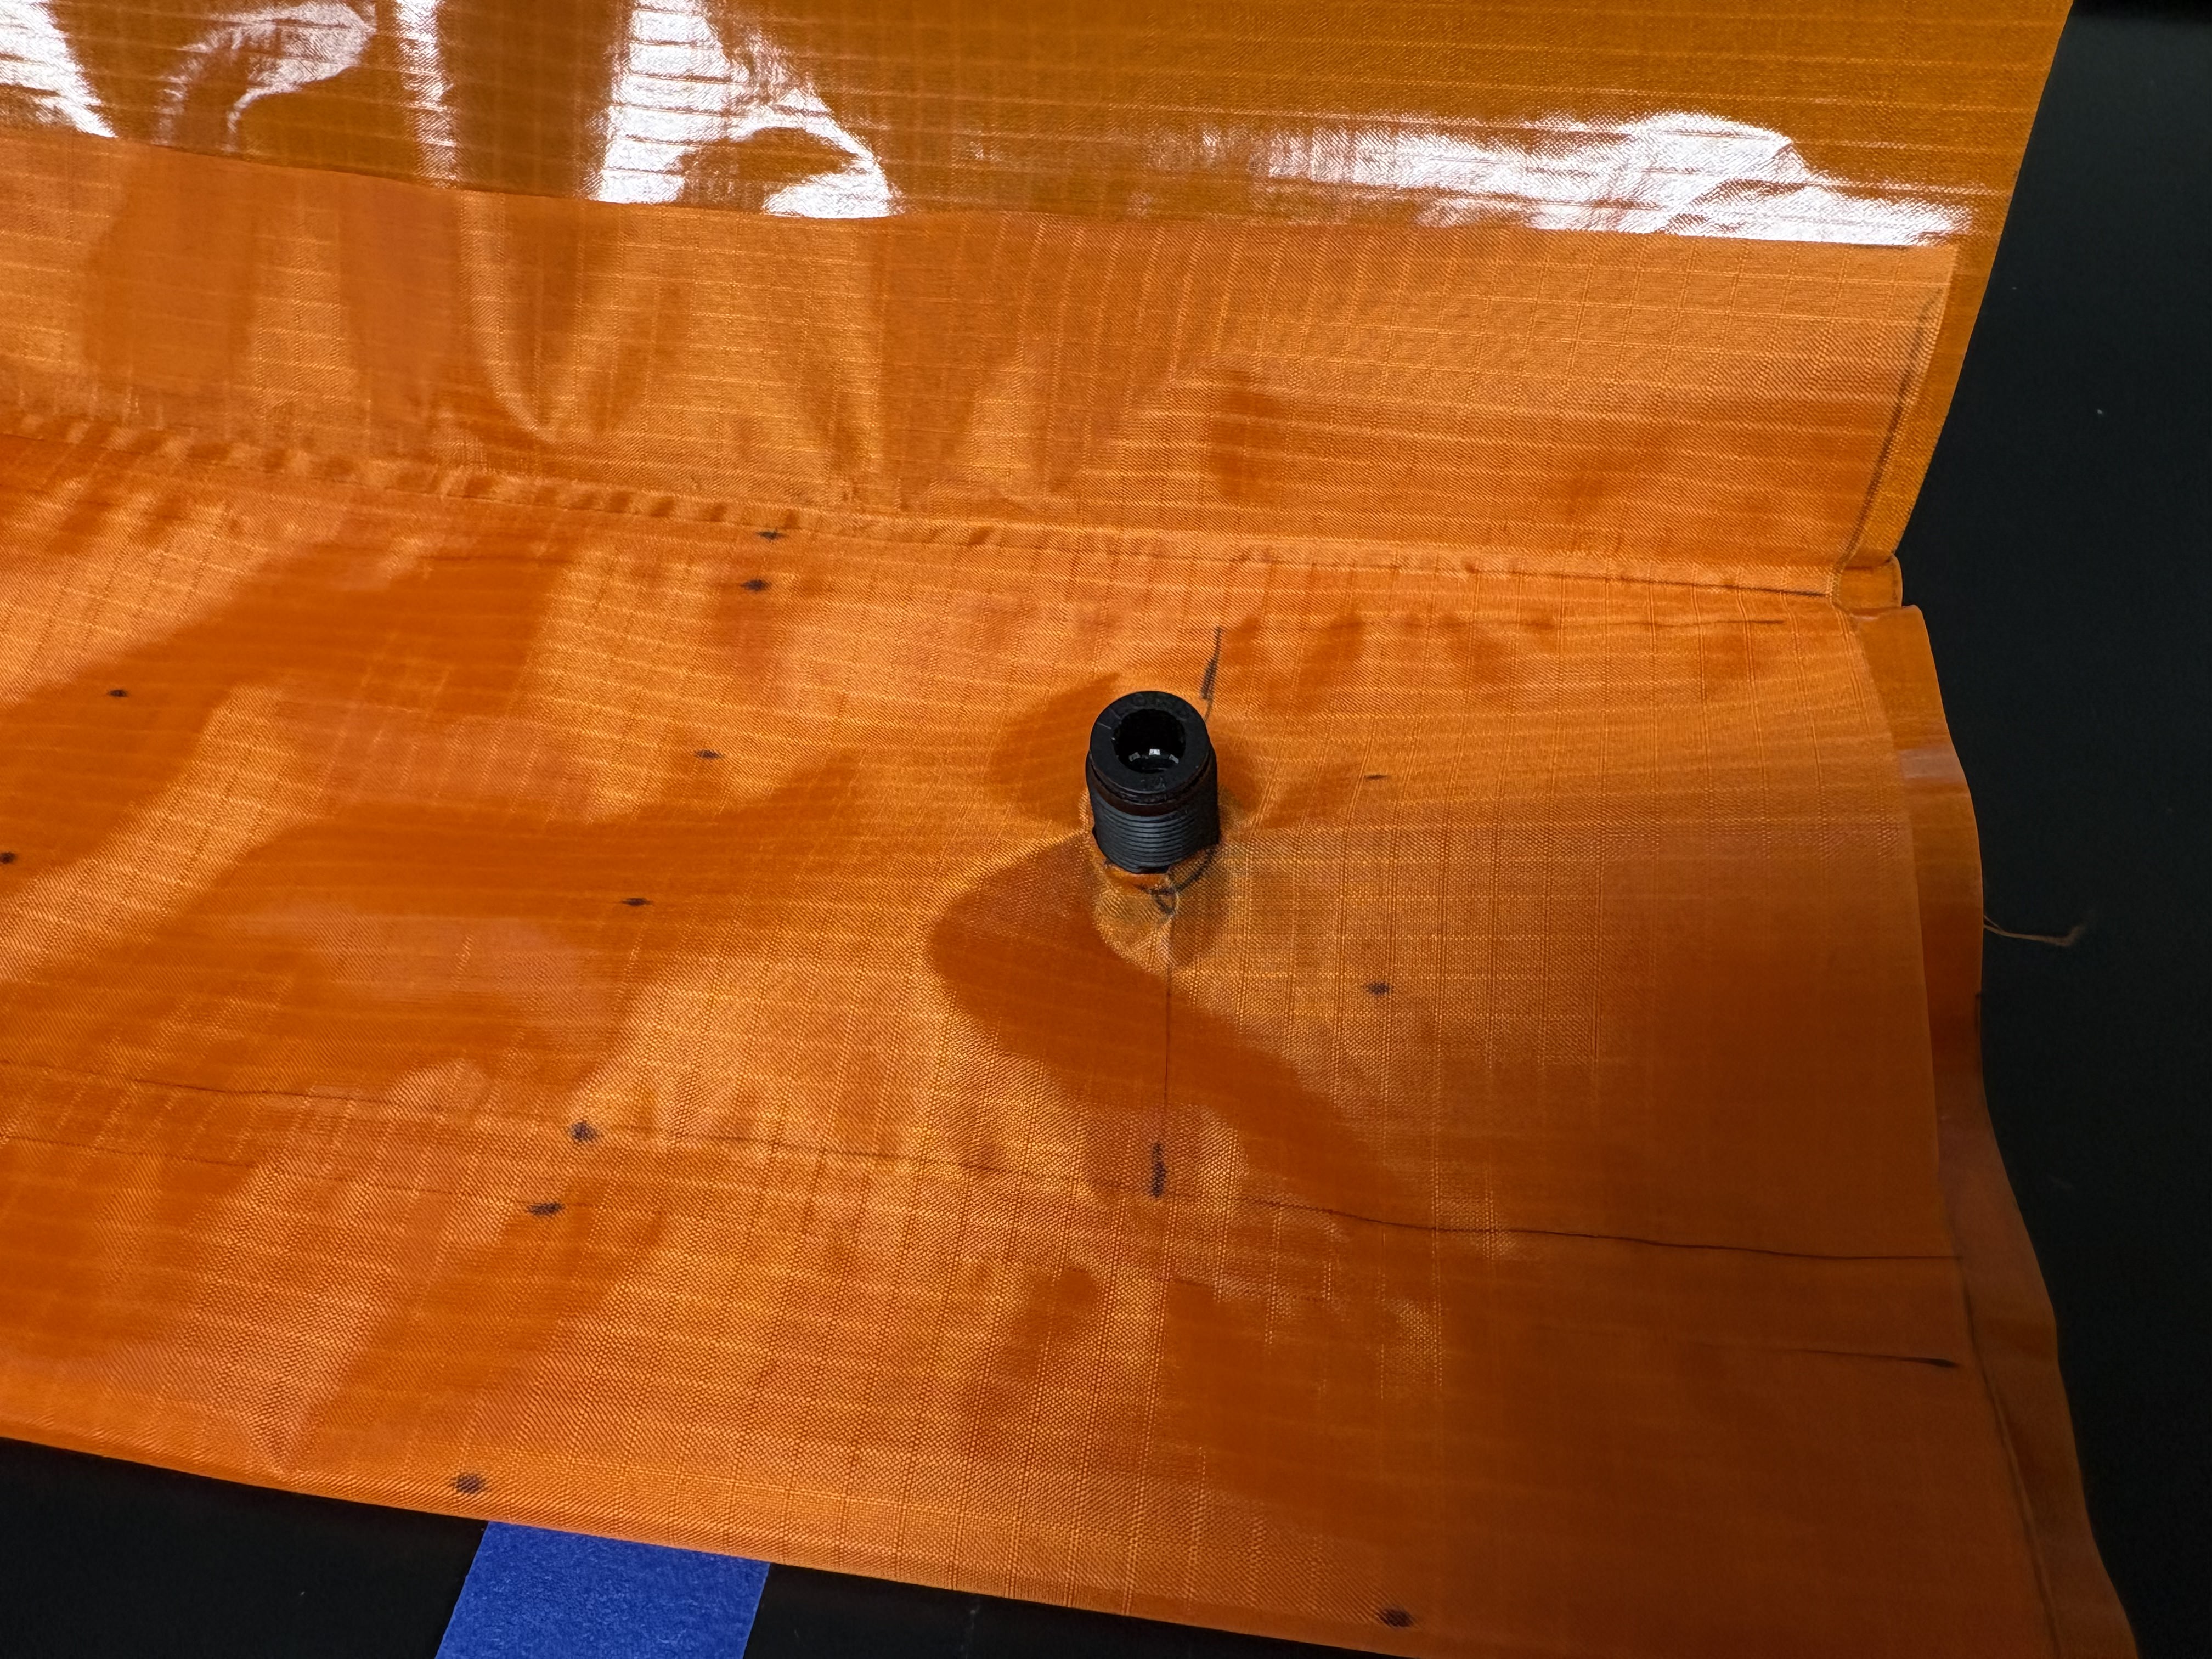
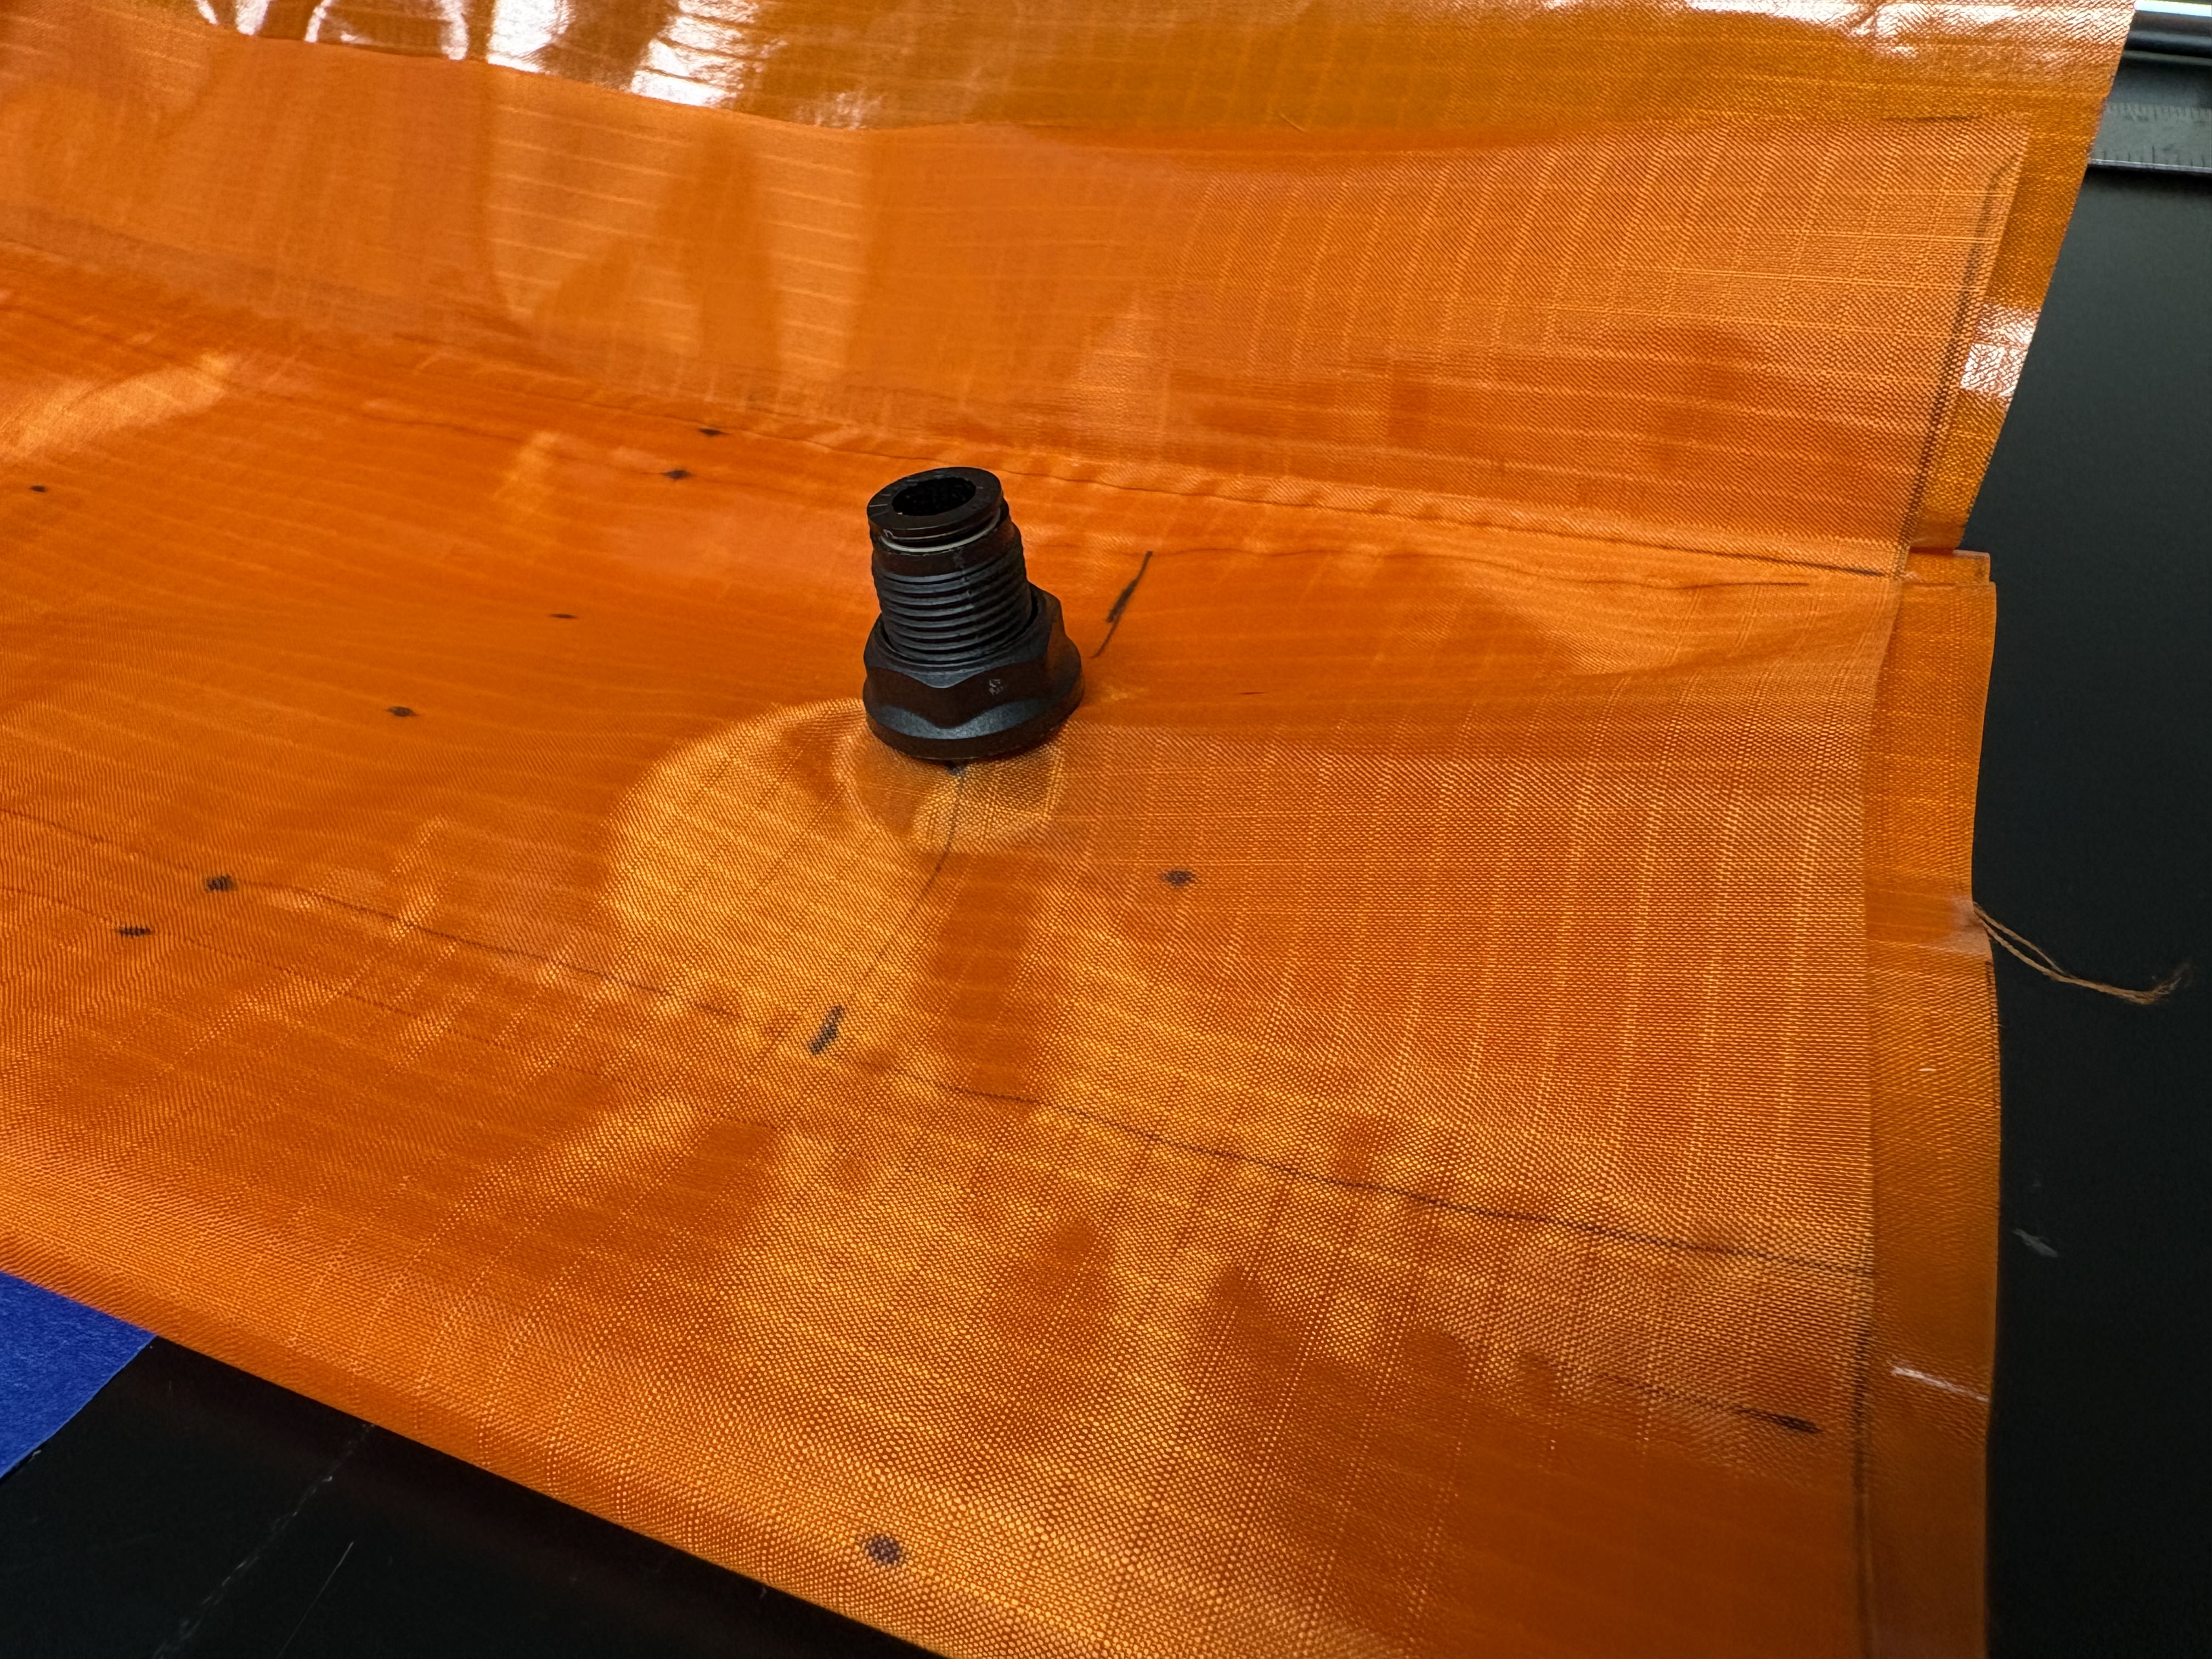
To install the pneumatic adapters, slide them inside each pouch motor line, push them through the cut holes, and secure them with the provided nut.
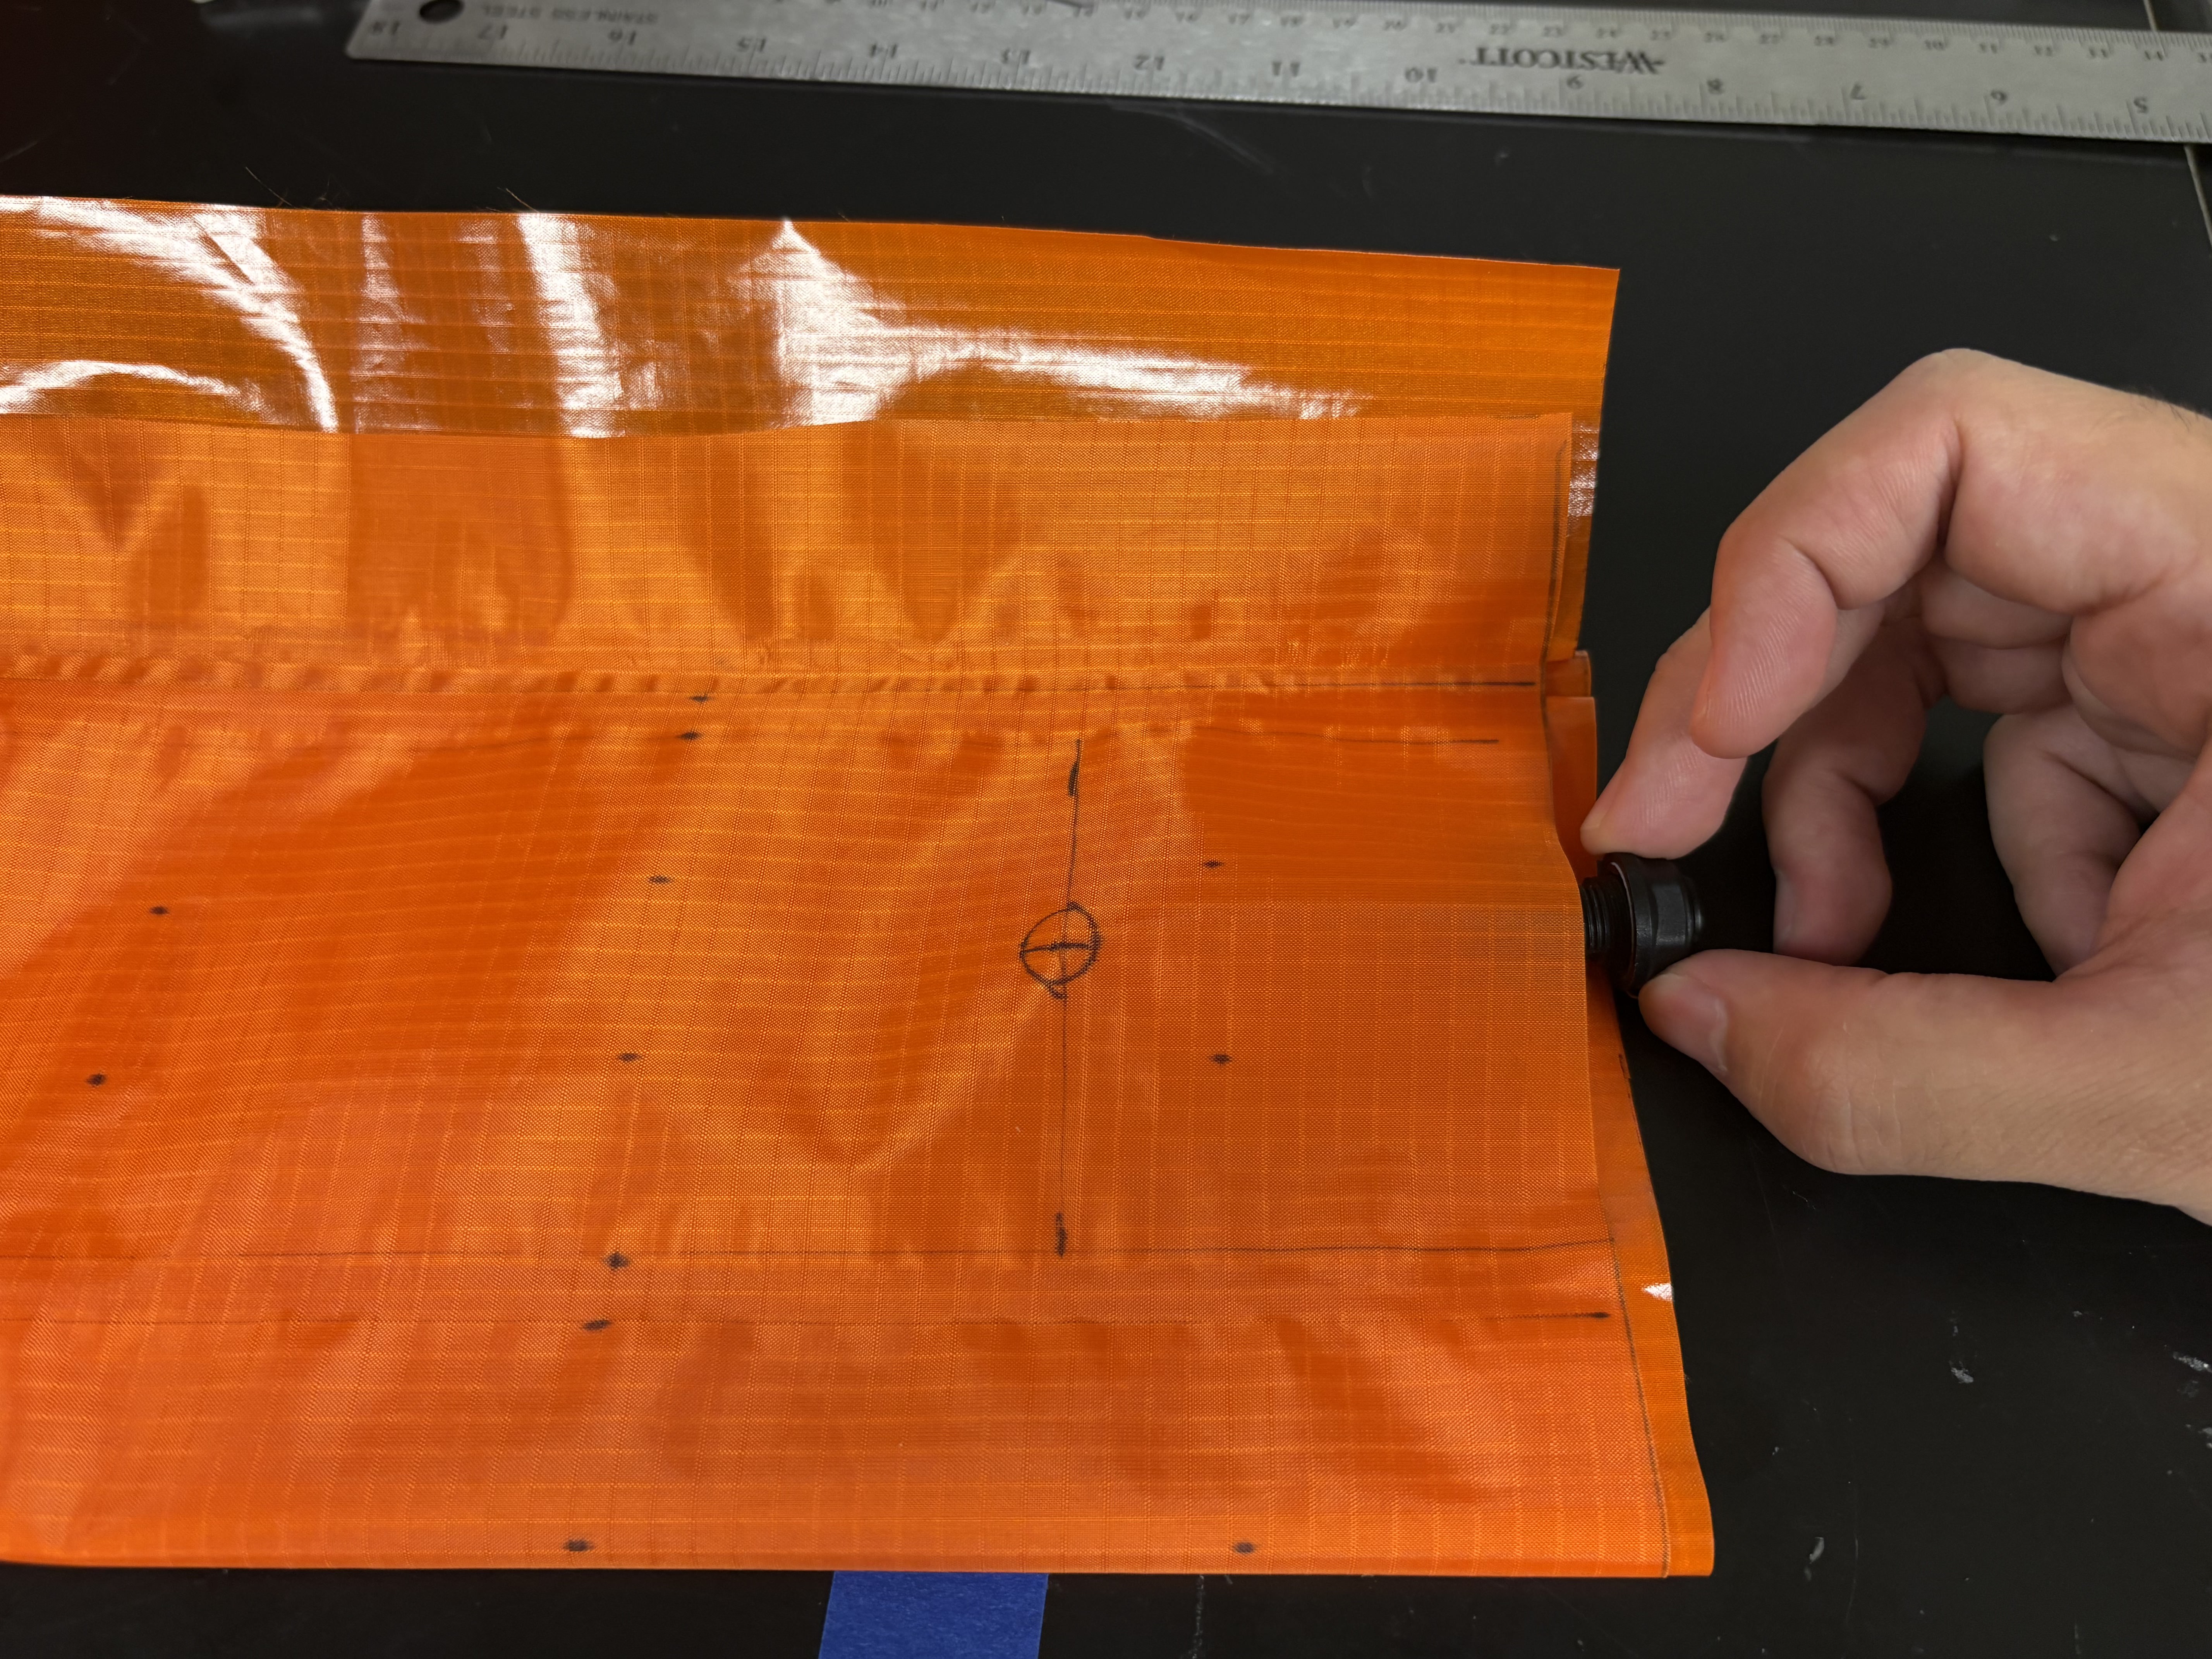
Step 4: Inspection and validation
Visual inspection
Verify:
- seam continuity
- fabric integrity
- pneumatic adapter attachment
Leak / pressure test
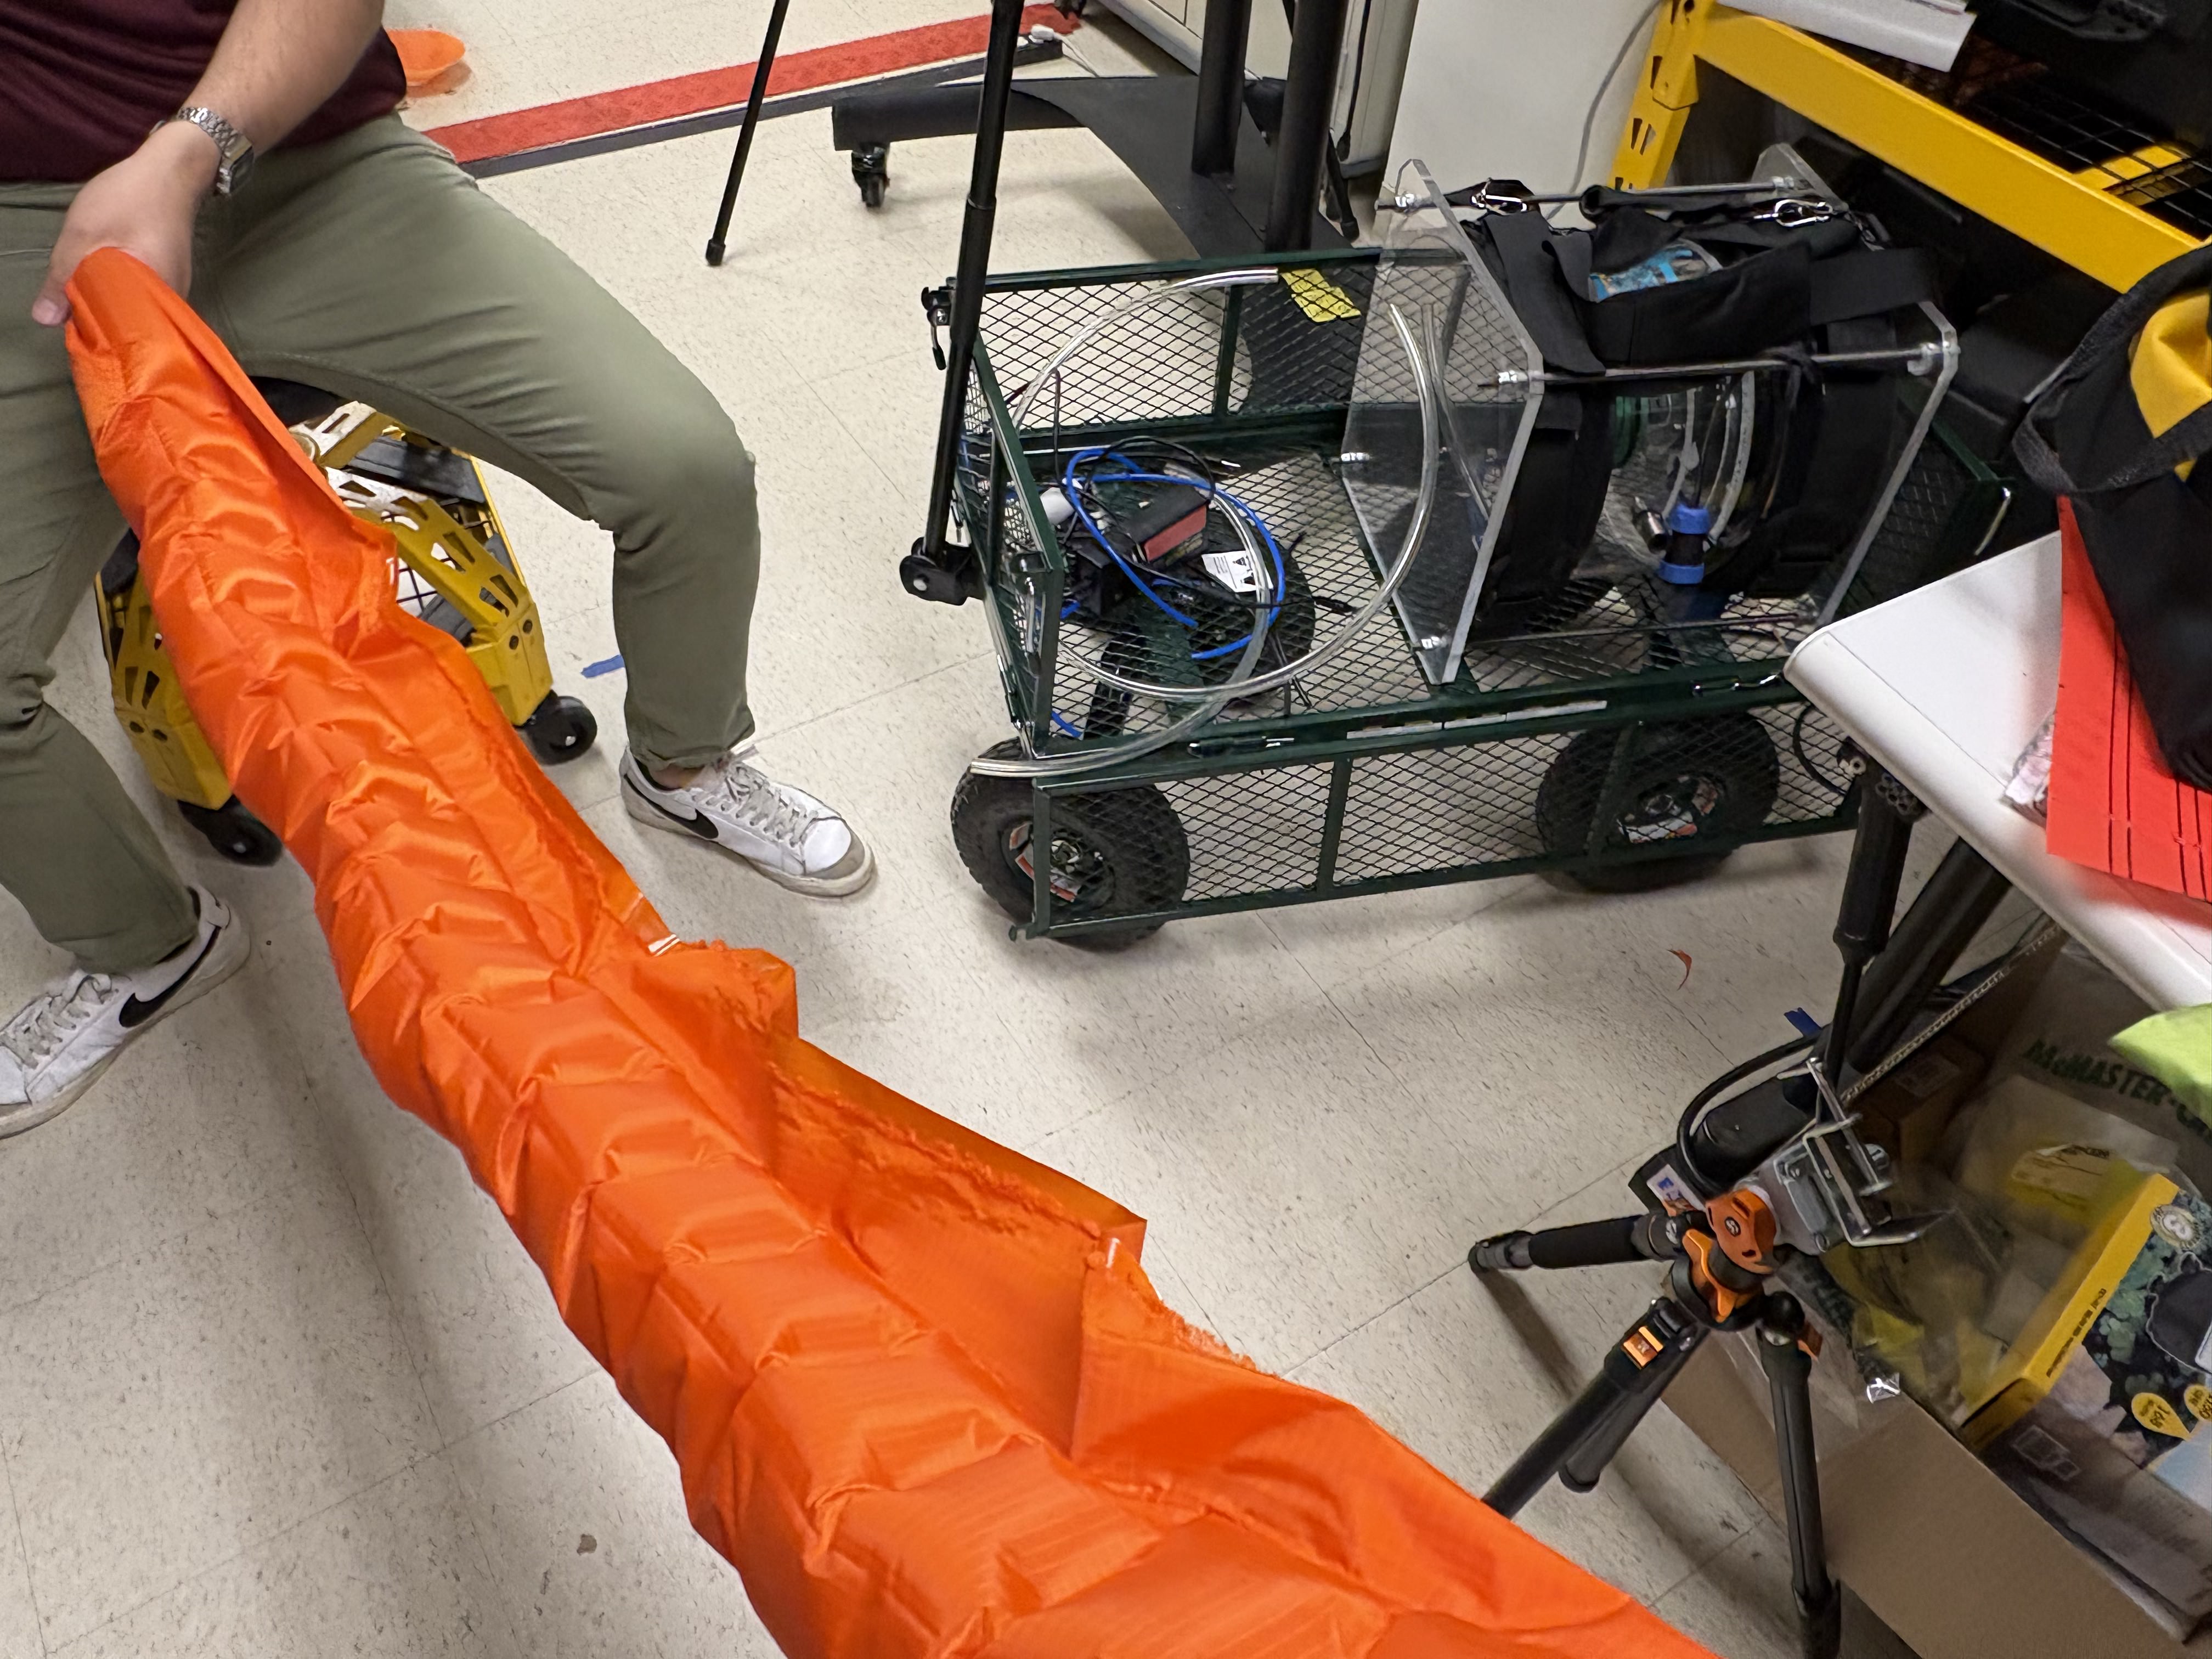
To test the robot, use a compressed air line at low pressure (~2 psi) and verify that the main robot body holds pressure. Connect pressurized air to each pouch motor line to verify these are in working order as well.
Reference
The current base construction follows the steps from vinerobots.org, with modifications noted in Assembly → Step 8.